






Rated Excellent Rating Gas Safe Registered BPEC Certified 25 Years’ Experience 2 Year Guarantee Card Payments AcceptedApple Pay, Mastercard, Visa, Amex, Google Pay Worcester BoschVaillantBaxiGlow-wormAccredited

Category: Heating Tips

  • Heating alternatives in Sussex and Surrey: Your 2026 guide

    Heating alternatives in Sussex and Surrey: Your 2026 guide

    Table of Contents

    Last Updated: August 8, 2026

    Best central heating alternatives 2026

    When your boiler fails mid-winter or energy bills climb, the question isn’t whether you need heating, it’s which alternative suits your home. The landscape has shifted dramatically. Today’s options include air source heat pumps, underfloor systems, and hybrid approaches. Each solves different problems. A heat pump excels at efficiency but requires upfront investment. Underfloor heating offers unmatched comfort but costs more to retrofit. Gas boilers remain reliable but face long-term regulatory pressure.

    The real decision framework is "which is best for my specific situation." This guide walks through the main heating alternatives available to homeowners in Sussex and Surrey, how each works, what it costs to install, and how to find qualified engineers.

    Key Takeaway
    The best heating alternative depends on three factors: your current setup, your budget, and your priority (comfort, efficiency, or cost). There’s no single winner, only the right choice for your home.

    Gas boilers: traditional heating that still works

    Gas boilers remain the most common heating system in UK homes. They burn natural gas to heat water, which circulates through radiators or underfloor pipes. For most homeowners, they’re straightforward, affordable to install, and reliable.

    A gas boiler installation typically takes one day. Running costs are predictable. Hundreds of engineers across Sussex and Surrey can fix problems quickly. Replacement boilers cost less upfront than heat pumps and integrate seamlessly into existing radiator systems.

    However, gas boilers become less efficient as properties improve insulation. A modern boiler achieves around 90% efficiency, meaning 10% of fuel energy is wasted. For a well-insulated home with minimal heat loss, that gap matters less. The real problem emerges over time: gas prices fluctuate, servicing becomes more expensive as units age, and regulatory pressure is building. The government has signalled that gas heating will face restrictions in new builds and potentially in existing homes over the next decade.

    When a gas boiler makes sense:

    • You have an existing radiator system and want to replace like-for-like
    • Your property is poorly insulated, making a heat pump less efficient
    • You need the lowest upfront cost
    • You prioritize simplicity and rapid repair access

    When it doesn’t:

    • You’re planning to stay in the property for 15+ years (efficiency costs add up)
    • Your home is well-insulated with good fabric efficiency
    • You want to future-proof against regulatory changes

    Apex Gas & Heating Ltd installs and services gas boilers across Sussex and Surrey, with transparent pricing and 24/7 emergency support. They hold full public liability insurance and employ only Gas Safe registered engineers, ensuring your installation meets all safety standards. Whether you need a new boiler installation or boiler repair, their team can advise on the best option for your situation.
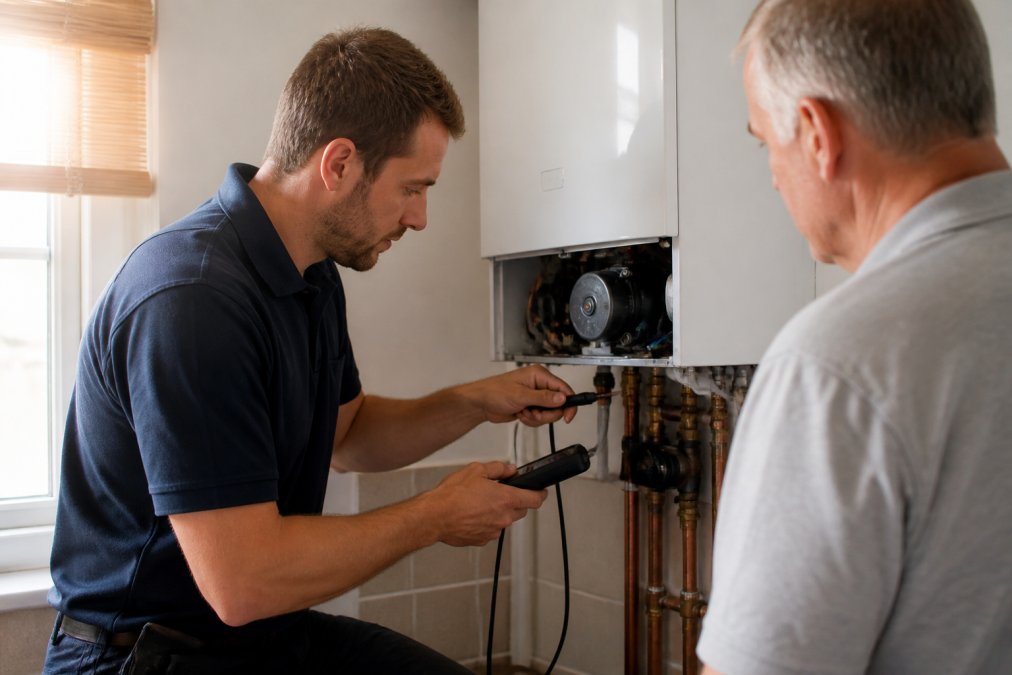
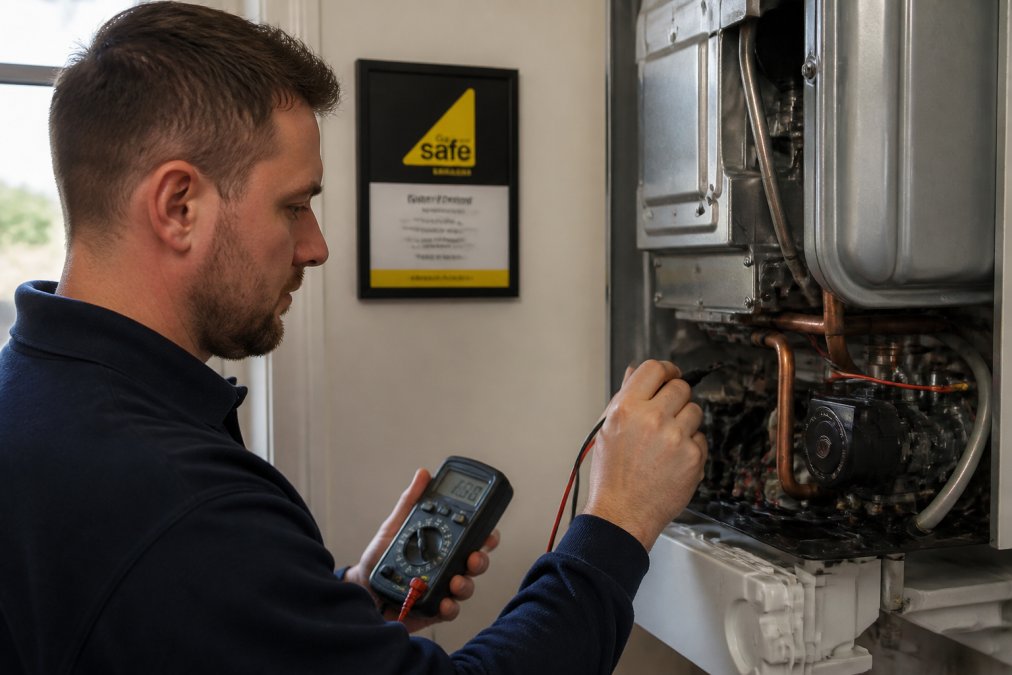
    Professional heating engineer in uniform checking a gas boiler installation in a residential home, using diagnostic tools to inspect the system for safety and efficiency
    Professional heating engineer in uniform checking a gas boiler installation in a residential home, using diagnostic tools to inspect the system for safety and efficiency

    Air source heat pumps: energy-efficient heating

    An air source heat pump extracts heat from outside air, even when cold, and uses electricity to concentrate that heat for indoor use. It’s the most mature renewable heating technology in the UK market.

    A modern air source heat pump delivers 3-4 units of heat for every unit of electricity consumed. Compare that to a gas boiler’s 90% efficiency, and the running costs are significantly lower over a 15-year lifespan, especially when electricity comes from renewable sources.

    Installation is more involved than a boiler swap. The outdoor unit needs space and clear airflow. Your radiators may need upgrading to work efficiently with lower water temperatures. The process typically takes 3-5 days.

    Heat pumps work best in well-insulated homes. A property with poor insulation, single-glazed windows, and heat loss through the roof will struggle to reach target temperatures efficiently. In a well-insulated home, the system barely needs to run, and savings are substantial.

    When an air source heat pump makes sense:

    • Your home is well-insulated (EPC rating C or better)
    • You’re planning to stay for 10+ years
    • You want to reduce running costs and carbon footprint
    • You have space for an outdoor unit

    When it doesn’t:

    • Your property has poor insulation and you can’t upgrade it
    • You need immediate heat in an extremely cold climate
    • You can’t accommodate an outdoor unit
    • Your electricity costs are very high

    Heat Geek specializes in heat pump design using AI optimization, offering performance guarantees and monitoring. British Gas provides comprehensive heat pump installation with flexible payment options. Warmup Plc focuses on water-based underfloor systems that pair well with heat pumps.
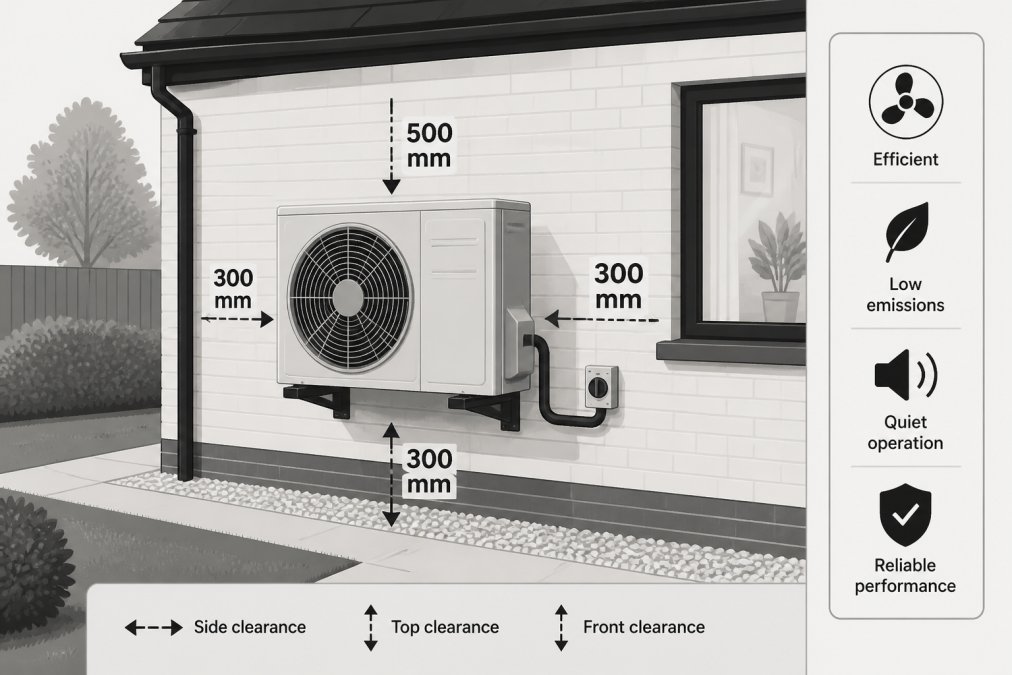
    External air source heat pump unit mounted on the side of a brick residential property, showing the outdoor compressor component in a modern residential setting with clear airflow space
    External air source heat pump unit mounted on the side of a brick residential property, showing the outdoor compressor component in a modern residential setting with clear airflow space

    Underfloor heating systems: comfort without radiators

    Underfloor heating delivers warmth through pipes or electric mats embedded in floors rather than wall-mounted radiators. It creates even heat distribution from bottom to top, eliminating cold spots and drafts. There are no radiators taking up wall space, which opens design flexibility. The systems run at lower water temperatures than traditional radiators, making them highly compatible with heat pumps.

    Two types exist: electric mats (simpler, faster to install, better for retrofits) and water-based systems (more efficient, better for whole-house heating). Electric systems work well for individual rooms. Water-based systems suit new builds and major renovations.

    Installation disruption depends on your setup. In a new build, underfloor heating is straightforward. In an existing property, you’re either lifting floorboards (disruptive and expensive) or installing thin systems under existing flooring (less efficient). Running costs are lower due to the lower water temperatures required.

    Once installed, underfloor systems are difficult to modify. If a leak develops, diagnosis and repair can be invasive.

    When underfloor heating makes sense:

    • You’re building new or doing major renovation
    • You want maximum comfort and design flexibility
    • You’re pairing it with a heat pump or renewable energy
    • You have good insulation and low heat loss

    When it doesn’t:

    • You’re retrofitting into an existing property with solid floors
    • You need quick, low-disruption installation
    • You want the ability to modify the system later
    • You’re on a tight budget

    Warmup Plc supplies electric and water-based underfloor heating systems across the UK, with smart thermostat integration. The Underfloor Heating Store provides complete kits and components for DIY or professional installation.

    How to check heating engineer credentials

    Not every person calling themselves a heating engineer has the qualifications to work safely on your system. Gas work is particularly hazardous; carbon monoxide leaks, explosions, and fires are real risks from poor installation or maintenance.

    The critical credential is Gas Safe registration. This is the legal requirement in the UK for anyone working on gas appliances. A Gas Safe registered engineer has passed rigorous exams, maintains current competency, and is subject to regular audits.

    How to verify: Ask for their Gas Safe registration number. Visit the Gas Safe Register website and search for their name and registration. A genuine engineer will have this information readily available.

    Beyond Gas Safe registration, look for:

    Get a Free Quote Today →

    • Worcester or Glowworm approval if they’re installing those brands
    • Public liability insurance covering their work
    • Membership in trade bodies like FENSA or OFTEC
    • References or reviews from recent customers

    Many unregistered engineers operate openly, betting that homeowners won’t check. Some are competent but cutting corners. Others are genuinely dangerous.

    Apex Gas & Heating Ltd employs only Gas Safe registered engineers and holds full public liability insurance. Their Glowworm and Worcester approvals mean they’re authorised by these manufacturers to install and service their equipment to warranty-valid standards. They also provide Gas Safety & CP12 certification to ensure your heating system meets all legal safety requirements.

    Finding Gas Safe registered heating engineers

    The Gas Safe Register maintains a searchable database of all legitimate engineers. Visit the Gas Safe Register website, enter your postcode, and search for engineers in your area. You’ll see their registration number, the types of work they’re certified for, and their contact details.

    Beyond the register, use these channels:

    Online directories: Checkatrade and TrustATrader vet engineers and display customer reviews. Engineers on these platforms have undergone background checks and agree to dispute resolution.

    Recommendations: Ask friends, family, or neighbours who they’ve used. Personal recommendations carry weight because they’re based on real experience.

    Quotes from multiple engineers: Get at least three quotes before committing. This helps you understand market price and assess how each engineer communicates.

    Red flags to watch for:

    • No Gas Safe registration or reluctance to provide it
    • Quotes significantly lower than others
    • Pressure to decide immediately
    • No written quote or contract
    • No mention of insurance or guarantees

    Apex Gas & Heating Ltd operates across Sussex and Surrey with 24/7 emergency call-out availability. Their local presence means faster response times, and their transparent pricing eliminates surprise bills. You can verify their Gas Safe credentials and Glowworm/Worcester approvals before booking.

    Verification Method What It Checks Time Required Cost
    Gas Safe Register search Legal registration and certification type 5 minutes Free
    Checkatrade/TrustATrader Customer reviews and vetting 10 minutes Free
    Personal recommendations Real experience from trusted source Varies Free
    Multiple quotes Market rates and communication quality 1-2 weeks Free
    Insurance verification Public liability and professional indemnity 5 minutes Free

    Cost-benefit analysis: repairs versus replacement

    At some point, every boiler reaches the decision threshold: repair it or replace it. The choice hinges on three factors: age, repair history, and efficiency loss.

    Age matters because boiler lifespan is typically 10-15 years. A boiler at year 12 is in its decline phase. Repair costs rise. Spare parts become harder to source. At this stage, another major repair might tip the balance toward replacement.

    Repair history reveals a pattern. One repair in ten years is normal maintenance. Three repairs in two years suggests the boiler is failing. A rule of thumb: if annual repair costs exceed 50% of a replacement boiler’s cost, replacement becomes the rational choice.

    Efficiency loss is real but often invisible. A boiler that’s 15 years old operates at 85% efficiency instead of 90%. That gap translates to higher fuel bills every month. If you’re staying in the property for another 10 years, that efficiency penalty adds up.

    Get a repair quote and a replacement quote. Calculate your annual energy savings from a new boiler (usually 10-15% lower bills). Divide the replacement cost by the annual savings. That’s your payback period. If it’s under 7 years and you’re staying, replace. If it’s 10+ years or you’re moving soon, repair.

    One factor people underestimate: peace of mind. A new boiler comes with a warranty. An old boiler doesn’t. Some homeowners rationally choose replacement simply to eliminate the risk of catastrophic failure during winter.

    Apex Gas & Heating Ltd handles both repairs and installations, so they can advise honestly on which makes sense for your situation. Their 24/7 emergency service means you’re covered either way, but a new installation with warranty protection reduces your long-term vulnerability.

    Conclusion

    The heating alternative that makes sense for your home depends on your specific circumstances: your property’s insulation quality, your budget, how long you’re staying, and your priorities around comfort, efficiency, and simplicity.

    Gas boilers remain practical for immediate replacement. Air source heat pumps deliver long-term efficiency gains if your home is well-insulated. Underfloor heating offers unmatched comfort in new builds or major renovations. All require qualified installation from Gas Safe registered engineers to work safely and reliably.

    When you’re ready to move forward, verification matters. Check credentials, compare quotes, and choose an engineer with transparent pricing and real accountability.


    Apex Gas & Heating Ltd provides professional heating installation, repair, and servicing across Sussex and Surrey with Gas Safe registered engineers, Glowworm and Worcester approvals, and 24/7 emergency support. Their transparent pricing and full public liability insurance mean you know exactly what you’re paying for and who’s responsible if something goes wrong. Get a Quote and see how their locally trusted team can help you find the right heating solution for your home.

    Frequently Asked Questions

    What are the best alternatives to gas central heating in the UK?

    The main heating alternatives in the UK include air source heat pumps, which extract warmth from outside air and are highly efficient; underfloor heating systems that provide even heat distribution without radiators; and modern gas boilers that remain reliable for many homes. Heat pumps are increasingly popular due to energy efficiency and lower running costs, though installation costs are higher. Your choice depends on your property type, budget, and long-term sustainability goals. Consult a qualified heating engineer to assess which option suits your home best.

    How do I find a Gas Safe registered heating engineer in my area?

    You can verify a heating engineer's Gas Safe registration by checking the official Gas Safe Register website using their name or company name. Always ask for their Gas Safe ID card before work begins. In Sussex and Surrey, many local heating companies display their registration prominently. Request proof of certification, public liability insurance, and warranties on workmanship. Trusted platforms like Checkatrade also list vetted engineers with customer reviews, making it easier to find reliable professionals in your area.

    Should I repair my boiler or replace it with a heating alternative?

    If your boiler is over 15 years old and requires frequent repairs, replacement often makes financial sense. Consider the repair cost versus replacement cost, your boiler's efficiency rating, and how long you plan to stay in your property. A boiler service costs around £100, while repairs can range significantly. Modern heating alternatives like heat pumps offer lower running costs and better efficiency, but have higher upfront costs. Get quotes from qualified engineers to compare long-term costs and energy savings before deciding.

    Are there government grants available for upgrading heating systems?

    Yes, the UK government offers the Boiler Upgrade Scheme, providing up to £7,500 towards heat pump installations. You may also qualify for the Warm Homes Grant if you're on a low income. Some local councils offer additional support for energy-efficient heating upgrades. Eligibility depends on your property type, location, and household circumstances. Contact a Gas Safe registered engineer or your local authority to check what grants you qualify for and how to apply.

    How often should I have my boiler serviced by a professional?

    Annual boiler servicing is recommended by manufacturers and safety standards. Regular servicing keeps your boiler efficient, extends its lifespan, and helps identify potential safety issues like carbon monoxide leaks before they become dangerous. Landlords must have gas safety certificates (CP12) completed annually for rental properties. If you notice any issues between services, strange noises, reduced heating, or pilot light problems, contact a Gas Safe registered engineer immediately rather than waiting for the annual service.

    Get a Free Quote Today →

    This article was written using GrandRanker

  • K D Jones Alternative for Heating: Complete 2026 Guide

    K D Jones Alternative for Heating: Complete 2026 Guide

    Table of Contents

    Last Updated: August 7, 2026

    K D Jones Alternative for Heating: Your Options Explained

    When your heating system fails in winter, the pressure to find a replacement quickly can cloud your judgment. But rushing into the wrong choice costs more money and disruption than taking a few days to understand what actually suits your home. Whether you’re looking to move away from an aging boiler, explore renewable options, or find a system that works better with your property’s setup, there are several proven heating alternatives available across the UK today.

    At Apex Gas & Heating Ltd, we’ve helped homeowners and landlords across Sussex and Surrey navigate this exact decision. The reality is that no single heating system works best for everyone. What matters most is matching the right technology to your home’s circumstances, your budget, and your long-term priorities. This guide walks you through the main alternatives, what each actually delivers, and how to choose a reliable heating engineer to install and maintain whatever system you select.

    Heating Alternatives Comparison Table

    Heating System Best For Key Advantage Main Consideration
    Gas Boiler Mains gas connection, quick heat-up Familiar, affordable to run Fossil fuel reliance, potential phase-out by 2035
    Air Source Heat Pump Energy efficiency, renewable heating Lower carbon footprint, eligible for grants Higher upfront cost, needs good insulation
    Electric Boiler Off-grid homes, limited space Simple installation, no flue needed Higher running costs than gas
    Oil Boiler Rural properties without gas Reliable for off-grid locations Volatile fuel costs, requires storage tank
    Biomass Boiler Rural homes with fuel storage space Renewable, eligible for grants Requires regular maintenance, fuel storage
    Storage Heaters Economy 7 tariff users Lower running costs with off-peak rates Requires compatible electricity tariff
    Underfloor Heating New builds, renovations Comfortable, space-saving Expensive to retrofit, slower response
    Infrared Panels Targeted heating, allergies Energy-efficient, minimal maintenance May need multiple panels for whole-house coverage

    Gas Boilers: The Traditional Choice

    A gas boiler remains the most common heating system in UK homes, and for properties connected to the mains gas network, it’s often the most straightforward option. Modern A-rated combi boilers achieve energy efficiency above 90 per cent, delivering hot water on demand without the need for a separate tank. Installation is relatively quick, and most engineers are familiar with the process.

    The practical advantage of gas is cost. Natural gas remains cheaper than electricity per unit of energy, so running costs are typically lower than electric alternatives. A gas boiler heats your home rapidly, which matters on cold mornings when you need immediate warmth. The technology is proven, widely available, and spare parts are easy to source.

    However, gas boilers depend on fossil fuels, which contributes to your home’s carbon emissions. The UK government has indicated that gas boiler installations may be phased out by 2035, though existing systems will continue to operate. If you’re installing a new gas boiler now, understand that you may face pressure to upgrade to a renewable system within the next decade. For landlords, this timeline is particularly relevant when planning property maintenance budgets.

    Installation must be carried out by a Gas Safe registered engineer. This is a legal requirement, not optional. Any engineer working on a gas system must hold current Gas Safe registration and be able to demonstrate it on request. After installation, annual servicing is recommended to maintain efficiency and safety. Boiler servicing keeps your system running reliably and helps identify potential issues before they become costly problems.

    Air Source Heat Pumps: Energy-Efficient Renewable Heating

    An air source heat pump extracts heat from the outside air, even in cold temperatures, and uses it to warm your home and provide hot water. This technology has become increasingly popular across the UK as homeowners seek renewable alternatives and the government has made grants available to support adoption.

    The efficiency advantage is substantial. A well-installed air source heat pump can be three times as energy-efficient as a traditional gas boiler, meaning you extract three units of heat from the environment for every unit of electricity consumed. This translates to lower energy bills over time, especially if you’re switching from an older boiler.

    Government support makes the financial case stronger. The Boiler Upgrade Scheme provides grants towards the installation cost, which significantly reduces the barrier to entry for homeowners considering the switch.

    The system works with both radiators and underfloor heating, though larger radiators may be needed to maximise efficiency. Installation involves placing a monoblock unit outside your home, roughly the size of two wheelie bins, connected to your internal heating system via pipework. The unit is visible, so placement matters for aesthetics.

    A critical consideration is insulation. Air source heat pumps perform best in well-insulated homes. If your property has poor insulation, heat loss through walls and windows undermines the system’s efficiency advantage. Before committing, assess your home’s thermal performance. Loft insulation, wall insulation, and draught-proofing should ideally be addressed first.

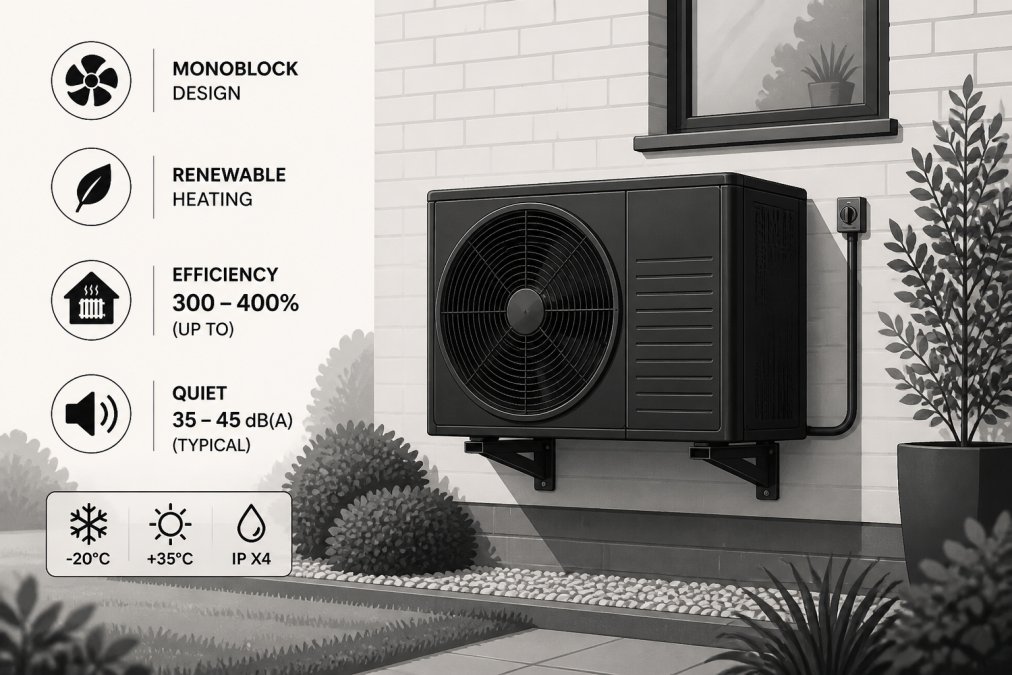
    Outdoor air source heat pump unit mounted on the exterior wall of a residential home in a garden setting, showing the monoblock design with surrounding landscaping and brick wall
    Outdoor air source heat pump unit mounted on the exterior wall of a residential home in a garden setting, showing the monoblock design with surrounding landscaping and brick wall

    Noise is another practical factor. Modern units are quieter than older models, but they do produce sound during operation. Placement away from bedrooms and neighbours’ windows is advisable. Some homeowners report noise levels around 40-50 decibels, similar to a quiet conversation.

    Electric Boilers and Storage Heaters: Off-Grid Solutions

    Electric boilers offer a straightforward alternative for homes without access to mains gas. They work like traditional boilers but use electricity as the heat source, with no flue, fuel storage, or combustion required. Installation is simpler than gas systems because there’s no need for gas pipework or ventilation.

    An electric boiler integrates seamlessly with existing radiator systems, so retrofitting is often straightforward. For smaller homes or flats where space is limited, the compact design is an advantage.

    The trade-off is running cost. Electricity is more expensive per unit than gas or oil, so your heating bills will be higher. For homes with poor insulation or high heating demand, electric boilers can become costly to operate. This makes them most suitable for smaller properties or as a supplementary heating source rather than the sole system.

    Storage heaters represent a different approach for off-grid homes with access to Economy 7 or Economy 10 electricity tariffs. These modern high heat retention units charge during cheap off-peak hours (typically 11pm to 7am) and release stored heat gradually throughout the day. Unlike older storage heaters, contemporary models include advanced controls to manage heat output, reducing the risk of running out of warmth.

    They require no boiler, pipes, or flues, simplifying the system architecture. For homes where Economy 7 pricing is available, running costs can be significantly lower than daytime electricity rates.

    The limitation is heat management. You must estimate your heating need the night before and charge accordingly. If you underestimate, you’ll have insufficient heat; if you overestimate, you’ve wasted energy. This requires planning and adjustment over several weeks as you learn your home’s heating pattern.

    How to Choose a Reliable Heating Engineer

    Selecting the right engineer matters more than selecting the system. A skilled installation determines whether your heating system performs as designed, whilst poor workmanship creates problems that persist for years. Here’s how to identify someone reliable.

    First, verify credentials. For gas work, the engineer must hold current Gas Safe registration. This is not a suggestion or nice-to-have; it’s a legal requirement. You can verify registration on the Gas Safe Register website using the engineer’s registration number. For oil boilers, look for OFTEC (Oil Firing Technical Association) certification. For heat pumps and renewable systems, check that the installer is MCS (Microgeneration Certification Scheme) accredited if you’re claiming government grants.

    Get a Free Quote Today →

    Ask about public liability insurance. This protects you if the engineer damages your property during installation. Apex Gas & Heating Ltd carries full public liability insurance, which is standard for professional operators. Any engineer who can’t produce proof of insurance should be considered a risk.

    Request references from recent installations. A reliable engineer will have completed similar work in the last 6-12 months and be willing to share contact details. Call these references and ask specific questions: Did the engineer arrive on time? Was the work completed as quoted? Has the system worked reliably since installation?

    Transparent pricing is a red flag test. If an engineer provides a quote without visiting your property, or quotes a figure significantly lower than competitors, question whether they’ve assessed the job properly. A thorough survey takes time and identifies complications (like difficult pipework routing or electrical upgrades needed) that affect cost.

    Check warranty terms. Most boilers come with manufacturer warranties, but the installation warranty matters equally. Apex Gas & Heating Ltd provides clear warranty documentation so you understand what’s covered and for how long. If an engineer can’t explain their warranty clearly, that’s a warning sign.

    Gas Safe Registered Heating Engineers Near Me

    Finding a Gas Safe registered engineer in your area is straightforward using the official Gas Safe Register website, where you can search by postcode and see all registered engineers operating locally. However, registration alone doesn’t guarantee quality. The register confirms someone is legally permitted to do the work, not that they’re the best choice.

    When contacting engineers, ask how long they’ve been registered and whether they hold additional qualifications. Some engineers specialise in specific boiler brands (like Worcester or Glowworm), which can be advantageous because they’re trained on those systems’ nuances. Apex Gas & Heating Ltd, for example, are approved Glowworm and Worcester installers, meaning our team has manufacturer-level training on these systems.

    Response time matters, especially for emergency repairs. A reliable local engineer should be able to visit within 24-48 hours for non-emergency work and ideally within a few hours for breakdown calls. Apex Gas & Heating Ltd offers 24/7 emergency call-out service across Sussex and Surrey, which is important during winter when heating failures are most disruptive.

    Ask about their diagnostic approach. Before recommending a replacement, a good engineer will thoroughly test your current system to confirm it’s beyond repair. This protects you from unnecessary replacement costs and demonstrates that the engineer prioritises your financial interest, not just the sale. If your boiler can be repaired, professional boiler repair is often a more economical choice than replacement.

    Boiler Installation Services UK: What to Expect

    A professional new boiler installation typically takes 1-2 days depending on the system type and your home’s existing setup. The engineer will disconnect the old boiler, isolate the heating system, and install the new unit with all necessary pipework, controls, and safety devices.

    Before installation, expect a site survey where the engineer assesses your property’s heating demand, existing pipework, water pressure, and electrical supply. This survey informs the boiler specification and identifies any preparatory work needed. For example, if your home has low water pressure, a pressure vessel may need to be installed.

    On installation day, the process involves draining the system, removing the old boiler, installing the new unit, refilling and bleeding the system to remove air, and commissioning the boiler with full safety checks. The engineer should provide you with all documentation, including the installation certificate, warranty information, and instructions for basic operation and maintenance.

    After installation, annual servicing is recommended. This typically involves cleaning the boiler’s internal components, checking safety devices, testing the system, and identifying any emerging issues before they become failures. Regular servicing also maintains your warranty and ensures the system operates at peak efficiency.

    Professional heating engineer in uniform performing diagnostic checks on a residential boiler system with testing equipment, with a Gas Safe certificate visible on the wall in the background
    Professional heating engineer in uniform performing diagnostic checks on a residential boiler system with testing equipment, with a Gas Safe certificate visible on the wall in the background

    For landlords, remember that gas safety certificates (CP12) are a legal requirement. These must be obtained annually by a Gas Safe registered engineer and provided to your tenants. Failure to provide a valid CP12 is a criminal offence in the UK. Apex Gas & Heating Ltd handles Gas safety & CP12 certification for landlords with multiple properties, simplifying compliance across your portfolio.


    Choosing a heating system is a decision that affects your comfort, bills, and carbon footprint for the next 10-15 years. The right choice depends on your home’s circumstances, not on what’s popular or cheapest upfront. Whether you’re considering an air source heat pump, sticking with a gas boiler, or exploring electric alternatives, the quality of installation and the reliability of your engineer matter as much as the system itself. For homeowners and landlords across Sussex and Surrey, Apex Gas & Heating Ltd provides expert guidance on heating alternatives, professional installation by approved engineers, and reliable ongoing support. Get a quote today and discover which system is right for your home.

    Frequently Asked Questions

    What is the best K D Jones alternative for heating?

    The best alternative depends on your home's circumstances. If you're on the mains gas network, a modern gas boiler remains efficient and cost-effective. For off-grid properties or those seeking renewable heating, air source heat pumps offer significant energy savings and lower carbon emissions, with government grants available. Electric boilers suit homes without gas access, whilst biomass boilers work well for rural properties with fuel storage space. Consider your property type, location, and budget before deciding.

    How do I find a Gas Safe registered heating engineer near me?

    Check the official Gas Safe Register website to verify any engineer's credentials before booking. Ask for their Gas Safe registration number and confirm it's current. Look for local heating specialists with strong customer reviews mentioning reliability and professionalism. Apex Gas & Heating Ltd, for example, maintains full Gas Safe registration and provides transparent credentials. Request references from previous customers and ensure they carry public liability insurance for your protection.

    Is it worth replacing a 20-year-old boiler?

    Yes, typically. Boilers older than 15 years operate at significantly lower efficiency, wasting fuel and money. Modern A-rated boilers achieve over 90% efficiency, potentially saving 20-30% on heating bills annually. Older boilers also carry higher breakdown risks, leading to costly emergency repairs. If your boiler requires frequent servicing or fails to heat your home adequately, replacement usually pays for itself within 5-7 years through energy savings and reduced repair costs.

    What qualifications should a professional heating engineer have in the UK?

    A heating engineer must hold Gas Safe registration if installing or servicing gas boilers. They should be qualified in plumbing and heating installation, typically holding NVQ Level 3 or equivalent. Look for engineers registered with Worcester Bosch or Glowworm for manufacturer-backed credibility. They must carry full public liability insurance and understand current Building Regulations and heating compliance standards. Always verify credentials independently rather than relying on claims alone.

    What are the benefits of choosing a local heating specialist over a national firm?

    Local specialists like Apex Gas & Heating Ltd offer faster response times, often arriving within an hour for emergency breakdowns. They know local conditions and building types, providing tailored advice for your area. Personal accountability is stronger with local businesses, and they typically offer transparent pricing without hidden charges. Local engineers understand regional regulations and can often schedule work faster than national firms. You'll also build a relationship with someone who knows your property and heating history.

    Get a Free Quote Today →

    This article was written using GrandRanker

  • How to Prevent Frozen Pipes Winter: 8 Essential Steps

    How to Prevent Frozen Pipes Winter: 8 Essential Steps

    Table of Contents

    Last Updated: July 26, 2026

    Understanding how to prevent frozen pipes in winter is one of the most important maintenance tasks homeowners in the UK can undertake during the colder months. Frozen pipes can burst and cause thousands of pounds in damage to your property. At Apex Gas & Heating Ltd, we’ve helped countless homeowners across Sussex and Surrey protect their plumbing systems before winter arrives, and we’re sharing the practical strategies that actually work.

    When water inside pipes freezes, it expands with tremendous force until the pipe fails completely. The danger is that frozen pipes often burst inside walls or under floorboards, where damage goes unnoticed until water has already caused serious problems. Preventing frozen pipes is straightforward when you follow the right approach.

    Below, we’ll walk you through eight essential steps that cover everything from insulation to emergency response. Some take just minutes to implement, while others require more planning. The key is starting before temperatures drop.

    What You’ll Need Before Starting

    Gather these basic materials before tackling any prevention method. Most items are available from any DIY store or online retailer.

    Essential supplies:

    • Pipe lagging or foam insulation sleeves (various diameters)
    • Heat tape or heat cables (electric, thermostat-controlled preferred)
    • Weatherstripping and caulk for sealing gaps
    • Pipe clips and fasteners
    • Thermometer to monitor temperatures
    • A torch or headlamp for checking pipes in dark spaces
    • Basic hand tools: adjustable wrench, screwdriver, utility knife

    Step 1: Insulate Pipes with Pipe Lagging UK

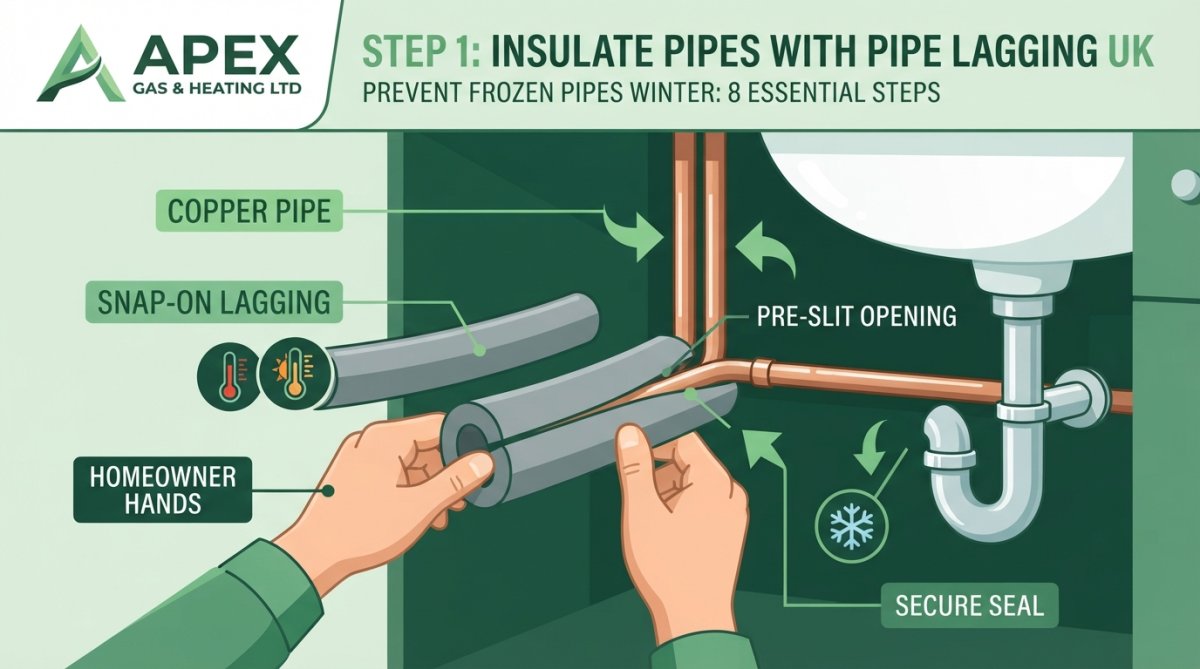
    Pipe lagging is your first line of defence against freezing temperatures. This insulation wraps around your pipes and significantly slows heat loss, keeping water moving through at warmer temperatures even when outdoor conditions drop below freezing.

    Process diagram showing steps for prevent frozen pipes
    Process diagram showing steps for prevent frozen pipes

    Pipes in unheated areas, attics, crawl spaces, garages, basements, and exterior walls, are most vulnerable. Foam pipe lagging comes in snap-on sleeves that split lengthwise, making installation quick without disconnecting pipes. These typically cost between £2-8 per metre depending on pipe diameter. For specific guidance on pipe insulation thickness, refer to [EXTERNAL_LINK: Building Regulations Part L (Approved Document L, 2021) | squote.org.uk] and BS 5422:2009.

    Pro Tip
    Start with pipes closest to your external walls and work inward. The pipes that feel coldest to touch are losing the most heat.

    DIY Difficulty and Tools Required

    Installing pipe lagging rates as very easy on the DIY difficulty scale. Most homeowners complete this task in 2-4 hours. You’ll need a utility knife, measuring tape, and your hands. For snap-on foam lagging, measure your pipe diameter, select the matching size, cut the sleeves to length, and snap them around the pipe. Secure them with the adhesive backing or pipe clips. The most common mistake is leaving gaps; insulation only works if it covers the entire pipe run, including bends, joints, and where pipes enter walls.

    Product Recommendations for Pipe Insulation

    For most UK homes, snap-on foam lagging offers the best balance of cost, ease of installation, and effectiveness. Products like Armacell or Johns Manville foam sleeves are readily available and perform well in typical UK winter conditions, available in diameters from 15mm to 50mm. For pipes in particularly exposed locations, consider thicker insulation or combined foam-and-foil products. United Utilities recommends "closed cell" type insulation that is tubular to ensure equal thickness around the pipe.

    Step 2: Maintain Consistent Indoor Temperature and Thermostat Settings for Winter

    Temperature control is perhaps the most effective freeze prevention method available. Keeping your home consistently warm throughout winter protects all interior pipes, regardless of insulation.

    Pipes freeze when water inside them reaches 0°C. By maintaining adequate indoor heating, you keep pipes above freezing even when outdoor temperatures plummet.

    Key Takeaway
    Set your thermostat to a minimum of 12°C, even when away from home. This simple setting prevents most freeze damage while keeping heating costs reasonable.

    Optimal Temperature Range to Prevent Bursting

    The safest approach is maintaining your home at 15-18°C minimum during winter. This temperature keeps interior pipes well above freezing while remaining economical. If you’re away from home for extended periods, never drop below 12°C. This is your absolute minimum threshold. According to boiler expert Andy Kerr, keeping your home at 10°C and above can stop pipes from freezing.

    The relationship between indoor temperature and pipe safety is direct: every degree you lower your thermostat increases freeze risk. During severe cold spells, resist the temptation to save money by dropping your heating. The cost of repairs far exceeds the modest savings. Smart thermostats with frost protection modes automatically maintain minimum temperatures even when you’ve set lower targets.

    Step 3: Seal Air Leaks and Drafts Around Exterior Walls

    Cold air infiltration is a major factor in pipe freezing. Gaps, cracks, and poorly sealed penetrations allow freezing outdoor air to flow directly past your pipes. Sealing these leaks protects your pipes and improves your home’s overall energy efficiency.

    Common locations where cold air enters:

    • Where pipes penetrate exterior walls
    • Gaps around external door and window frames
    • Cracks in mortar or render on brick walls
    • Poorly sealed cable and conduit entries
    • Gaps between wall and foundation

    Use weatherstripping on doors and windows, and caulk for gaps in walls. For larger penetrations, expandable foam sealant works well.

    Watch Out
    Do NOT seal ventilation vents completely. Your home needs air circulation to prevent moisture buildup and condensation. Seal around vents, not the vents themselves.

    Step 4: Disconnect and Drain Outdoor Hoses and Frost-Proof Faucets

    Outdoor hoses and external water supplies are among the first things to freeze. Water sitting in a hose freezes solid and expands, potentially cracking the hose attachment point or the external tap itself.

    The solution is simple: disconnect all outdoor hoses before the first frost and drain them completely. Don’t leave hoses connected to external taps during winter.

    Steps for winterising outdoor water supplies:

    1. Turn off the external tap’s isolation valve (if fitted)
    2. Disconnect the hose and drain any remaining water from it
    3. Store the hose indoors or in a shed
    4. Open the external tap briefly to release any trapped water
    5. Leave the tap open slightly to allow any residual water to drain

    Step 5: Locate Your Main Water Valve (Stopcock Location)

    Every homeowner should know where their main water shut-off valve is located. In an emergency, being able to shut off your water supply quickly can prevent thousands of pounds in damage.

    In most UK homes, the stopcock is located under the kitchen sink, in a cupboard, or in the hallway near the front door. It’s usually a small valve with a handle that turns 90 degrees to shut off water flow. Some properties have it outside in a small inspection chamber in the garden or at the boundary.

    Why Knowing Your Stopcock Location Matters

    When a pipe bursts, you have minutes to stop water flowing before serious damage occurs. Being able to shut off your supply immediately is your emergency response. Beyond burst pipes, knowing your stopcock location is essential for any plumbing work. During a freeze event, if you suspect a pipe has frozen, shutting off your main supply prevents additional water from flowing into the frozen section, reducing pressure buildup and rupture risk.

    Pro Tip
    Write down your stopcock location and take a photo. Share this information with household members and anyone who might need it in an emergency. Consider labelling your stopcock clearly.

    Step 6: Use Heat Tape and Heat Cables on Vulnerable Pipes

    Heat tape and heat cables provide active protection for pipes in extremely vulnerable locations. Unlike passive insulation, these devices actively warm your pipes, preventing freezing even during severe cold spells.

    Heat tape is an electric heating element that wraps around pipes. Self-regulating heat cables are particularly useful; they automatically adjust their heat output based on pipe temperature, switching on when temperatures drop and off when pipes warm up. This approach works exceptionally well for pipes in unheated spaces like attics and crawl spaces, or for outdoor hose bibs and irrigation lines.

    Installation considerations:

    Wrap heat tape around the pipe in a spiral pattern, maintaining contact along the entire length. Secure it with the adhesive backing or with tape designed for heat cables. Never allow heat tape to touch itself or create bunched sections. Thermostatic heat cables are preferred over simple on-off models, as they reduce energy consumption.

    Cost Analysis: Prevention vs. Repair Costs

    A burst pipe repair typically costs between £500-2,000 depending on location and severity. Water damage from an undetected burst can easily exceed £10,000 when walls, flooring, and electrical systems are affected. According to 2021 statistics from the Association of British Insurers, the average cost of remedying the impact of burst pipes in domestic properties was £9,300.

    Prevention costs are modest by comparison. Pipe lagging for an average home costs £50-150. Heat tape for vulnerable sections runs £30-100. Weatherstripping and caulk costs £20-50. Even comprehensive prevention across an entire property rarely exceeds £300-500. Preventing even a single burst pipe pays for years of prevention efforts.

    What to Do If Pipes Freeze: Emergency Response

    Despite best efforts, pipes sometimes freeze anyway. Knowing how to respond quickly can prevent rupture and water damage.

    The first sign of frozen pipes is usually reduced water pressure or no water flowing from affected taps. If you notice this during cold weather, act immediately.

    Immediate steps:

    1. Turn off your main water supply at the stopcock
    2. Open affected taps to relieve pressure
    3. Locate the frozen section by feeling pipes for the coldest area
    4. Apply gentle heat to thaw the ice

    Never use an open flame like a blowtorch or candle. Instead, use safe heat sources like a heat gun, hair dryer, or heating pad. Start thawing from the tap end and work toward the frozen section. This allows water to flow out as ice melts, relieving pressure buildup. Thawing can take 30 minutes to several hours depending on how much ice has formed.

    Watch Out
    If you cannot locate the frozen section, or if thawing doesn’t restore water flow within a couple of hours, call a professional plumber. Attempting aggressive thawing risks rupturing the pipe.

    How to Thaw Frozen Pipes Safely

    The safest thawing method uses a heat gun or hair dryer on a low setting. Hold it 15-20cm from the pipe and move it slowly along the frozen section. For pipes in walls or difficult-to-reach locations, heating pads designed for pipe thawing work well. Never use boiling water directly on pipes, as the thermal shock can crack them.

    When to Call a Professional Plumber

    Contact a professional plumber immediately if you cannot locate the frozen section, thawing doesn’t restore water flow after 2-3 hours, you suspect a pipe has burst, the frozen section is in a wall or inaccessible location, or you’re uncomfortable working with heat sources or electrical equipment.

    Professional plumbers have thermal imaging equipment that pinpoints frozen sections instantly. For properties with recurring freeze problems, a plumber can identify underlying issues and recommend permanent solutions. At Apex Gas & Heating Ltd, our 24/7 emergency call-out service means help is available immediately when pipes freeze. Our licensed technicians can assess damage, thaw pipes safely, and implement long-term prevention strategies tailored to your property’s specific vulnerabilities.


    Frozen pipes represent one of winter’s most costly threats to your home. The eight strategies covered here address every aspect of freeze prevention. Starting these measures before winter arrives means you’ll sleep soundly through even the coldest nights, knowing your plumbing is protected. Get in touch with Apex Gas & Heating Ltd for a property assessment and personalised prevention plan. Our team can identify your specific vulnerabilities and recommend the most cost-effective protection for your situation.

    Prevention Method Difficulty Cost Effectiveness Best For
    Pipe lagging Very easy £50-150 High Interior pipes in unheated spaces
    Temperature control Easy Minimal Very high All interior pipes
    Sealing air leaks Easy £20-50 High Pipes entering home
    Disconnecting hoses Very easy Free Very high Outdoor water supplies
    Heat tape Moderate £100-200 Very high Extremely vulnerable pipes
    Knowing stopcock Very easy Free Essential Emergency response

    Protecting your home from frozen pipes requires understanding how water freezes, where your pipes are most vulnerable, and which prevention methods work best for your specific situation. According to [EXTERNAL_LINK: UK Health and Safety Executive guidance on winter maintenance | hse.gov.uk], homeowners who implement multiple prevention strategies see significantly reduced risk during severe cold spells. Research from [EXTERNAL_LINK: Building Research Establishment studies on residential pipe freezing | parliament.uk] confirms that combining insulation, temperature control, and sealing gaps provides the most reliable protection. The [EXTERNAL_LINK: British Plumbing Employers Council winter preparedness guide | bpec.org.uk] recommends starting prevention measures in autumn, before temperatures drop, to ensure all vulnerable sections are protected before freezing weather arrives.

    Frequently Asked Questions

    What temperature do pipes freeze at in the UK?

    Pipes typically freeze when exposed to temperatures below 0°C for extended periods. In the UK, freezing temperatures most commonly occur during December through February. However, pipes in unheated areas like attics, crawl spaces, and garages can freeze at slightly higher temperatures due to reduced air circulation. The risk increases significantly when temperatures drop below -6°C or remain below freezing for several consecutive hours. This is why preventing frozen pipes during winter is essential for UK homeowners.

    Should I leave my heating on low to prevent pipes freezing in winter?

    Yes, maintaining a consistent minimum temperature is an effective prevention method. Keep your thermostat set to at least 12-15°C, even when away from home for extended periods. This steady indoor temperature prevents water moving through pipes from freezing. Combined with pipe lagging insulation on exposed pipes in unheated areas, low continuous heating significantly reduces burst pipe risk. However, this method alone is insufficient for pipes in exterior walls, attics, or garages; these require additional insulation or heat tape for complete protection.

    How do I insulate outdoor pipes and faucets for winter using pipe lagging UK products?

    Pipe lagging UK products include foam sleeves, wrap-around insulation, and snap-on covers. Measure your pipe diameter, then slide foam lagging over exposed pipes or wrap foam material around them, securing with tape. For outdoor faucets, use frost-proof faucet covers or insulating boxes. Ensure all joints, valves, and bends are covered, as these areas freeze first. Pay special attention to pipes on exterior walls, in unheated garages, and near outdoor taps. DIY installation typically requires only basic tools (utility knife, tape measure, scissors) and takes 1-2 hours for an average property.

    What’s the cost difference between preventing frozen pipes and repairing burst pipes?

    Prevention costs are significantly lower than repairs. Pipe lagging materials cost between £15-50 per property, heat tape ranges from £20-100, and professional installation adds labour costs. In contrast, burst pipe repairs typically cost £500-3,000+ depending on location and damage severity. Water damage from burst pipes can exceed £10,000. Emergency call-outs for thawing frozen pipes or repairing burst pipes cost substantially more than preventative measures. For UK homeowners, investing in insulation, thermostat management, and heat cables represents excellent value compared to potential property damage and expensive emergency plumber fees.

    This article was written using GrandRanker

  • Why Are My Radiators Cold at the Bottom? Complete Fix Guide

    Why Are My Radiators Cold at the Bottom? Complete Fix Guide

    Table of Contents

    Last Updated: July 25, 2026

    Why Are My Radiators Cold at the Bottom? Common Causes Explained

    If you’re asking "why are my radiators cold at the bottom," you’re experiencing one of the most common heating problems in UK homes. At Apex Gas & Heating Ltd, we’ve diagnosed this issue in hundreds of properties across Sussex and Surrey. A radiator that’s hot at the top but cold at the bottom signals one of three core problems: sludge blocking water circulation, a faulty valve preventing flow, or an imbalanced heating system. Sludge build-up accounts for roughly 70% of these cases, accumulating in the lower channels of your radiator and blocking hot water from reaching the bottom section.

    Below, we’ll walk you through exactly what causes the problem, how to diagnose it yourself, and when to call a heating engineer.

    Sludge and debris build-up blocking water flow

    Central heating systems accumulate magnetite, a black iron oxide powder created by corrosion inside pipes and radiators. This sludge settles at the lowest point of each radiator, forming a barrier that prevents hot water from circulating through the bottom sections. Limescale deposits compound the problem, especially in hard-water areas across the UK. As water heats and cools repeatedly, mineral deposits crystallise inside radiator channels. Combined with rust particles from aging pipes, these deposits create a thick sludge layer that blocks water flow.

    The longer sludge accumulates, the more it restricts water flow and forces your boiler to work harder, consuming more energy and generating higher bills.

    Watch Out
    If you notice multiple radiators cold at the bottom across your home, the problem likely extends beyond individual radiators. System-wide sludge requires power flushing, not just bleeding individual radiators. Ignoring this accelerates boiler wear and increases energy bills by 15-25%.

    Faulty radiator valves preventing circulation

    Every radiator has two valves: the thermostatic radiator valve (TRV) on one end and a manual or lockshield valve on the other. These control water flow through the radiator. If either valve sticks or closes partially, water bypasses the radiator entirely or flows only to the top section.

    A stuck TRV is particularly common in older systems. The internal mechanism becomes clogged with sludge particles, preventing the valve from opening fully. The lockshield valve, often hidden behind a plastic cap, regulates how much hot water enters the radiator. If this valve closes partially, less water flows through, and the bottom section never receives enough hot water to warm up.

    Pro Tip
    Lockshield valves have a specific adjustment range. If you’ve adjusted one recently and now have a cold-bottom radiator, that adjustment may have restricted flow too much. Turning the valve clockwise reduces flow; counter-clockwise increases it. Make small adjustments in quarter-turn increments.

    System imbalance and low boiler pressure

    In homes with multiple radiators, water naturally flows to the easiest path, usually radiators closest to the boiler or on the lowest floor. Radiators further away or on upper floors receive less hot water, causing uneven heating.

    Low boiler pressure compounds the problem. Your boiler needs sufficient pressure to push water through all radiators simultaneously. If pressure drops below 1.0 bar, the pump struggles to circulate water effectively, especially to radiators furthest from the boiler. Check the pressure gauge on your boiler; it should read between 1.0 and 1.5 bar when cold.

    Understanding Central Heating Sludge and Rust Deposits

    What magnetite and limescale do to your system

    Magnetite forms whenever ferrous metals contact water without proper corrosion inhibitor. Limescale develops in hard-water regions where calcium and magnesium minerals crystallise on pipe walls and radiator internals, reducing channel diameter and restricting water flow.

    A radiator with moderate sludge build-up delivers 30-40% less heat output than a clean radiator, even when water temperature remains identical. This forces your boiler to run longer, consuming more gas and driving up energy bills. Over a heating season, sludge-related inefficiency costs typical households £150-300 in wasted energy.

    Research from UK heating system efficiency studies shows that regular system maintenance, including sludge removal, improves efficiency by up to 25%.

    How sludge settles in radiator channels

    Radiators contain internal channels that carry hot water from the inlet valve to the outlet valve. These channels are narrow, typically 3-5mm wide. Sludge particles settle in these channels because water moves slowly at the bottom of each radiator, especially as the radiator cools. Once sludge blocks these channels, water can’t circulate through them at all. The radiator becomes a two-zone system: a hot zone at the top where water flows freely, and a cold zone at the bottom where water is completely blocked.

    Key Takeaway
    Sludge accumulation is irreversible without system flushing. Bleeding a radiator removes trapped air, but it cannot remove sludge. If your radiator has been cold at the bottom for more than a few weeks, sludge is almost certainly the cause, and only power flushing will restore full heat output.

    Step-by-Step: How to Fix a Radiator Cold at the Bottom

    Step 1: Check your boiler pressure and system settings

    Locate the pressure gauge on your boiler’s front panel. The needle should sit between 1.0 and 1.5 bar when your system is cold and at rest. If pressure reads below 1.0 bar, locate the filling loop, a flexible hose with isolation valves at each end, usually under the boiler. Open both valves slowly until pressure rises to 1.2 bar, then close the valves. If pressure drops again within days, you have a leak requiring professional diagnosis.

    Check your thermostat settings. If your room thermostat is set too low or positioned in a warm room, your boiler may not run long enough to heat all radiators fully. Set your thermostat to 20-21°C and ensure it’s not in direct sunlight or near heat sources. Listen for the sound of the burner igniting when you raise the thermostat. If the boiler doesn’t respond, check that the gas supply is on and the electrical switch near the boiler is in the "on" position.

    Time required: 5-10 minutes

    Step 2: Inspect and test radiator valves

    Locate the thermostatic radiator valve (TRV) on your radiator, the dial-topped valve on one end. Twist the dial fully clockwise until it stops, then fully counter-clockwise until it stops. The valve should click or feel resistance at each extreme. If the dial spins freely without resistance, the valve mechanism is broken and needs replacement.

    Feel the inlet pipe leading into the radiator. It should be hot to the touch. If it’s cold, water isn’t reaching the radiator at all. Check the lockshield valve on the opposite end of the radiator. This valve has a cap covering the adjustment screw. Gently turn the screw counter-clockwise (opening) by a quarter-turn. Wait 30 seconds, then feel the inlet pipe again. If it’s now warm, the valve was restricting flow.

    Time required: 10-15 minutes

    Step 3: Bleed trapped air from your radiators

    Trapped air at the top of a radiator can prevent water from flowing through the entire radiator. Locate the bleed valve, a small brass nipple on the top corner of the radiator, opposite the inlet valve. Place a container underneath to catch water. Using a radiator key (a small square-shaft tool costing £3-5 from any hardware store), turn the valve counter-clockwise slowly. You’ll hear a hissing sound as air escapes.

    Continue turning until water begins to drip from the valve, then immediately stop and close the valve by turning clockwise. Repeat this process for every radiator in your home, starting with the radiator closest to the boiler and working toward the furthest radiator. After bleeding all radiators, check your boiler pressure again. If it falls below 1.0 bar, use the filling loop to restore pressure to 1.2 bar.

    Time required: 20-30 minutes for a typical 4-bedroom home

    Step 4: Balance your heating system

    System balancing ensures that water distributes evenly across all radiators. Begin with your boiler running and all radiators at full heat. Feel each radiator from top to bottom. Radiators should warm evenly.

    Identify radiators that are significantly hotter than others. These are receiving too much flow. Using a radiator key, slightly close the lockshield valve on these radiators by turning clockwise a quarter-turn. Wait 5 minutes and reassess. Continue making small adjustments until all radiators feel similarly warm.

    For radiators that remain cold at the bottom after balancing, the problem is sludge, not imbalance. Sludge cannot be fixed by valve adjustment, only by power flushing.

    Time required: 30-45 minutes

    Radiator Bleeding: Why It Often Doesn’t Solve Cold Bottoms

    When bleeding works and when it doesn’t

    Bleeding removes trapped air from radiators, which improves heat output when air is the problem. A radiator with significant air pockets will feel lukewarm throughout, not hot at the top and cold at the bottom. Bleeding helps if you’ve recently drained your system for maintenance, if you’ve added radiators, or if you notice a hissing sound when the heating runs.

    However, bleeding does nothing for sludge. If your radiator is hot at the top and cold at the bottom, a clear distinction between two zones, sludge is blocking water circulation. Bleeding will not remove sludge. If bleeding improves heat output slightly but the bottom remains cold, sludge is definitely present.

    Watch Out
    Do not bleed radiators more than once per heating season unless you have a specific reason. Repeated bleeding removes corrosion inhibitor from your system, accelerating sludge formation and rust development.

    Using a radiator key correctly

    A radiator key is a small square-shaft tool that fits the bleed valve on your radiator. Keys cost £2-5 and are available from any DIY store or online retailer. Insert the key fully into the bleed valve and turn counter-clockwise slowly and steadily. Do not force the key; if it doesn’t turn easily, the valve may be stuck or you may have the wrong size key.

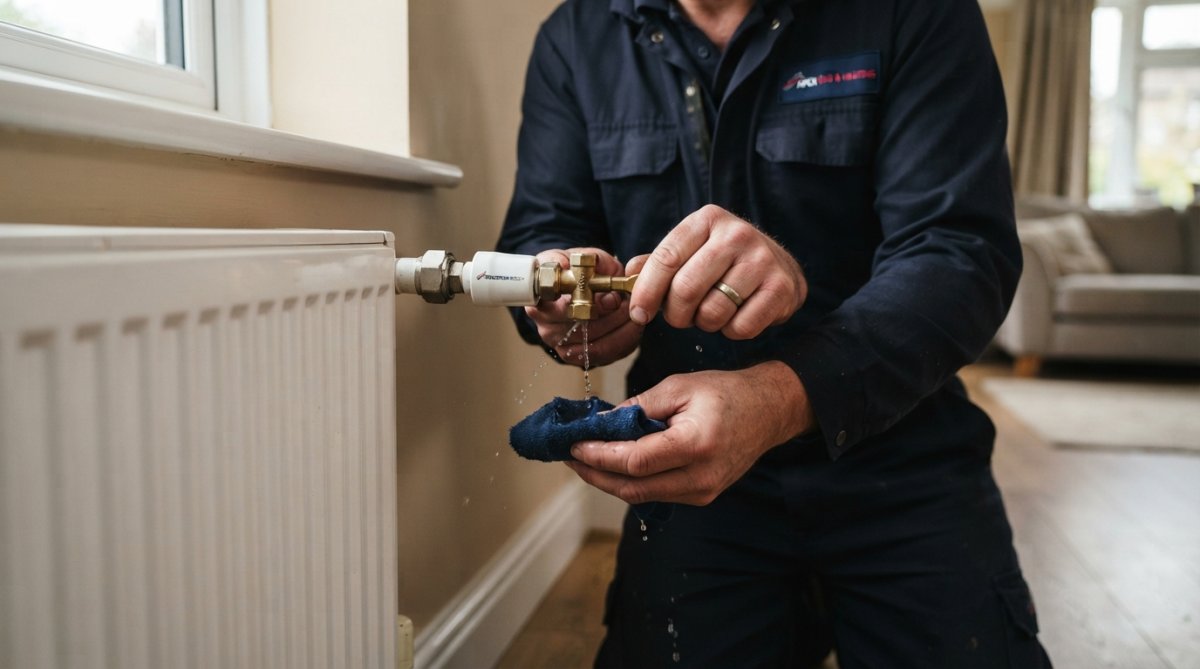
    As you turn, you’ll hear air hissing out. Continue turning until water begins to drip from the valve. The moment water appears, stop turning and close the valve immediately by turning clockwise.

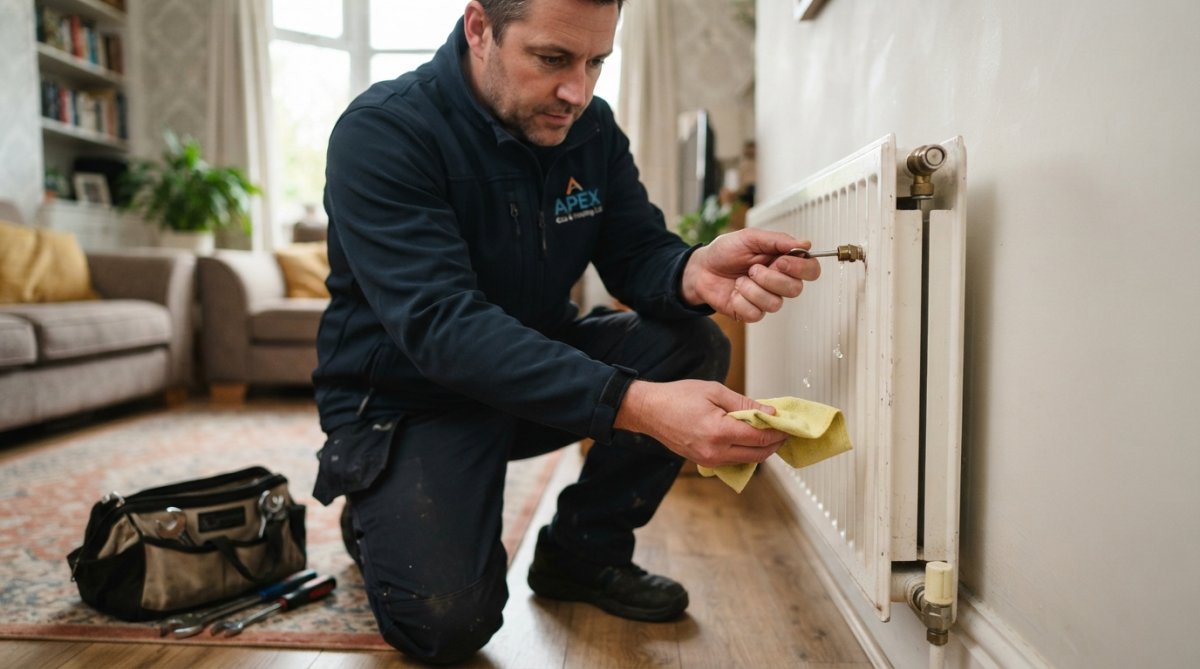
    Close-up of a hand using a radiator key on a bleed valve, with a radiator visible in the background in a modern home setting
    Close-up of a hand using a radiator key on a bleed valve, with a radiator visible in the background in a modern home setting

    Power Flushing Central Heating: The Deep Clean Solution

    How power flushing removes sludge and corrosion

    Power flushing uses a powerful pump to force water through your entire heating system at high velocity. This high-velocity flow dislodges sludge deposits that normal circulation cannot remove. The process flushes sludge out of radiators, pipes, and the boiler, restoring full water circulation.

    The procedure takes 4-6 hours. An engineer connects a flushing machine to your system, then circulates water at high pressure through each radiator individually. As sludge dislodges, it’s captured in a filter on the flushing machine. After flushing, the engineer adds fresh corrosion inhibitor to your system. This chemical prevents future magnetite formation by coating internal metal surfaces.

    Power flushing restores heat output to radiators that have been cold at the bottom for years. A radiator that previously delivered 40% of its rated heat output will return to 95%+ output after flushing. According to Chartered Institute of Plumbing and Heating Engineers guidance, power flushing is the only effective method for removing sludge from a heating system.

    When to call a heating engineer for professional flushing

    Call a heating engineer if your radiator has been cold at the bottom for more than 4 weeks, if multiple radiators show the same problem, or if your boiler is making unusual noises (kettling or banging sounds indicate sludge in the boiler).

    Apex Gas & Heating Ltd provides power flushing services across Sussex and Surrey with transparent pricing and fast scheduling. Our heating engineers use industry-standard flushing equipment and add professional-grade corrosion inhibitor to protect your system long-term. With our 24/7 emergency call-out service, we can often schedule flushing within 48 hours of your call.

    Radiator Balancing: Ensuring Even Heat Distribution

    Understanding TRV and manual valve adjustment

    Thermostatic radiator valves (TRVs) automatically adjust water flow based on room temperature. The numbered dial (typically 1-5) sets your target temperature: 1 is coolest, 5 is warmest. TRVs should never be installed on the radiator in the room where your main thermostat is located. If the thermostat is in your lounge, that lounge radiator should have a manual valve, not a TRV. Using a TRV on the thermostat radiator creates conflicting signals, causing erratic heating.

    Manual valves (lockshield valves) simply restrict flow. These are used on radiators in the same room as your main thermostat, and they’re used to balance flow across your entire system.

    How to balance radiators across your home

    Start with your heating system running at full capacity. Set all TRVs to 5 (maximum heat) and set your main thermostat to 21°C. Wait 30 minutes for the system to stabilize.

    Visit each radiator and feel it from top to bottom. Radiators should feel warm throughout. Note which radiators feel significantly hotter than others; these are receiving too much flow and need balancing.

    Start with radiators closest to the boiler. Locate the lockshield valve on the radiator (usually on the right side, with a plastic cap). Using a radiator key, gently turn the valve clockwise by a quarter-turn. This restricts flow slightly. Wait 10 minutes and reassess. Continue making small adjustments on hot radiators until all radiators feel similarly warm.

    Once balanced, write down the position of each lockshield valve. These settings should remain unchanged unless you add or remove radiators from your system.

    Pro Tip
    Balancing is easier if you work with a second person, one person adjusts valves while the other feels radiators and reports back. Use a thermometer to measure radiator surface temperature at the top and bottom of each radiator. Balanced radiators should show a temperature difference of no more than 5°C between top and bottom.

    DIY vs. Professional Help: When to Call a Plumber

    What you can safely fix yourself

    You can safely check boiler pressure, test radiator valves for responsiveness, bleed trapped air, and balance your heating system. These tasks require no special tools beyond a £5 radiator key and take 2-3 hours total. If these steps restore heat to your cold radiators, you’ve solved the problem without professional expense.

    You can also safely replace a radiator valve if one is faulty. Valve replacement requires turning off the heating, draining the radiator, and unbolting the old valve. The process takes 1-2 hours and costs £30-80 for a replacement valve.

    Do not attempt to remove a radiator or modify your boiler settings beyond the filling loop. Do not try to flush your system yourself; power flushing requires specialized equipment worth thousands of pounds.

    Why professional heating engineers are worth the investment

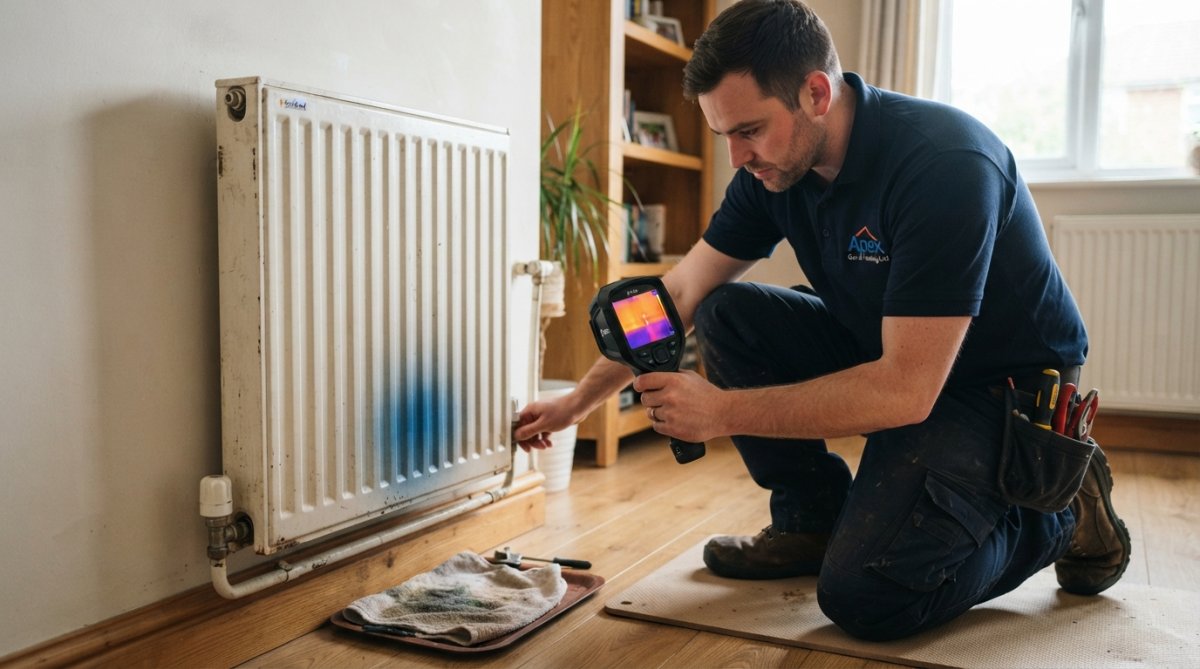
    A heating engineer brings diagnostic equipment that identifies problems you cannot see. Thermal imaging cameras reveal temperature distribution across radiators, pinpointing exactly where sludge is blocking flow. More importantly, an engineer can perform work that carries legal responsibility. Power flushing must be done correctly; improper flushing can damage your boiler or introduce air into the system.

    At Apex Gas & Heating Ltd, our heating engineers are approved installers for Glowworm and Worcester boilers, meaning they can service and repair these systems without voiding your warranty. We provide transparent quotes before work begins, full public liability insurance, and fast response times, often within 24 hours of your call.

    Cost Breakdown: Fixing Cold Radiators Without Breaking the Bank

    Fixing a cold radiator costs between £0 (if DIY troubleshooting solves it) and £500-800 (if power flushing is required).

    DIY troubleshooting: £5-20
    Radiator key and possibly a replacement valve if needed. Time investment: 2-3 hours.

    Professional radiator valve replacement: £80-150
    Includes labour and parts for a single valve.

    Power flushing: £400-800
    Typical cost for a 4-5 bedroom house. Smaller properties may cost £300-400; larger properties may reach £800-1000.

    Boiler repair: £150-400
    If your boiler is faulty, repairs typically cost £150-300. If the boiler requires replacement, expect £1500-3000 for a new unit plus installation.

    If you’re comfortable checking pressure, testing valves, and bleeding radiators, you’ll spend 2-3 hours and £5-20. If these steps work, you’ve saved £200-400 in professional labour. However, if DIY troubleshooting doesn’t solve the problem, calling a professional immediately is more cost-effective than trying repeatedly.


    Cold radiators at the bottom are frustrating, but they’re rarely expensive to fix. Most problems stem from sludge or valve issues that professional heating engineers can diagnose and resolve within a day. If your DIY troubleshooting hasn’t solved the problem after 2-3 hours of effort, contact Apex Gas & Heating Ltd for a professional assessment. Our heating engineers will identify the exact cause, provide a transparent quote, and restore your radiators to full heat output. With our fast response times and approved installer status, you’ll have your heating working properly again quickly.

    Frequently Asked Questions

    Why is my radiator hot at the top but cold at the bottom?

    A radiator cold at the bottom typically indicates sludge, magnetite, or rust deposits blocking water flow in the lower channels. This prevents hot water from circulating fully through the radiator. Less commonly, it's caused by a faulty valve, trapped air, or an unbalanced heating system. The most effective solution depends on the root cause, sludge requires power flushing, while valve issues need inspection and replacement. A heating engineer can diagnose which problem you're facing.

    Will bleeding my radiator fix a cold bottom?

    Bleeding removes trapped air, which can help if your radiator is completely cold or has cold spots at the top. However, if only the bottom is cold, bleeding often won't help because the problem is usually sludge build-up or a faulty valve, not air. Sludge requires power flushing central heating to remove debris and restore full water circulation. Always check your boiler pressure and radiator valves before assuming bleeding will solve it.

    What causes central heating sludge and how do I remove it?

    Central heating sludge forms from rust, magnetite (iron oxide), limescale, and debris that accumulate inside pipes and radiators over time. Corrosion from old water and sediment naturally build up, especially in systems over 10 years old. To remove sludge, power flushing is the most effective solution, a heating engineer uses high-velocity water and chemicals to dislodge and flush out deposits. Installing a magnetic filter on the return pipe also helps trap future sludge and protect your boiler.

    Should I call a plumber or heating engineer for a cold radiator bottom?

    For simple checks, boiler pressure, valve testing, bleeding, you can handle these yourself with basic tools. However, if sludge is suspected or your radiator remains cold after these steps, call a qualified heating engineer. Power flushing requires specialist equipment and expertise. A professional can also diagnose system imbalance and perform radiator balancing safely. Apex Gas & Heating Ltd offers 24/7 emergency call-outs and approved Glowworm and Worcester installer expertise for fast, reliable diagnosis and repair across Sussex and Surrey.

    This article was written using GrandRanker

  • Best Way to Bleed Radiators Efficiently: A Step-by-Step Guide

    Best Way to Bleed Radiators Efficiently: A Step-by-Step Guide

    Table of Contents

    Best Way to Bleed Radiators Efficiently: A Step-by-Step Guide

    Last Updated: July 24, 2026

    Understanding the best way to bleed radiators efficiently is essential for maintaining a comfortable home and reducing energy bills. At Apex Gas & Heating Ltd, we’ve helped thousands of homeowners across Sussex and Surrey master this straightforward maintenance task. When air becomes trapped in your central heating system, radiators develop cold spots that prevent them from heating properly, forcing your boiler to work harder and consume more fuel. This guide walks you through the entire process, from identifying which radiators need bleeding to repressurisating your boiler afterwards.

    What Is Bleeding a Radiator and Why It Matters

    Bleeding a radiator is the process of releasing trapped air from your heating system through a small valve, allowing hot water to circulate freely and warm the entire radiator surface. Air pockets prevent water from flowing efficiently through radiators, creating cold spots that waste energy and leave rooms uncomfortably cool.

    Air enters your central heating system when you drain part of it for repairs or maintenance. Over time, dissolved oxygen in the water separates and forms bubbles that rise to the highest points in your system, typically the top of radiators. When air blocks the path, water cannot reach the top of the radiator, leaving that section cold. This forces your boiler to maintain higher temperatures to compensate, increasing your heating bills unnecessarily. Bleeding radiators restores full circulation and improves heating performance.

    Pro Tip
    Most homeowners wait until they notice cold spots before bleeding radiators. The better approach is to bleed radiators once a year, typically in autumn before the heating season begins. This prevents problems before they start and maintains consistent warmth throughout winter.

    Why Do Radiators Get Air in Them?

    Air enters your central heating system through several common mechanisms. The most frequent cause is maintenance work, whenever a plumber or heating engineer repairs a pipe, valve, or component, the system must be drained and refilled. During this process, air inevitably enters the pipes and rises to the highest points in your system.

    Another source is the filling loop, a flexible hose with isolation valves that connects your mains water supply to the heating system. If this valve leaks slightly or is not fully sealed, air can be drawn in over time. Dissolved oxygen in fresh water also contributes to air pockets. Every time you top up your heating system with mains water, you introduce oxygen that separates from the water over weeks and months, forming small bubbles that migrate upward to radiators.

    Magnetite and sludge buildup can also trap air pockets. Magnetite is a black iron oxide that forms inside steel pipes and radiators as the system ages. Flushing your system with a product like Fernox F3 Central Heating Cleaner removes this debris and improves water circulation.

    Signs Your Radiator Needs Bleeding

    Cold spots at the top of a radiator are the clearest sign that air is trapped inside. Feel the radiator surface with your hand, if the top section is noticeably cooler than the bottom, air is blocking water circulation in that area.

    Unusual noises in your heating pipes signal trapped air. You may hear gurgling, hissing, or banging sounds, particularly when the boiler first fires up. Reduced heating performance across multiple radiators or longer warm-up times also suggest air pockets are reducing efficiency throughout the system.

    A pressure gauge reading that drops between bleedings indicates a persistent air problem or a slow leak. Your boiler’s pressure gauge should read between 1 and 1.5 bar when cold. If pressure drops noticeably within a few weeks of bleeding, you may have a leak in the filling loop that requires professional attention.

    Watch Out
    If your boiler pressure drops rapidly (within days) after you bleed radiators, do not attempt further repairs yourself. Contact a Gas Safe registered engineer immediately, this indicates a leak in a pressurised component that requires professional diagnosis and repair.

    Tools Required for the Best Way to Bleed Radiators Efficiently

    Manual radiator keys vs. automatic air vents

    A radiator key is a simple tool that fits over the bleed valve at the top of your radiator. The Rothenberger Brass Radiator Air Bleed Key (Pack of 2) costs around £1.09 per key and fits most standard UK radiators with 5mm square valves. This durable brass option resists corrosion and provides good use for stiff valves.

    For a more advanced solution, automatic air vents like the Aladdin HV30C eliminate manual bleeding entirely. These devices automatically release trapped air as it accumulates, maintaining optimal system performance without intervention. They cost between £15 and £25 depending on the model and retailer.

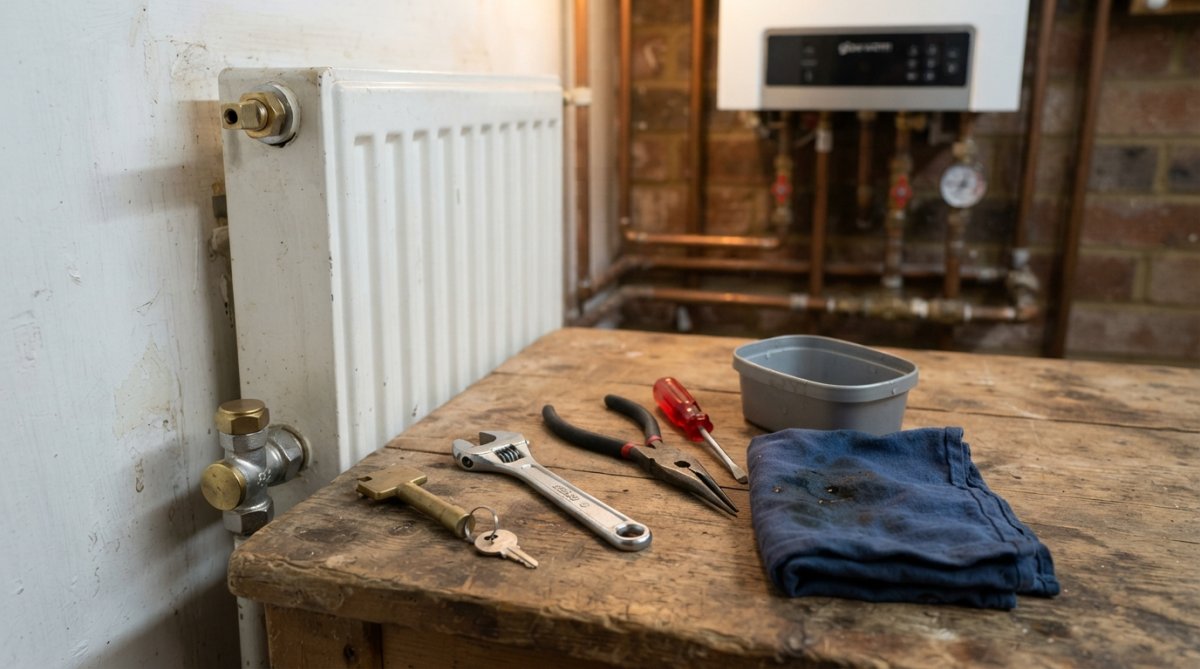
    Close-up of a brass radiator bleed key, flat-head screwdriver, white towel, and clear plastic jug arranged on a surface next to a white panel radiator
    Close-up of a brass radiator bleed key, flat-head screwdriver, white towel, and clear plastic jug arranged on a surface next to a white panel radiator

    Additional equipment you’ll need

    Beyond a radiator key, gather these items before starting:

    • Towel or cloth: Essential for catching water drips and preventing stains
    • Container or jug: A small jug catches water as it escapes from the bleed valve
    • Flathead screwdriver: Some radiators use a small flathead slot instead of a square valve
    • Pressure gauge: Check your boiler’s pressure before and after bleeding
    • Filling loop: Located near your boiler, this is how you add water back to the system

    The WENKO Radiator Bleeding Key with Water Reservoir (around £10-15) combines the key and collection container into one tool, eliminating the need for separate cloths and containers.

    Step-by-Step Guide: The Best Way to Bleed Radiators Efficiently

    Step 1: Turn off your central heating system

    Before touching any radiator valves, switch off your boiler completely. Allow the system to cool for at least 30 minutes. This is critical for safety, hot water under pressure can cause severe burns if it escapes from the bleed valve.

    Step 2: Locate the bleed valve on each radiator

    The bleed valve is a small metal fitting, usually brass or chrome-plated, located at the top corner of each radiator. Most radiators have the bleed valve on one of the top corners, typically the opposite end from the lockshield valve and the thermostatic radiator valve (TRV). Look for a small square hole or a slotted opening.

    Step 3: Prepare your workspace and safety precautions

    Position your container or jug directly under the bleed valve before opening it. Place your towel nearby to catch any splashes. Wear old clothes or an apron, as radiator water may contain rust or sediment that stains fabric. Ensure good ventilation in the room and check that your radiator key fits the valve properly before applying pressure.

    Key Takeaway
    The best way to bleed radiators efficiently starts before you touch the valve: proper preparation prevents mistakes, reduces mess, and keeps everyone safe.

    Step 4: Open the bleed valve and release trapped air

    Insert your radiator key into the valve opening and turn it anti-clockwise (counter-clockwise) approximately one quarter turn. Do not force it, radiator valves are delicate and turn easily when properly loosened. You should hear a faint hissing sound as air escapes. Keep your container positioned to catch the water that follows. Once water flows steadily without any air bubbles or hissing, close the valve by turning the key clockwise approximately one quarter turn.

    Step 5: Close the valve and repeat for remaining radiators

    Once the first radiator is bled, move to the next one. Work systematically through your home, starting with radiators on the lowest floor and working upward. This approach ensures air is displaced from the entire system efficiently. Repeat the process for each radiator: position your container, turn the key anti-clockwise one quarter turn, wait for water to flow steadily, then close the valve.

    After bleeding all radiators, check your boiler’s pressure gauge. The needle should have dropped slightly because you released pressurised water from the system. Most likely, you will need to repressurise the boiler to restore proper operation.

    Radiator Balancing vs. Bleeding: Understanding the Difference

    Radiator balancing and bleeding radiators efficiently are two separate but related maintenance tasks that homeowners often confuse. Bleeding removes air from radiators. Balancing adjusts the flow of water to each radiator so heat is distributed evenly throughout your home.

    A radiator that remains cold even after bleeding may need balancing. If the top is warm but the bottom is cold, bleeding is the solution. If the entire radiator is cold while others nearby are hot, the lockshield valve is likely closed or partially restricted, requiring balancing rather than bleeding. Professional heating engineers use measuring tools and adjust lockshield valves to achieve consistent temperature differences.

    How to Repressurise Your Boiler After Bleeding Radiators

    Checking your pressure gauge and filling loop

    After bleeding radiators, your boiler’s pressure will have dropped. Check the pressure gauge on your boiler, it should show a reading between 1 and 1.5 bar when the system is cold. If it has dropped below 1 bar, you must repressurise the system.

    Locate your filling loop, a flexible hose with two isolation valves (one on each end) connected near your boiler. Before opening the filling loop, ensure both isolation valves are fully closed and the boiler is switched off and cool.

    Restoring optimal boiler pressure

    To repressurise your boiler, open both isolation valves on the filling loop slowly. You will hear water entering the system. Watch the pressure gauge, it should begin to rise. Stop when the gauge reaches 1.2-1.3 bar (approximately mid-range on most gauges). Do not overfill, as excessive pressure can damage components and cause leaks.

    Once the pressure is correct, close both isolation valves on the filling loop by turning them clockwise. Check that both valves are fully closed, if left open, the filling loop can develop leaks. Switch the boiler back on and allow it to run for several minutes. The pressure may rise slightly as the system heats up, which is normal.

    If the pressure drops again within a few days, you likely have a leak somewhere in the system. Contact Apex Gas & Heating Ltd’s 24/7 emergency service if you suspect a leak.

    Watch Out
    Never force the filling loop valves open or closed. They are delicate and can be damaged by excessive force. If a valve will not turn, stop and call a professional rather than risk breaking it.

    Common Mistakes to Avoid When Bleeding Radiators

    Opening the bleed valve too far is a frequent error. A quarter turn is sufficient, opening it further than necessary increases water spillage and makes it harder to close the valve cleanly. Excessive force can strip the valve mechanism, rendering it unusable.

    Bleeding radiators while the system is still hot causes unnecessary risk. Hot water under pressure can cause severe burns. Always allow at least 30 minutes for the system to cool after turning off the boiler.

    Forgetting to repressurise the boiler after bleeding is surprisingly common. Low pressure reduces heating efficiency and can eventually damage the boiler. Always check the pressure gauge and top up the system to 1.2-1.3 bar before resuming normal operation.

    Attempting to bleed a radiator without a proper container leads to water damage. Always position a container to catch water before opening any valve. Bleeding only one or two radiators when the entire system has air problems provides temporary relief but does not solve the underlying issue.

    Common Mistake Why It’s a Problem How to Avoid It
    Opening valve too far Damages valve mechanism, excessive spillage Turn key only one quarter turn
    Bleeding hot system Risk of severe burns Cool system for 30 minutes minimum
    Skipping repressurise Reduces heating efficiency and damages boiler Check pressure gauge and top up to 1.2-1.3 bar
    No container ready Water damage to carpets and walls Position jug before opening valve
    Bleeding only one radiator Leaves air in other radiators Bleed all affected radiators systematically

    Bleeding radiators is one of the most important heating maintenance tasks you can perform, yet many homeowners struggle with pressure issues or persistent cold spots even after attempting to bleed their system. If you’ve followed these steps and your radiators still have cold spots, or if your boiler pressure keeps dropping, the problem may require professional diagnosis. Apex Gas & Heating Ltd’s licensed Gas Safe engineers can identify underlying issues like leaks in your filling loop, sludge buildup requiring system flushing, or faulty pressure relief valves. With our 24/7 emergency call-out service across Sussex and Surrey, we’re available whenever heating problems arise. Get a quote from Apex Gas & Heating Ltd and let our approved Glowworm and Worcester installers restore your heating system to peak efficiency.

    Frequently Asked Questions

    How often should you bleed radiators in the UK?

    Most UK homeowners should bleed radiators once a year, typically at the start of the heating season in autumn. However, if you notice cold spots, hissing sounds, or uneven heating across your central heating system, bleed them immediately. Systems with recurring air problems may need bleeding more frequently, consult a Gas Safe engineer if this occurs.

    What are the signs that a radiator needs bleeding?

    Common signs include cold spots at the top of radiators, hissing or gurgling sounds from the bleed valve, reduced heating efficiency, and uneven warmth across your home. You may also notice your boiler pressure dropping or needing frequent top-ups. If your radiator feels cool despite the central heating running, air pockets are likely trapped inside and need releasing.

    Can you bleed a radiator when the heating is on, and what safety precautions matter most?

    No, always turn off your central heating and allow the system to cool for at least 30 minutes before bleeding. Hot water can cause scalding injuries. Wear protective gloves, place a towel beneath the bleed valve to catch water discharge, and use a jug to collect any spillage. Never force a stuck valve; contact a professional heating engineer instead to avoid damaging the radiator.

    What happens if you don't bleed radiators, and how does it affect heating efficiency?

    Trapped air in radiators creates cold spots and reduces heating efficiency, forcing your boiler to work harder and increasing energy bills. Over time, air pockets can cause system-wide problems including pressure fluctuations, corrosion, and damage to components like the expansion vessel. Regular bleeding maintains optimal performance and helps prevent costly repairs while keeping your home warm and comfortable.

    This article was written using GrandRanker