







Table of Contents
- Why Are My Radiators Cold at the Bottom? Common Causes Explained
- Understanding Central Heating Sludge and Rust Deposits
- Step-by-Step: How to Fix a Radiator Cold at the Bottom
- Radiator Bleeding: Why It Often Doesn’t Solve Cold Bottoms
- Power Flushing Central Heating: The Deep Clean Solution
- Radiator Balancing: Ensuring Even Heat Distribution
- DIY vs. Professional Help: When to Call a Plumber
- Cost Breakdown: Fixing Cold Radiators Without Breaking the Bank
Last Updated: July 25, 2026
Why Are My Radiators Cold at the Bottom? Common Causes Explained
If you’re asking "why are my radiators cold at the bottom," you’re experiencing one of the most common heating problems in UK homes. At Apex Gas & Heating Ltd, we’ve diagnosed this issue in hundreds of properties across Sussex and Surrey. A radiator that’s hot at the top but cold at the bottom signals one of three core problems: sludge blocking water circulation, a faulty valve preventing flow, or an imbalanced heating system. Sludge build-up accounts for roughly 70% of these cases, accumulating in the lower channels of your radiator and blocking hot water from reaching the bottom section.
Below, we’ll walk you through exactly what causes the problem, how to diagnose it yourself, and when to call a heating engineer.
Sludge and debris build-up blocking water flow
Central heating systems accumulate magnetite, a black iron oxide powder created by corrosion inside pipes and radiators. This sludge settles at the lowest point of each radiator, forming a barrier that prevents hot water from circulating through the bottom sections. Limescale deposits compound the problem, especially in hard-water areas across the UK. As water heats and cools repeatedly, mineral deposits crystallise inside radiator channels. Combined with rust particles from aging pipes, these deposits create a thick sludge layer that blocks water flow.
The longer sludge accumulates, the more it restricts water flow and forces your boiler to work harder, consuming more energy and generating higher bills.
If you notice multiple radiators cold at the bottom across your home, the problem likely extends beyond individual radiators. System-wide sludge requires power flushing, not just bleeding individual radiators. Ignoring this accelerates boiler wear and increases energy bills by 15-25%.
Faulty radiator valves preventing circulation
Every radiator has two valves: the thermostatic radiator valve (TRV) on one end and a manual or lockshield valve on the other. These control water flow through the radiator. If either valve sticks or closes partially, water bypasses the radiator entirely or flows only to the top section.
A stuck TRV is particularly common in older systems. The internal mechanism becomes clogged with sludge particles, preventing the valve from opening fully. The lockshield valve, often hidden behind a plastic cap, regulates how much hot water enters the radiator. If this valve closes partially, less water flows through, and the bottom section never receives enough hot water to warm up.
Lockshield valves have a specific adjustment range. If you’ve adjusted one recently and now have a cold-bottom radiator, that adjustment may have restricted flow too much. Turning the valve clockwise reduces flow; counter-clockwise increases it. Make small adjustments in quarter-turn increments.
System imbalance and low boiler pressure
In homes with multiple radiators, water naturally flows to the easiest path, usually radiators closest to the boiler or on the lowest floor. Radiators further away or on upper floors receive less hot water, causing uneven heating.
Low boiler pressure compounds the problem. Your boiler needs sufficient pressure to push water through all radiators simultaneously. If pressure drops below 1.0 bar, the pump struggles to circulate water effectively, especially to radiators furthest from the boiler. Check the pressure gauge on your boiler; it should read between 1.0 and 1.5 bar when cold.
Understanding Central Heating Sludge and Rust Deposits
What magnetite and limescale do to your system
Magnetite forms whenever ferrous metals contact water without proper corrosion inhibitor. Limescale develops in hard-water regions where calcium and magnesium minerals crystallise on pipe walls and radiator internals, reducing channel diameter and restricting water flow.
A radiator with moderate sludge build-up delivers 30-40% less heat output than a clean radiator, even when water temperature remains identical. This forces your boiler to run longer, consuming more gas and driving up energy bills. Over a heating season, sludge-related inefficiency costs typical households £150-300 in wasted energy.
Research from UK heating system efficiency studies shows that regular system maintenance, including sludge removal, improves efficiency by up to 25%.
How sludge settles in radiator channels
Radiators contain internal channels that carry hot water from the inlet valve to the outlet valve. These channels are narrow, typically 3-5mm wide. Sludge particles settle in these channels because water moves slowly at the bottom of each radiator, especially as the radiator cools. Once sludge blocks these channels, water can’t circulate through them at all. The radiator becomes a two-zone system: a hot zone at the top where water flows freely, and a cold zone at the bottom where water is completely blocked.
Sludge accumulation is irreversible without system flushing. Bleeding a radiator removes trapped air, but it cannot remove sludge. If your radiator has been cold at the bottom for more than a few weeks, sludge is almost certainly the cause, and only power flushing will restore full heat output.
Step-by-Step: How to Fix a Radiator Cold at the Bottom
Step 1: Check your boiler pressure and system settings
Locate the pressure gauge on your boiler’s front panel. The needle should sit between 1.0 and 1.5 bar when your system is cold and at rest. If pressure reads below 1.0 bar, locate the filling loop, a flexible hose with isolation valves at each end, usually under the boiler. Open both valves slowly until pressure rises to 1.2 bar, then close the valves. If pressure drops again within days, you have a leak requiring professional diagnosis.
Check your thermostat settings. If your room thermostat is set too low or positioned in a warm room, your boiler may not run long enough to heat all radiators fully. Set your thermostat to 20-21°C and ensure it’s not in direct sunlight or near heat sources. Listen for the sound of the burner igniting when you raise the thermostat. If the boiler doesn’t respond, check that the gas supply is on and the electrical switch near the boiler is in the "on" position.
Time required: 5-10 minutes
Step 2: Inspect and test radiator valves
Locate the thermostatic radiator valve (TRV) on your radiator, the dial-topped valve on one end. Twist the dial fully clockwise until it stops, then fully counter-clockwise until it stops. The valve should click or feel resistance at each extreme. If the dial spins freely without resistance, the valve mechanism is broken and needs replacement.
Feel the inlet pipe leading into the radiator. It should be hot to the touch. If it’s cold, water isn’t reaching the radiator at all. Check the lockshield valve on the opposite end of the radiator. This valve has a cap covering the adjustment screw. Gently turn the screw counter-clockwise (opening) by a quarter-turn. Wait 30 seconds, then feel the inlet pipe again. If it’s now warm, the valve was restricting flow.
Time required: 10-15 minutes
Step 3: Bleed trapped air from your radiators
Trapped air at the top of a radiator can prevent water from flowing through the entire radiator. Locate the bleed valve, a small brass nipple on the top corner of the radiator, opposite the inlet valve. Place a container underneath to catch water. Using a radiator key (a small square-shaft tool costing £3-5 from any hardware store), turn the valve counter-clockwise slowly. You’ll hear a hissing sound as air escapes.
Continue turning until water begins to drip from the valve, then immediately stop and close the valve by turning clockwise. Repeat this process for every radiator in your home, starting with the radiator closest to the boiler and working toward the furthest radiator. After bleeding all radiators, check your boiler pressure again. If it falls below 1.0 bar, use the filling loop to restore pressure to 1.2 bar.
Time required: 20-30 minutes for a typical 4-bedroom home
Step 4: Balance your heating system
System balancing ensures that water distributes evenly across all radiators. Begin with your boiler running and all radiators at full heat. Feel each radiator from top to bottom. Radiators should warm evenly.
Identify radiators that are significantly hotter than others. These are receiving too much flow. Using a radiator key, slightly close the lockshield valve on these radiators by turning clockwise a quarter-turn. Wait 5 minutes and reassess. Continue making small adjustments until all radiators feel similarly warm.
For radiators that remain cold at the bottom after balancing, the problem is sludge, not imbalance. Sludge cannot be fixed by valve adjustment, only by power flushing.
Time required: 30-45 minutes
Radiator Bleeding: Why It Often Doesn’t Solve Cold Bottoms
When bleeding works and when it doesn’t
Bleeding removes trapped air from radiators, which improves heat output when air is the problem. A radiator with significant air pockets will feel lukewarm throughout, not hot at the top and cold at the bottom. Bleeding helps if you’ve recently drained your system for maintenance, if you’ve added radiators, or if you notice a hissing sound when the heating runs.
However, bleeding does nothing for sludge. If your radiator is hot at the top and cold at the bottom, a clear distinction between two zones, sludge is blocking water circulation. Bleeding will not remove sludge. If bleeding improves heat output slightly but the bottom remains cold, sludge is definitely present.
Do not bleed radiators more than once per heating season unless you have a specific reason. Repeated bleeding removes corrosion inhibitor from your system, accelerating sludge formation and rust development.
Using a radiator key correctly
A radiator key is a small square-shaft tool that fits the bleed valve on your radiator. Keys cost £2-5 and are available from any DIY store or online retailer. Insert the key fully into the bleed valve and turn counter-clockwise slowly and steadily. Do not force the key; if it doesn’t turn easily, the valve may be stuck or you may have the wrong size key.
As you turn, you’ll hear air hissing out. Continue turning until water begins to drip from the valve. The moment water appears, stop turning and close the valve immediately by turning clockwise.
Power Flushing Central Heating: The Deep Clean Solution
How power flushing removes sludge and corrosion
Power flushing uses a powerful pump to force water through your entire heating system at high velocity. This high-velocity flow dislodges sludge deposits that normal circulation cannot remove. The process flushes sludge out of radiators, pipes, and the boiler, restoring full water circulation.
The procedure takes 4-6 hours. An engineer connects a flushing machine to your system, then circulates water at high pressure through each radiator individually. As sludge dislodges, it’s captured in a filter on the flushing machine. After flushing, the engineer adds fresh corrosion inhibitor to your system. This chemical prevents future magnetite formation by coating internal metal surfaces.
Power flushing restores heat output to radiators that have been cold at the bottom for years. A radiator that previously delivered 40% of its rated heat output will return to 95%+ output after flushing. According to Chartered Institute of Plumbing and Heating Engineers guidance, power flushing is the only effective method for removing sludge from a heating system.
When to call a heating engineer for professional flushing
Call a heating engineer if your radiator has been cold at the bottom for more than 4 weeks, if multiple radiators show the same problem, or if your boiler is making unusual noises (kettling or banging sounds indicate sludge in the boiler).
Apex Gas & Heating Ltd provides power flushing services across Sussex and Surrey with transparent pricing and fast scheduling. Our heating engineers use industry-standard flushing equipment and add professional-grade corrosion inhibitor to protect your system long-term. With our 24/7 emergency call-out service, we can often schedule flushing within 48 hours of your call.
Radiator Balancing: Ensuring Even Heat Distribution
Understanding TRV and manual valve adjustment
Thermostatic radiator valves (TRVs) automatically adjust water flow based on room temperature. The numbered dial (typically 1-5) sets your target temperature: 1 is coolest, 5 is warmest. TRVs should never be installed on the radiator in the room where your main thermostat is located. If the thermostat is in your lounge, that lounge radiator should have a manual valve, not a TRV. Using a TRV on the thermostat radiator creates conflicting signals, causing erratic heating.
Manual valves (lockshield valves) simply restrict flow. These are used on radiators in the same room as your main thermostat, and they’re used to balance flow across your entire system.
How to balance radiators across your home
Start with your heating system running at full capacity. Set all TRVs to 5 (maximum heat) and set your main thermostat to 21°C. Wait 30 minutes for the system to stabilize.
Visit each radiator and feel it from top to bottom. Radiators should feel warm throughout. Note which radiators feel significantly hotter than others; these are receiving too much flow and need balancing.
Start with radiators closest to the boiler. Locate the lockshield valve on the radiator (usually on the right side, with a plastic cap). Using a radiator key, gently turn the valve clockwise by a quarter-turn. This restricts flow slightly. Wait 10 minutes and reassess. Continue making small adjustments on hot radiators until all radiators feel similarly warm.
Once balanced, write down the position of each lockshield valve. These settings should remain unchanged unless you add or remove radiators from your system.
Balancing is easier if you work with a second person, one person adjusts valves while the other feels radiators and reports back. Use a thermometer to measure radiator surface temperature at the top and bottom of each radiator. Balanced radiators should show a temperature difference of no more than 5°C between top and bottom.
DIY vs. Professional Help: When to Call a Plumber
What you can safely fix yourself
You can safely check boiler pressure, test radiator valves for responsiveness, bleed trapped air, and balance your heating system. These tasks require no special tools beyond a £5 radiator key and take 2-3 hours total. If these steps restore heat to your cold radiators, you’ve solved the problem without professional expense.
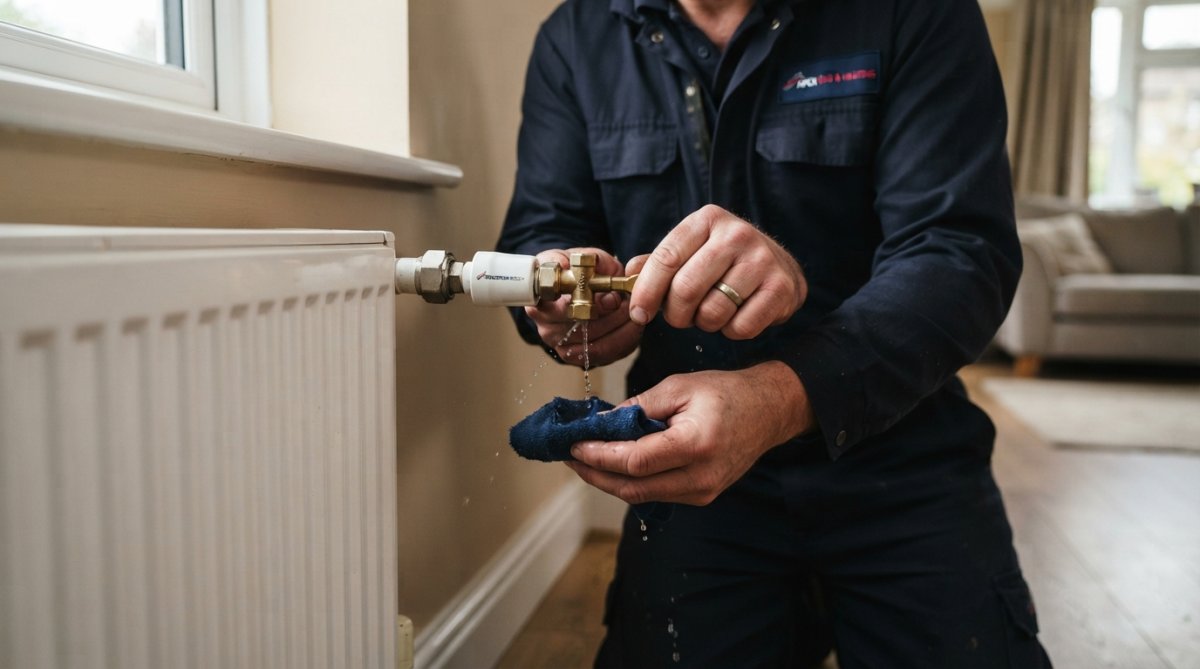
You can also safely replace a radiator valve if one is faulty. Valve replacement requires turning off the heating, draining the radiator, and unbolting the old valve. The process takes 1-2 hours and costs £30-80 for a replacement valve.
Do not attempt to remove a radiator or modify your boiler settings beyond the filling loop. Do not try to flush your system yourself; power flushing requires specialized equipment worth thousands of pounds.
Why professional heating engineers are worth the investment
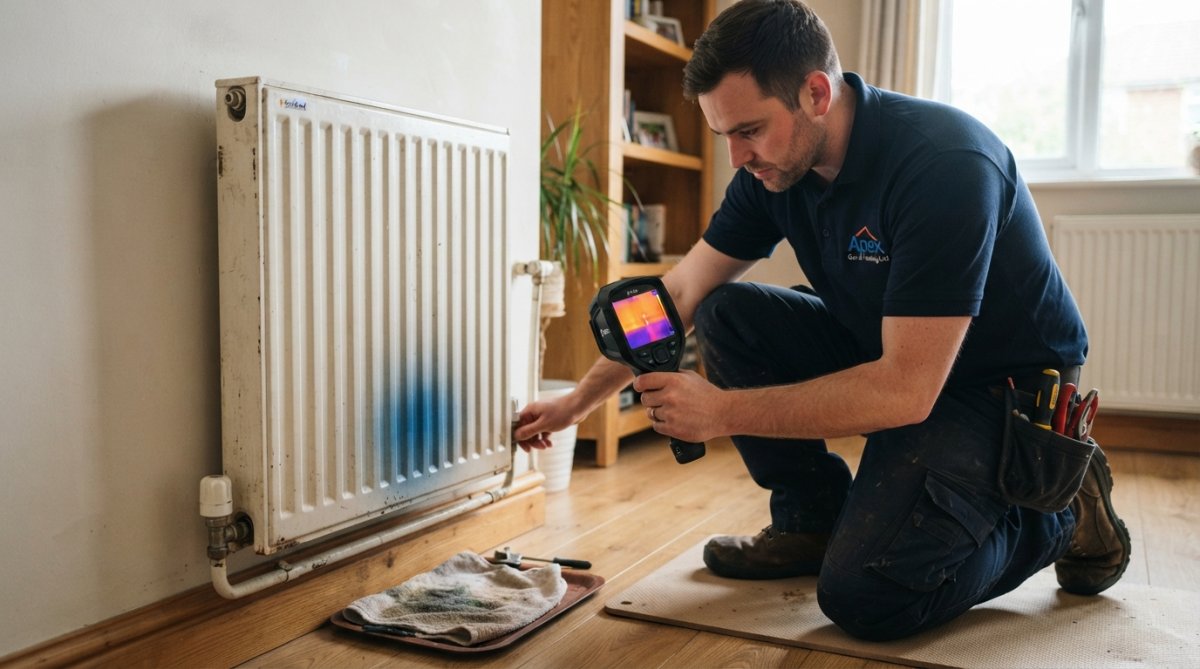
A heating engineer brings diagnostic equipment that identifies problems you cannot see. Thermal imaging cameras reveal temperature distribution across radiators, pinpointing exactly where sludge is blocking flow. More importantly, an engineer can perform work that carries legal responsibility. Power flushing must be done correctly; improper flushing can damage your boiler or introduce air into the system.
At Apex Gas & Heating Ltd, our heating engineers are approved installers for Glowworm and Worcester boilers, meaning they can service and repair these systems without voiding your warranty. We provide transparent quotes before work begins, full public liability insurance, and fast response times, often within 24 hours of your call.
Cost Breakdown: Fixing Cold Radiators Without Breaking the Bank
Fixing a cold radiator costs between £0 (if DIY troubleshooting solves it) and £500-800 (if power flushing is required).
DIY troubleshooting: £5-20
Radiator key and possibly a replacement valve if needed. Time investment: 2-3 hours.
Professional radiator valve replacement: £80-150
Includes labour and parts for a single valve.
Power flushing: £400-800
Typical cost for a 4-5 bedroom house. Smaller properties may cost £300-400; larger properties may reach £800-1000.
Boiler repair: £150-400
If your boiler is faulty, repairs typically cost £150-300. If the boiler requires replacement, expect £1500-3000 for a new unit plus installation.
If you’re comfortable checking pressure, testing valves, and bleeding radiators, you’ll spend 2-3 hours and £5-20. If these steps work, you’ve saved £200-400 in professional labour. However, if DIY troubleshooting doesn’t solve the problem, calling a professional immediately is more cost-effective than trying repeatedly.
Cold radiators at the bottom are frustrating, but they’re rarely expensive to fix. Most problems stem from sludge or valve issues that professional heating engineers can diagnose and resolve within a day. If your DIY troubleshooting hasn’t solved the problem after 2-3 hours of effort, contact Apex Gas & Heating Ltd for a professional assessment. Our heating engineers will identify the exact cause, provide a transparent quote, and restore your radiators to full heat output. With our fast response times and approved installer status, you’ll have your heating working properly again quickly.
Frequently Asked Questions
Why is my radiator hot at the top but cold at the bottom?
A radiator cold at the bottom typically indicates sludge, magnetite, or rust deposits blocking water flow in the lower channels. This prevents hot water from circulating fully through the radiator. Less commonly, it's caused by a faulty valve, trapped air, or an unbalanced heating system. The most effective solution depends on the root cause, sludge requires power flushing, while valve issues need inspection and replacement. A heating engineer can diagnose which problem you're facing.
Will bleeding my radiator fix a cold bottom?
Bleeding removes trapped air, which can help if your radiator is completely cold or has cold spots at the top. However, if only the bottom is cold, bleeding often won't help because the problem is usually sludge build-up or a faulty valve, not air. Sludge requires power flushing central heating to remove debris and restore full water circulation. Always check your boiler pressure and radiator valves before assuming bleeding will solve it.
What causes central heating sludge and how do I remove it?
Central heating sludge forms from rust, magnetite (iron oxide), limescale, and debris that accumulate inside pipes and radiators over time. Corrosion from old water and sediment naturally build up, especially in systems over 10 years old. To remove sludge, power flushing is the most effective solution, a heating engineer uses high-velocity water and chemicals to dislodge and flush out deposits. Installing a magnetic filter on the return pipe also helps trap future sludge and protect your boiler.
Should I call a plumber or heating engineer for a cold radiator bottom?
For simple checks, boiler pressure, valve testing, bleeding, you can handle these yourself with basic tools. However, if sludge is suspected or your radiator remains cold after these steps, call a qualified heating engineer. Power flushing requires specialist equipment and expertise. A professional can also diagnose system imbalance and perform radiator balancing safely. Apex Gas & Heating Ltd offers 24/7 emergency call-outs and approved Glowworm and Worcester installer expertise for fast, reliable diagnosis and repair across Sussex and Surrey.
Leave a Reply