






Rated Excellent Rating Gas Safe Registered BPEC Certified 25 Years’ Experience 2 Year Guarantee Card Payments AcceptedApple Pay, Mastercard, Visa, Amex, Google Pay Worcester BoschVaillantBaxiGlow-wormAccredited

Category: Plumbing

  • Emergency Drainage Solutions for Homes: A 2026 Guide

    Emergency Drainage Solutions for Homes: A 2026 Guide

    Table of Contents

    Last Updated: August 5, 2026

    Signs You Have a Drainage Emergency

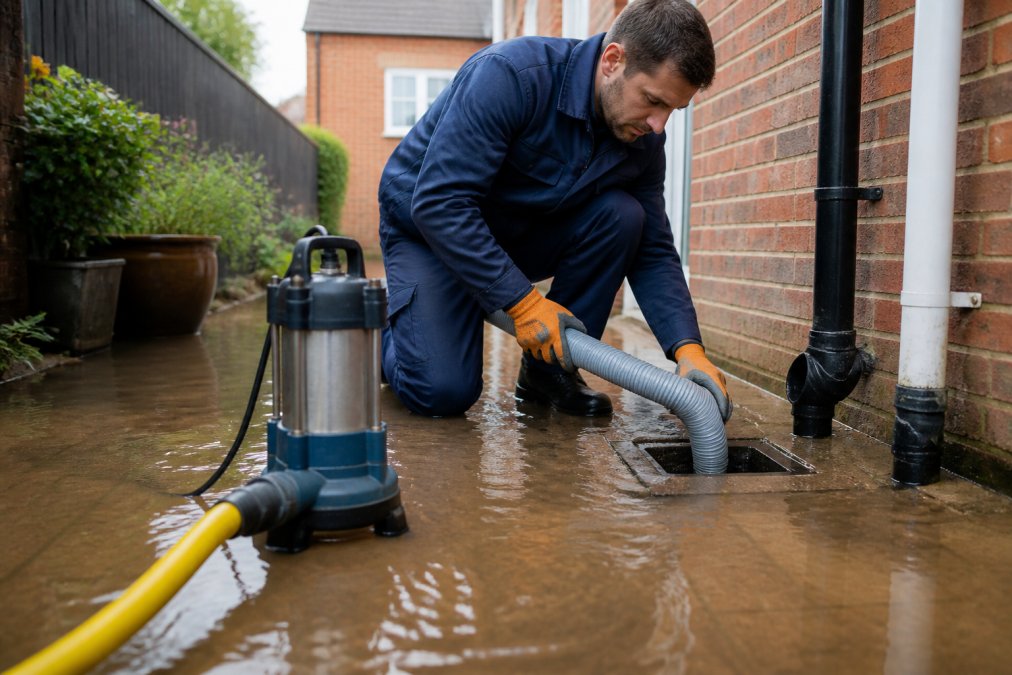
    A drainage emergency isn’t always obvious until water backs up into your home or foul smells become impossible to ignore. If water is pooling around your property, sewage is surfacing in your garden, or multiple drains are failing simultaneously, you’re facing an emergency that demands immediate action.

    Common warning signs include overflowing toilets that won’t stop, persistent foul-smelling drains, water damage on ceilings or walls below ground level, and gurgling sounds from pipes when appliances drain. These indicate your drainage system’s integrity is compromised. Heavy rainfall can overwhelm aging systems, tree roots actively grow in autumn and spring, and frozen ground in winter can crack drainage lines.
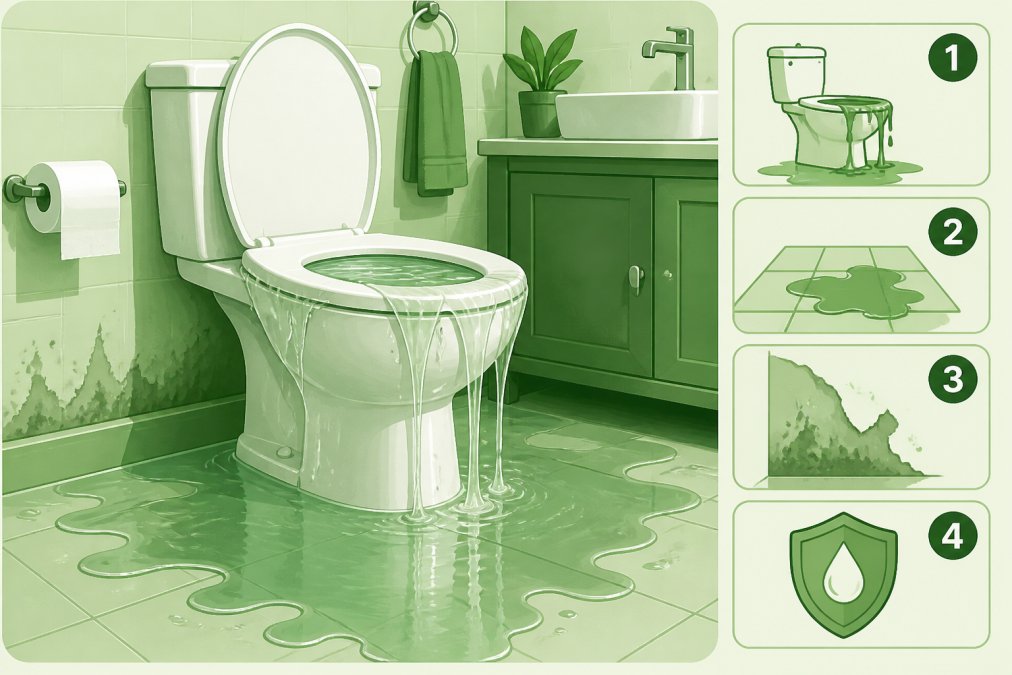
    Close-up of an overflowing toilet with water pooling across a bathroom floor, showing visible water damage and wet tiles, captured under bright bathroom lighting
    Close-up of an overflowing toilet with water pooling across a bathroom floor, showing visible water damage and wet tiles, captured under bright bathroom lighting
    Watch Out
    Sewage backup poses serious health risks. If you see raw sewage emerging anywhere on your property, do not attempt DIY solutions. Contact a professional immediately to avoid contamination and potential structural damage to your home.

    How to Unblock a Drain Quickly: Immediate DIY Steps

    When facing a drainage emergency, the first 30 minutes matter. Most common household blockages can be temporarily cleared using methods you likely have at home. These approaches work best for localized blockages in sinks, baths, and toilets, not for deep sewer line issues.

    Step 1: Use a Plunger

    Start with the simplest tool first. A manual plunger creates suction that can dislodge blockages near the drain opening. Fill the sink or bath with enough water to cover the plunger cup completely, then position it directly over the drain hole. Push down firmly and pull up sharply in rapid succession, maintaining the seal. Repeat 15-20 times without breaking contact.

    For toilet blockages, use a specialized toilet plunger (flange-type design). The same rapid plunging motion applies, though be cautious not to splash contaminated water around the bathroom.

    Pro Tip
    Fill the sink completely with water before plunging. Partial water coverage reduces suction effectiveness. The fuller the basin, the more pressure you can generate with each plunge.

    Step 2: Try Chemical Unblockers

    If plunging doesn’t work, chemical drain unblockers can dissolve organic matter. Products like Mr Muscle Power Gel work on grease, hair, and soap residue. Pour the gel directly down the drain and let it sit for the recommended time, typically 5-20 minutes. Always follow product instructions carefully and never mix different chemical unblockers. Wear gloves and avoid skin contact. After the chemical has worked, flush the drain with plenty of hot water.

    Chemical unblockers work best on blockages within the first meter or two of the drain. They’re ineffective against deep blockages, tree root intrusion, or structural pipe damage.

    Step 3: Use Drain Rods for External Drains

    For external drainage systems, drain rods provide physical reach that plungers and chemicals cannot achieve. A set like the WORKPRO 12 Piece Drain Rod Set includes flexible rods that screw together, extending up to 9 metres, plus specialized attachments.

    Locate your external drain access point, usually a gully or inspection chamber in your garden. Unscrew the cover carefully and assess what you’re dealing with. Screw the rods together one section at a time, attaching the appropriate head (rubber plunger for soft blockages, claw for stubborn debris). Insert the rods into the drain and push firmly but steadily, adding rod sections as you progress deeper.

    Watch Out
    Never force drain rods past resistance. If you hit a solid obstruction that won’t move, stop immediately. Forcing rods can damage pipes from the inside, creating cracks that lead to more expensive repairs.

    Blocked Drain Emergency Cost: What You’ll Pay

    Professional emergency drainage services typically charge call-out fees ranging from £75 to £180 just to attend your property. A straightforward drain unblocking might cost £135-£250 total, while more serious issues like burst pipes or sewage backup can reach £300-£500 or beyond.

    Out-of-hours calls attract premium rates. What costs £120 during business hours might cost £180 after 6pm. Emergency calls at midnight can double or triple standard pricing.

    DIY tools cost significantly less: chemical unblockers cost £2.25 to £7.75 per bottle, a plunger costs £10-£20, and drain rod sets cost £40-£73.95. These might resolve your problem for under £25, but they won’t work for every situation.

    High-pressure drain jetting, the professional solution for stubborn blockages, costs £120-£250 for single drain runs or £250-£400 for full property system jetting. This method uses water jets at 2,000-4,000 PSI to blast through blockages and clean pipe walls completely.

    Key Takeaway
    Emergency call-out fees (£75-£180) apply regardless of problem complexity. This fixed cost makes professional help more attractive for serious issues where DIY methods have already failed.

    Types of Drainage Emergencies and Professional Solutions

    Not all drainage emergencies look the same or require the same response. Understanding what you’re facing helps you communicate effectively with professionals and understand why certain solutions cost more.
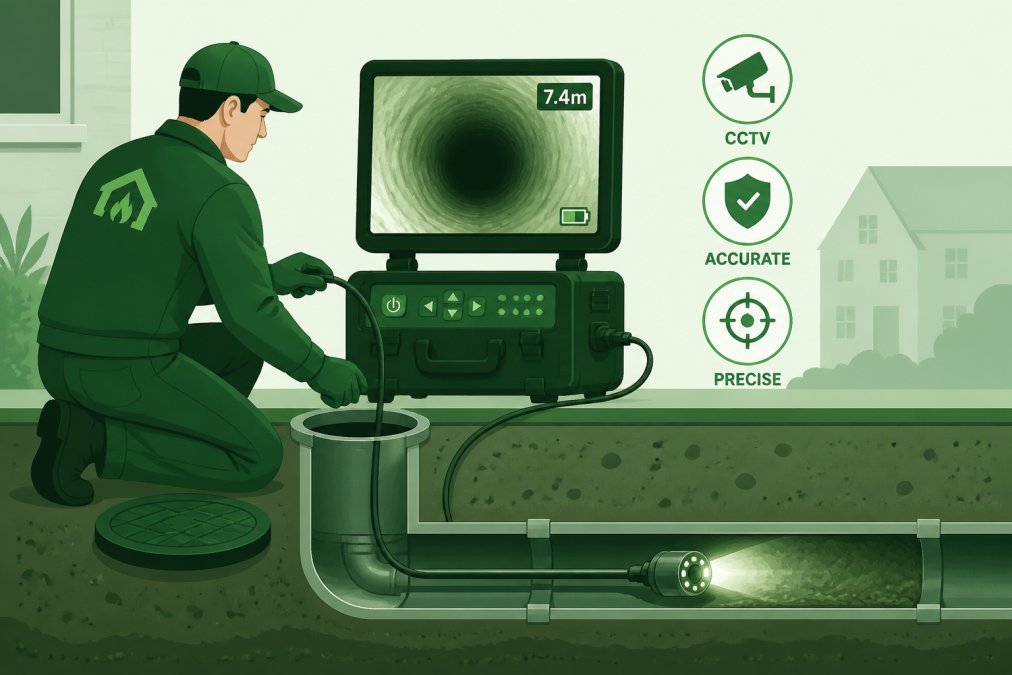
    Professional plumber using CCTV drain survey equipment to inspect underground pipes, with a monitor displaying the camera feed showing the interior of a drainage pipe
    Professional plumber using CCTV drain survey equipment to inspect underground pipes, with a monitor displaying the camera feed showing the interior of a drainage pipe

    Severe Blockages Requiring Hydro-Jetting

    Severe blockages that resist plungers and chemical unblockers need professional intervention. Hydro-jetting uses pressurized water, typically 2,000-4,000 PSI, to blast through the obstruction and scour the pipe walls clean. This method works exceptionally well for recurring blockages because it removes the entire buildup layer. A single drain run costs £120-£250, while treating your full property drainage system runs £250-£400. Professional drainage contractors include CCTV drain surveys beforehand to identify exactly where the blockage sits and ensure the hydro-jetting targets the right location safely.

    Burst Pipes and Structural Damage

    Burst pipes represent a more serious drainage emergency. Water pressure, ground movement, tree root intrusion, or age-related deterioration can cause pipes to crack or collapse. Signs include water pooling in your garden even when it hasn’t rained, unusually lush patches of grass over drainage lines, or sewage surfacing.

    Modern no-dig repair solutions like PipeAid Patch Repair Kits offer permanent fixes without excavation. These resin and fibreglass kits cure in the presence of water and bond to virtually all pipe materials, creating a watertight seal. For localized damage, no-dig repairs cost significantly less than full excavation and replacement.

    Sewage Backup and Wastewater Issues

    Sewage backing up into your home or garden is the most serious drainage emergency. This indicates complete or near-complete blockage of your main sewer line. Professional emergency drainage services respond with priority, using CCTV surveys to identify whether the blockage is in your private drainage system (your responsibility) or in the public sewer (the water company’s responsibility). Root ingress often causes wastewater backup and requires professional removal followed by preventative treatment to stop regrowth.

    Ask us about a plumbing job →

    Watch Out
    Never attempt to clear a sewage backup yourself. The health risks from raw sewage exposure are severe. Professional teams have proper protective equipment and know how to safely clear these blockages without contaminating your property further.

    Drainage Insurance Cover UK: What’s Protected

    Understanding what your home insurance covers regarding drainage emergencies prevents nasty surprises when you need to claim. Most standard home insurance policies include some drainage cover, but specifics vary significantly between providers.

    Accidental damage cover typically includes drainage system failures caused by sudden, unexpected events like a tree root breaking through a pipe. Gradual deterioration and blockages caused by normal wear aren’t covered. Some insurers offer optional drainage cover as an add-on, which might include planned maintenance, preventative jetting, and blockage removal regardless of cause. Annual premiums for this add-on typically range from £20-£50.

    Check your specific policy documents carefully. Coverage limits vary, some policies cap drainage claims at £500, others at £2,000 or more. Excess amounts typically range from £100-£250. When you need to claim, document everything with photos and receipts, and report the incident to your insurer promptly.

    Sewerage Responsibility: UK Water Companies and Homeowner Duties

    The UK’s drainage system divides responsibility between private property owners and water companies. Your private drainage system, the pipes running from your property to the public sewer connection point, is entirely your responsibility. The public sewer system, everything beyond your connection point, belongs to your water company.

    When you contact a professional drainage service about a blockage, they’ll perform a CCTV survey to identify the exact location. If the problem is in the public system, they’ll contact your water company to arrange repairs at no cost to you. Regular maintenance of your private system prevents emergencies. Avoid flushing non-biodegradable items, dispose of cooking grease properly, and consider preventative jetting every 2-3 years if your property has a history of blockages.

    24/7 Emergency Response and Rapid Repair Services

    When drainage emergencies strike at midnight on a Sunday, you need professionals available immediately. UK emergency drainage services operate round-the-clock specifically for situations where waiting until Monday morning means property damage and health risks.

    Apex Gas & Heating Ltd provides 24/7 emergency call-out service across Sussex and Surrey, responding to drainage emergencies with rapid response times. Professional emergency services bring equipment and expertise you can’t replicate with DIY tools. CCTV drain surveys pinpoint blockage locations precisely, high-pressure jetting equipment clears stubborn obstructions, and experienced technicians diagnose whether problems are in your system or the public sewer.

    When you call an emergency drainage service, expect to provide basic information: what’s happening, where you’re located, and whether you’ve already attempted any solutions. Most services can dispatch a technician within 1-2 hours during peak times.

    Pro Tip
    Save your local emergency drainage service’s number before you need it. During an actual emergency, you won’t want to spend 20 minutes searching for a reputable provider. Having the number ready means you can call immediately when problems start.

    Preventing Future Drainage Emergencies

    The best drainage emergency is one that never happens. Prevention costs far less than emergency repairs and saves you the stress of dealing with water damage and sewage backup.

    Understand what you can safely flush and what belongs in the bin. "Flushable" wipes aren’t actually flushable and accumulate in your system. Cooking grease is a major culprit; pour it into a container and dispose of it in the bin, never down the drain.

    Regular maintenance prevents most emergencies. Annual drain inspection using CCTV identifies problems before they become critical. Preventative jetting every 2-3 years removes buildup before blockages form. This proactive approach costs £100-£200 annually but prevents emergency call-outs costing £300-£500 or more.

    Prevention Method Cost Frequency Benefit
    Annual CCTV inspection £80-£150 Once yearly Identifies problems early
    Preventative jetting £120-£250 Every 2-3 years Removes buildup before blockages form
    Root barrier treatment £150-£300 Once, then monitor Prevents tree root intrusion
    Drain guards and screens £5-£20 Install once Catches hair and debris
    Grease disposal care Free Every drain use Prevents grease accumulation

    Apex Gas & Heating Ltd helps Sussex and Surrey homeowners maintain their drainage systems through regular inspections and preventative maintenance. Their 24/7 emergency service ensures that if problems do occur despite prevention efforts, professional help is always available.


    Drainage emergencies disrupt your home, damage your property, and create urgent financial pressure. The difference between a minor inconvenience and a catastrophic failure often comes down to how quickly you respond. Apex Gas & Heating Ltd delivers professional emergency drainage solutions across Sussex and Surrey with rapid response times, transparent pricing, and full public liability insurance backing every job. When you need immediate help unblocking drains, clearing sewage backup, or diagnosing complex drainage failures, their approved technicians provide the expertise and equipment that DIY methods simply can’t match. Get a quote from Apex Gas & Heating Ltd today and have their emergency contact details saved for peace of mind.

    Frequently Asked Questions

    How do I know if my drain blockage is an emergency?

    A drain blockage becomes an emergency when water backs up into your home, sewage odours are strong, multiple drains are affected simultaneously, or you notice structural damage around pipes. Overflowing toilets, foul-smelling drains, and water pooling in your garden are also warning signs. If raw sewage is involved or water damage is occurring, contact a professional immediately rather than attempting DIY solutions.

    Who is responsible for drain repairs: the homeowner or the water company?

    In the UK, water companies are responsible for public sewers and the pipe connecting your property to the public network (the public lateral drain). Homeowners are responsible for private drains serving only their property and the section from their property boundary to the public sewer. You can contact your water company to confirm responsibility, but typically anything within your property boundary is your responsibility. Emergency drainage solutions for homes often require professional diagnosis to determine who is liable for repairs.

    Are outside drains covered by house insurance in the UK?

    Drainage insurance cover UK varies by policy. Standard buildings insurance typically covers sudden, accidental damage to drains, but not gradual wear, tree root damage, or blockages from neglect. Some policies exclude external drains entirely. Check your policy wording or contact your insurer before an emergency occurs. Accidental damage cover may extend protection, but preventative maintenance is not usually covered. Professional emergency drainage solutions may be partially reimbursable if the damage qualifies as accidental.

    What is the cheapest way to unblock a drain quickly?

    The cheapest immediate solution is to use a manual plunger (around £10-20) or a chemical unblocker like Mr Muscle or Sainsbury's Sink Unblocker (£2.25-5.00), which work within minutes to hours. Drain rods cost £40-75 for a full set and are effective for external drains. These DIY methods suit minor blockages caused by hair or grease. For stubborn blockages, professional hydro-jetting (£120-400) or emergency drainage services (£75-180 call-out fee) are necessary but significantly more expensive.
  • Emergency Plumbing Call Out in Redhill: 24/7 Response

    Emergency Plumbing Call Out in Redhill: 24/7 Response

    Table of Contents

    Last Updated: August 3, 2026

    When a pipe bursts at midnight or your toilet overflows without warning, you need immediate help. An emergency plumbing call out in Redhill can mean the difference between a contained problem and catastrophic water damage to your home. At Apex Gas & Heating Ltd, we understand that plumbing emergencies don’t follow business hours, which is why our team responds 24/7 to keep your property safe and dry.

    This guide covers what counts as a genuine plumbing emergency, how to stabilise the situation yourself, and exactly what to expect when you call for professional help.

    What Counts as a Plumbing Emergency in Redhill

    Not every plumbing issue requires an emergency call-out charge. A true plumbing emergency is any situation where water damage is happening right now, or will happen within hours if left unaddressed. This includes burst pipes flooding your kitchen, a boiler breakdown in winter, or a blocked toilet overflowing onto your bathroom floor.

    Burst pipes and water leaks

    Burst pipes are the most urgent plumbing emergency. Water escapes at high pressure, soaking through walls, ceilings, and foundations within minutes. A single burst pipe can release hundreds of litres of water per hour, causing structural damage, mould growth, and electrical hazards.

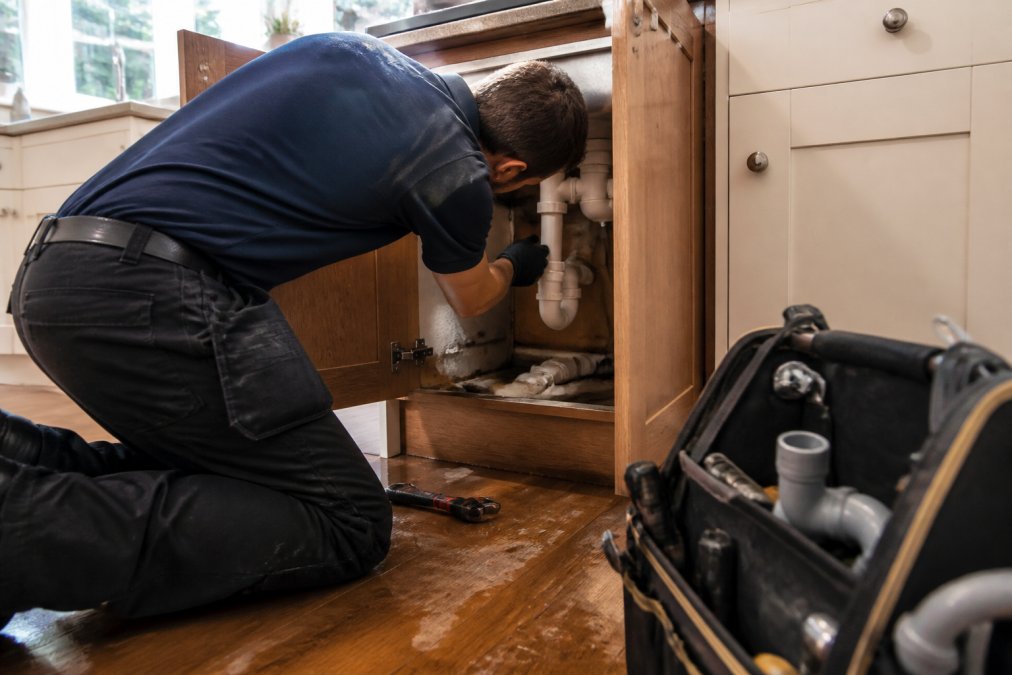
    Visible water spraying from a pipe, pooling beneath your sink, or cascading through a ceiling light fitting all signal a burst. Act immediately: shut off your mains water supply, then call for an emergency plumbing call out in Redhill. While you wait, place buckets under the leak and move valuables away from the water source.

    Slow leaks under sinks or around radiators may not require emergency response. A leak that drips once per second wastes over 3,000 litres annually and promotes hidden mould. Schedule a standard appointment within 48 hours to prevent it from worsening.

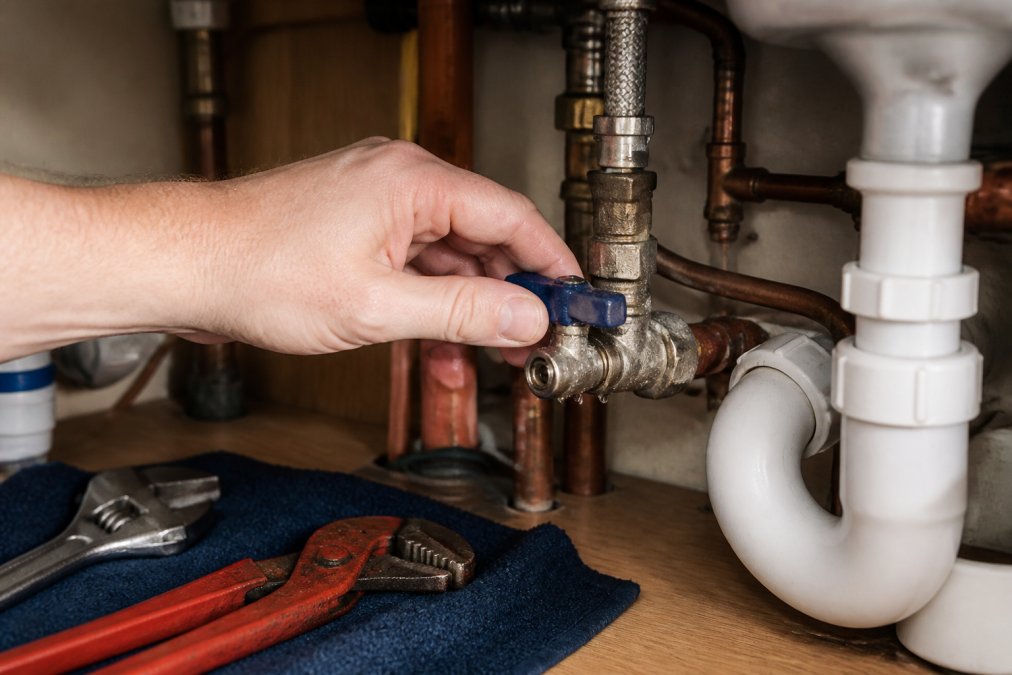
    Close-up of a homeowner's hand turning a water shut-off valve beneath a kitchen sink, with copper pipes visible in the background and water droplets on the valve handle
    Close-up of a homeowner's hand turning a water shut-off valve beneath a kitchen sink, with copper pipes visible in the background and water droplets on the valve handle

    Blocked toilets and drains

    A blocked toilet that won’t flush is inconvenient but not always an emergency, unless it’s overflowing sewage onto your bathroom floor. Overflow signals a serious blockage deep in your drainage system, possibly in the main sewer line, creating a health hazard that requires professional drain unblocking equipment.

    If multiple drains are blocked simultaneously (kitchen, bathroom, toilet), your main drain line is likely obstructed. This demands urgent attention because water will continue backing up into your home. Gurgling sounds from drains, sewage odours, or water pooling in your garden are all signs of drainage problems needing professional assessment.

    Boiler breakdowns and heating failures

    A boiler breakdown during winter is a genuine emergency. Without heating, your home temperature can drop below 10°C within hours, creating health risks for children, elderly people, and anyone with respiratory conditions. Frozen pipes are also likely, which will burst when temperatures rise.

    If your boiler stops producing hot water or heating, check that the pilot light is lit and the thermostat is set correctly. If those are fine, call for emergency assistance. A boiler that’s leaking water, making loud banging noises, or displaying a fault code requires professional diagnosis.

    Apex Gas & Heating Ltd provides 24/7 emergency boiler breakdown support across Redhill. Our Gas Safe registered engineers can diagnose and often repair boiler faults on the same day, restoring your heating before temperatures drop further.

    Immediate DIY Triage: How to Shut Off Water Supply in an Emergency

    The first action in any water emergency is to stop the water flowing. This single step can reduce damage from a burst pipe by 80% or more, buying you time to call for professional help.

    Locating your mains water shut-off valve

    Your mains water shut-off valve is typically located where the water company’s pipe enters your property. In most UK homes, this is under the kitchen sink, in the hallway, or in the downstairs toilet. Look for a small stopcock, a tap with a small flat head (not a round handle).

    If you can’t find it under the kitchen sink, check along the external wall where the water pipe enters your home. Some properties have the stopcock in a small inspection chamber buried in the garden or driveway. Find it now while there’s no emergency and mark its location clearly.

    Steps to isolate the water supply

    When a burst pipe or major leak occurs, act fast:

    1. Turn off the mains stopcock by turning the flat head clockwise. It should stop after a quarter turn.
    2. Open a tap upstairs to release pressure from the pipes and confirm the water has stopped.
    3. Open a downstairs tap to drain water still in the pipes, directing it into a bucket.
    4. Leave taps open so air can enter the pipes as they empty.
    5. Call for an emergency plumbing call out in Redhill immediately.

    If your stopcock is stiff or won’t turn, don’t force it. Call the emergency plumber and explain the situation. For a burst pipe in an upstairs room, you can also isolate just that section by closing the isolation valve under the affected sink or radiator, if one exists.

    Why Response Time Matters in an Emergency Plumbing Call Out

    Every minute counts when water is actively flooding your home. A response time of one hour versus four hours can mean the difference between minor repairs and structural damage requiring thousands of pounds in restoration.

    Fast response times reduce water damage exponentially. In the first hour, a burst pipe releases roughly 100-200 litres. By hour four, you’re looking at 400-800 litres soaking into walls, floorboards, and insulation. Water damage compounds: it promotes mould growth, weakens structural timber, and creates electrical hazards.

    Professional emergency plumbers in Redhill understand this urgency. Apex Gas & Heating Ltd dispatches engineers from our local team. Our engineers carry stock parts for common emergencies, burst pipes, leaking taps, broken radiator valves, so repairs often happen on the first visit.

    When choosing an emergency plumber, ask directly: "What’s your average response time?" A reputable service provider will guarantee a response within one hour for genuine emergencies in the Redhill area.

    Understanding Emergency Plumber Cost UK and Pricing Transparency

    Emergency call-out charges exist because your plumber is on standby outside normal hours, ready to respond to your crisis. Understanding what you’re paying for helps you avoid shock invoices.

    Call-out charges and fixed pricing

    A typical emergency call-out charge covers the engineer’s time to attend your property, diagnose the problem, and provide a quote for repairs. Transparent pricing is non-negotiable. Before work begins, a professional plumber should provide a fixed price for the repair, not an hourly rate that leaves you guessing at the final bill.

    Apex Gas & Heating Ltd offers transparent pricing. You’ll know what you’re paying before the engineer arrives, with no hidden fees or surprise invoices.

    See our plumbing services →

    Factors that affect your final bill

    The total cost of an emergency plumbing repair depends on several factors:

    • Parts required: A simple tap washer costs £5. A new boiler heat exchanger costs £400-600.
    • Complexity of diagnosis: A burst pipe under the sink is straightforward. A burst pipe inside a wall requires finding the exact location, which takes longer.
    • Time of call: Calls between 9am-5pm weekdays are cheaper than midnight calls.
    • Distance from base: Redhill is within our service area, so response times and costs are standard.
    • Repeat visits: If a problem requires multiple visits, each visit incurs a separate call-out charge.

    Ask your plumber to break down costs clearly: call-out charge, parts, labour, and any additional fees.

    Finding a Gas Safe Registered Plumber in Redhill

    Not all plumbers are qualified to work on boilers or gas appliances. A Gas Safe registered engineer has passed rigorous safety exams and is legally permitted to work on gas systems. Hiring an unregistered engineer puts your home and family at serious risk.

    What Gas Safe registration means

    Gas Safe registration is the UK’s official register of engineers qualified to work on gas appliances. Only a Gas Safe registered engineer can legally install, repair, or service boilers, gas cookers, gas fires, and other gas equipment. Gas Safe engineers must pass annual exams to maintain their registration and carry public liability insurance, which protects you if something goes wrong.

    When an engineer arrives at your home, they should carry a Gas Safe ID card displaying their registration number, photo, and the categories of work they’re qualified to perform.

    How to verify credentials before booking

    Before booking an emergency plumber, verify their Gas Safe status:

    1. Ask for their Gas Safe registration number.
    2. Visit the official Gas Safe Register at Gas Safe Register official verification tool and search their number.
    3. Confirm the registration is current and covers the type of work you need.
    4. Check their public liability insurance is active.

    Apex Gas & Heating Ltd is a Gas Safe registered company with all engineers fully qualified and insured. Our registration details are publicly verifiable, and every engineer carries their Gas Safe ID card. We also hold Worcester and Glowworm approved installer status, which means our work on those boiler brands is warrantied by the manufacturer.

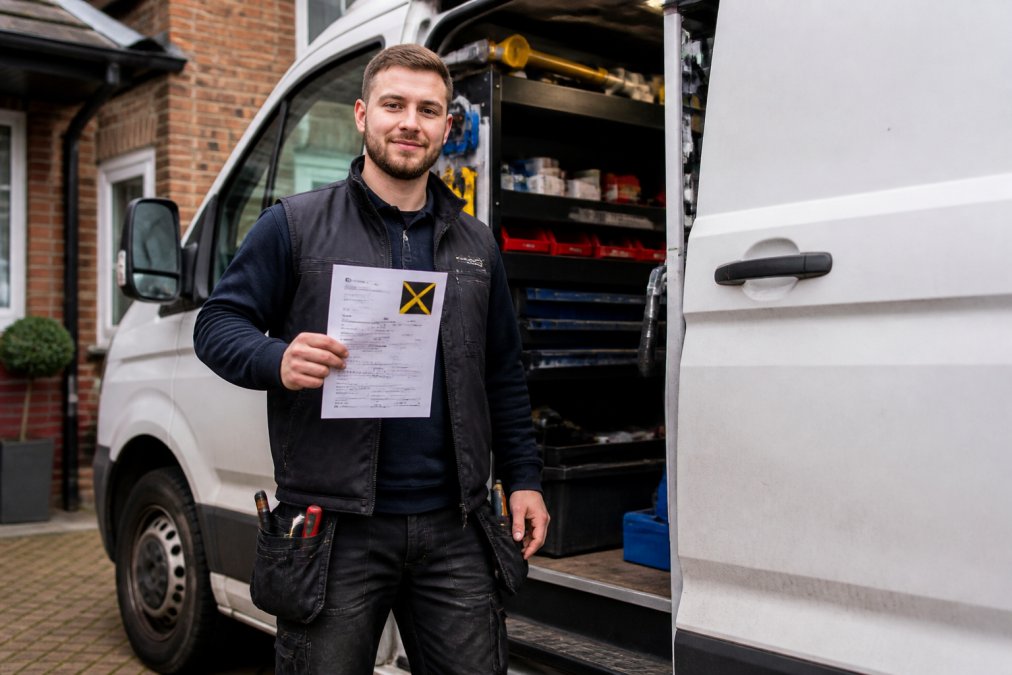
    A qualified plumber in dark uniform holding a Gas Safe registration certificate in one hand while standing next to a white service van, with professional tools visible in the background
    A qualified plumber in dark uniform holding a Gas Safe registration certificate in one hand while standing next to a white service van, with professional tools visible in the background

    Checklist for Hiring an Emergency Plumber: What to Look For

    When you’re in a plumbing crisis, taking 60 seconds to verify a few key details protects you from cowboys and ensures you get professional work.

    Workmanship guarantees and insurance

    A reputable emergency plumber guarantees their work. If a repair fails within a set period (typically 12 months), they’ll fix it for free. Public liability insurance protects you if the engineer damages your property during the repair.

    Many plumbers also offer extended warranties on parts. A new boiler might come with a 10-year manufacturer warranty, but only if installed by an approved installer. Apex Gas & Heating Ltd’s Worcester and Glowworm approved status means boiler installations carry the full manufacturer warranty.

    Service coverage in the RH1 postcode area

    Check that your emergency plumber actually covers your postcode. Some services claim 24/7 availability but have a 50-mile radius restriction that excludes Redhill.

    Apex Gas & Heating Ltd operates across Sussex and Surrey with local engineers based near Redhill. Our RH1 postcode area is core to our service territory, which means faster response times and lower travel costs than distant competitors.

    Aspect What to Check Red Flag
    Gas Safe Registration Verify on official register No ID card or unverifiable number
    Response Time Guarantee Specific timeframe (e.g., 1 hour) "We’ll try to get there soon"
    Public Liability Insurance Proof of current cover "It’s somewhere around here"
    Workmanship Guarantee 12 months minimum No guarantee offered
    Service Area Covers your postcode Vague about coverage
    Pricing Fixed price before work Hourly rate with no estimate

    How to Book an Emergency Plumbing Call Out: Your Next Steps

    When a plumbing emergency strikes, knowing exactly what to do removes panic and gets help faster.

    First, shut off your mains water and contain the damage. Move valuables away from water, place buckets under leaks, and open windows to reduce humidity and prevent mould.

    Next, call your emergency plumber. Have ready: your postcode, a description of the problem, and the location of the affected area. This information helps the engineer prepare for what they’ll find.

    When Apex Gas & Heating Ltd receives your emergency plumbing call out in Redhill, we dispatch an engineer from our local team. We confirm your postcode is in our service area, provide a call-out charge, and give you an estimated arrival time. Our engineers carry stock parts for common emergencies, so many repairs are completed on the first visit.

    During the repair, the engineer explains what went wrong and what they’re doing to fix it. You receive an itemised invoice showing call-out charge, parts, labour, and any additional costs. After the repair, ask the engineer to show you what was fixed and explain how to prevent it happening again.


    Plumbing emergencies are stressful, but they’re manageable if you know what to do. Shutting off your water supply immediately, calling a qualified plumber quickly, and choosing a service provider with transparent pricing and strong credentials protects your home and your wallet. Apex Gas & Heating Ltd provides 24/7 emergency plumbing call out in Redhill with Gas Safe registered engineers, transparent pricing, and rapid response times. When your pipes burst or your boiler fails, you need a team you can trust. Get a quote today and have our number saved for when you need it most.

    Frequently Asked Questions

    How quickly can an emergency plumber reach me in Redhill?

    Response times vary based on current demand and your exact location within the RH1 postcode area. Many emergency plumbers aim for same-day attendance during business hours, with some offering out-of-hours call-outs for genuine emergencies. Always confirm expected arrival time when you book. Fast response times are critical when water is actively leaking or your heating has failed, as delays can lead to significant water damage or safety risks.

    What should I do before calling an emergency plumber about a burst pipe?

    First, shut off your mains water supply immediately at the stop tap, usually located under the kitchen sink or where the water enters your property. Turn off the water at the meter if you cannot find the stop tap. Then, open all your taps to drain remaining water from the pipes. Mop up standing water to prevent damage. Document the damage with photos for your insurance claim. Only then call your emergency plumber with details of the burst location and what you have already done.

    How do I verify a Gas Safe registered plumber in Redhill?

    Ask for their Gas Safe registration number and check it directly on the official Gas Safe Register website. All engineers working on gas appliances, boilers, and heating systems must hold current Gas Safe registration. Do not proceed with any gas work from an unregistered engineer, as this is illegal and dangerous. Reputable plumbers will provide proof of registration without hesitation and carry a valid Gas Safe ID card.

    What factors affect the cost of an emergency plumbing call out?

    Emergency plumber cost UK depends on several factors: the call-out charge itself, the time of day (out-of-hours work typically costs more), the complexity of the repair, parts needed, and your location within Redhill. Some plumbers charge fixed prices for common emergencies like unblocking drains, while others charge hourly rates plus materials. Always ask for a transparent quote before work begins. Check whether your homeowner's insurance covers emergency plumbing costs, as some policies do.

  • How to Fix a Leaking Kitchen Tap: Step-by-Step Guide

    How to Fix a Leaking Kitchen Tap: Step-by-Step Guide

    Table of Contents

    Last Updated: August 2, 2026

    Most kitchen tap leaks stem from worn internal components that are straightforward to replace with basic tools and patience. At Apex Gas & Heating Ltd, we’ve guided countless customers through this repair, and understanding your tap type before you start makes the entire process significantly faster and less frustrating.

    A leaking kitchen tap wastes thousands of litres of water annually and drives up utility bills. The good news is that fixing a leaking kitchen tap doesn’t require specialist qualifications, most repairs take between 30 and 90 minutes once you’ve gathered the right tools and identified which components need replacing.

    Identify Your Tap Type Before You Start

    Before you purchase replacement parts, you need to know what kind of tap you’re working with. The three main categories, monobloc, traditional two-handle, and cartridge-based systems, require different approaches and use different internal components.

    Monobloc vs. Traditional Taps: Visual Identification

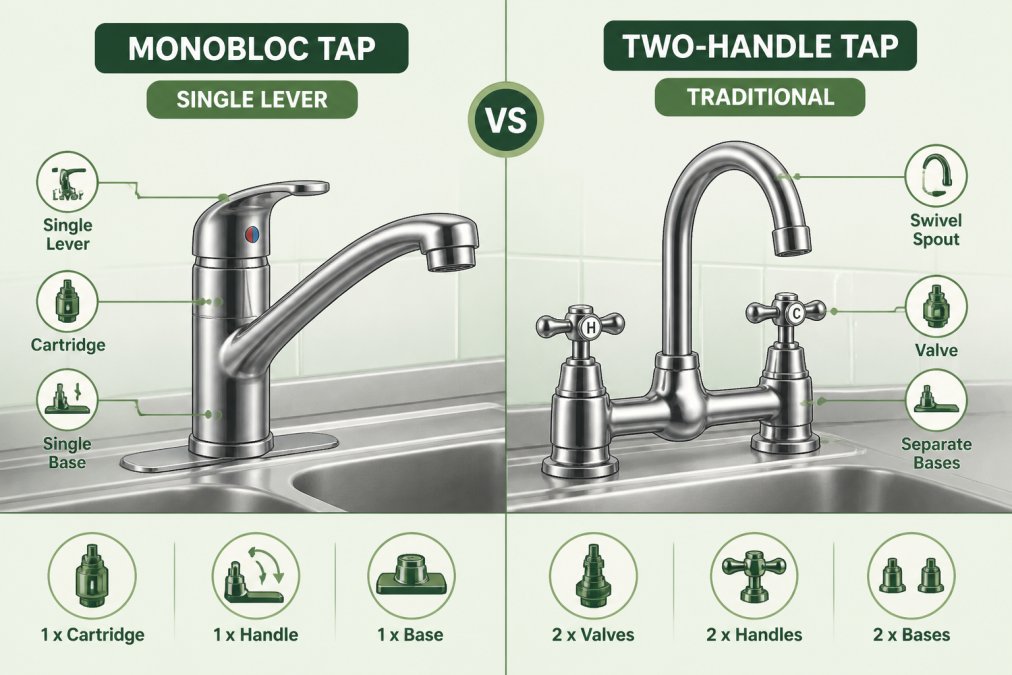
    A monobloc tap has a single spout where both hot and cold water are controlled by one lever or knob. A traditional tap has two separate handles, one for hot water and one for cold. The visual difference is immediately obvious: monobloc taps look unified and minimalist, while traditional taps have a separated, vintage appearance. If unsure, look at your tap from above. One control mechanism means monobloc; two distinct handles means traditional.

    Close-up comparison of a modern monobloc kitchen tap with single lever and a traditional two-handle kitchen tap side by side on a stainless steel sink, showing the structural differences clearly
    Close-up comparison of a modern monobloc kitchen tap with single lever and a traditional two-handle kitchen tap side by side on a stainless steel sink, showing the structural differences clearly

    Ceramic Disc, Compression, and Cartridge Systems

    Ceramic disc cartridges are found in most modern monobloc taps. Inside the tap body sits a cylindrical cartridge containing two ceramic discs that rotate to control water flow and temperature. When these discs wear down, water leaks through even when the tap is fully closed. Ceramic disc cartridges typically last 10-15 years.

    Compression taps use rubber washers and metal valve seats to create a watertight seal. When you turn the handle, a spindle presses the rubber washer against the valve seat, stopping water flow. Over time, the rubber washer hardens and cracks, allowing water to seep past. These taps are common in older homes and are the most affordable to repair, a new washer costs just a few pounds.

    Cartridge systems are hybrid designs found in some monobloc and traditional taps. They use a replaceable cartridge containing multiple sealing surfaces. To identify which system you have, look at the tap handle. If it moves smoothly in all directions without clicking, you likely have a ceramic disc cartridge. If the handle has distinct stopping points or requires more force to turn, it’s probably a compression system.

    What You’ll Need: Tools and Materials

    Gathering the right tools before you start prevents frustrating mid-repair trips to the hardware shop.

    Essential tools:

    • Adjustable wrench or spanner
    • Hex key set (Allen keys)
    • Flathead and Phillips head screwdrivers
    • Plumber’s grease or silicone lubricant
    • Towels or rags and bucket for water spillage
    • Torch or headlamp for visibility

    Materials you may need:

    • Replacement ceramic disc cartridge (£35-60)
    • Replacement rubber washers (£3-10 for assorted sets)
    • Replacement O-rings (£3-5 for assorted sets)
    • PTFE tape (plumber’s tape)
    • Penetrating oil for stuck parts

    Most replacement parts cost under £15, with genuine ceramic disc cartridges at the higher end.

    Tool Compatibility Guide for Different Tap Types

    For monobloc taps: You’ll primarily need hex keys and a flathead screwdriver. Most monobloc handles are secured with a single hex bolt hidden under a decorative cap.

    For traditional two-handle taps: Adjustable wrenches become more important because traditional taps have larger nuts and bolts. The handle spindle is often secured with a nut underneath the sink.

    For cartridge systems: Hex keys are usually sufficient, though some cartridges require a specific removal tool (often included with the replacement cartridge).

    Pro Tip
    Invest in a good adjustable wrench and a complete hex key set, these two tools alone will handle 90% of tap repairs. A quality wrench costs £15-25 and will last decades.

    Isolate the Water Supply

    Before you dismantle anything, shut off the water supply to your kitchen tap.

    Locate the isolation valves under your sink on the hot and cold water pipes. Turn both valves clockwise until they stop. After closing the isolation valves, turn on the tap and let any remaining water drain out. This depressurises the system and confirms the valves are working.

    Once water has stopped flowing, place a bucket or towel under the tap to catch residual water trapped in the tap body.

    Watch Out
    If your isolation valves won’t turn or water continues flowing after you’ve closed them, stop immediately and call a professional. Attempting to repair a tap without proper water isolation can cause flooding.

    How to Fix a Leaking Kitchen Tap: Remove and Inspect

    With the water supply isolated, you can now safely begin dismantling the tap.

    Removing the Tap Handle and Accessing the Cartridge

    Start by removing the decorative cap on the tap handle using a flathead screwdriver. Once the cap is removed, you’ll see a hex bolt or screw underneath. Use the appropriate hex key or screwdriver to loosen this bolt by turning it counterclockwise.

    After removing the handle, you’ll see the tap body more clearly. For monobloc taps, the ceramic disc cartridge sits directly under the handle. For traditional taps with compression systems, you’ll see a larger nut that secures the spindle assembly. Use your adjustable wrench to loosen this nut by turning it counterclockwise.

    As you loosen components, water will drip into your bucket. Keep loosening until you can gently pull out the cartridge or spindle assembly. If it’s stuck, apply penetrating oil around the edges and wait 15 minutes before trying again.

    Take a photo of the removed component before cleaning it. This photo will be invaluable if you need to order a replacement.

    Kitchen Tap Cartridge Replacement

    If your tap uses a ceramic disc cartridge, this is likely the source of your leak.

    When to Replace vs. Clean the Ceramic Disc Cartridge

    Before you automatically buy a replacement, try cleaning the cartridge first. Sometimes mineral deposits prevent the discs from sealing properly, and a thorough clean restores function without needing a new part.

    Remove the cartridge completely and examine the ceramic surfaces. If they look smooth and undamaged, soak the cartridge in white vinegar for 30 minutes to dissolve mineral buildup, then gently scrub with a soft brush. Rinse thoroughly and reinstall. If the leak stops, you’ve saved £40-60.

    However, if the ceramic surfaces are visibly cracked, pitted, or discoloured, the cartridge must be replaced. Damaged ceramic cannot be restored.

    To order the correct replacement cartridge, find the tap manufacturer’s name and model number (usually printed on the tap body). Search online for "[Manufacturer] [Model] ceramic disc cartridge." Genuine cartridges cost £35-60, while compatible aftermarket versions cost £15-25.

    Once your replacement arrives, slide the new cartridge into the tap body, ensuring the inlet and outlet ports align correctly. Reinstall the spindle assembly, handle, and decorative cap in reverse order. Test the tap carefully by turning on the water supply and checking for leaks around all connection points.

    Key Takeaway
    Most ceramic disc cartridge leaks are caused by mineral buildup rather than physical damage. A 30-minute vinegar soak often solves the problem without needing to buy a replacement part.

    Replace Tap Washer and Kitchen Tap O-Ring Replacement

    If your tap uses a compression system, the leak is almost certainly caused by a worn rubber washer, damaged O-ring, or pitted valve seat.

    Identifying Worn Rubber Washers and Gaskets

    Once you’ve removed the spindle assembly, examine the rubber washer at the bottom. If it’s visibly cracked, hardened, or flattened, replacement is necessary.

    The washer sits on top of the valve seat, the metal surface it presses against when the tap is closed. Inspect the valve seat for pitting or corrosion. A smooth, shiny valve seat indicates good condition. A rough, pitted, or corroded surface means the valve seat must also be replaced.

    O-rings are rubber seals that prevent water from leaking around the spindle itself. If water leaks from around the handle rather than from the spout, the O-ring is likely worn. O-rings are tiny (usually 3-8mm in diameter) and cost £3-5 for an assorted pack.

    Step-by-Step O-Ring and Washer Replacement

    Step 1: Remove the old washer and O-rings. The rubber washer sits in a recessed area at the bottom of the spindle. Use a flathead screwdriver to gently prise it out. O-rings sit in grooves around the spindle and can usually be prised out with a fingernail or screwdriver.

    Step 2: Clean the spindle and valve seat. Use an old toothbrush or soft cloth to clean away mineral deposits or debris.

    Step 3: Install the new washer. Select a replacement washer that matches the size of the old one. Press it into the recessed area, ensuring it sits flat and fully seated.

    Step 4: Install new O-rings. Slide the new O-rings into their grooves, ensuring they sit evenly all the way around. If difficult to install, apply a tiny amount of plumber’s grease to help them slide into place.

    Step 5: Apply plumber’s grease. Before reassembling, apply a thin layer of plumber’s grease to the spindle and valve seat.

    Component Typical Cost Lifespan Replacement Difficulty
    Rubber washer £1-3 5-10 years Very easy
    O-ring £2-5 per pack 5-8 years Easy
    Ceramic disc cartridge £35-60 10-15 years Moderate
    Valve seat £5-15 15+ years Moderate

    Reassemble the Tap and Test for Leaks

    With new components installed, carefully reassemble the tap in reverse order.

    Step 1: Reinstall the spindle assembly. Carefully insert the spindle back into the tap body, aligning it with the hole in the valve seat. Use your adjustable wrench to tighten the large nut underneath the sink, turning it clockwise until snug. Don’t overtighten.

    Step 2: Reinstall the handle. Slide the handle back onto the spindle and insert the hex bolt or screw. Tighten until secure but don’t force it.

    Step 3: Reinstall the decorative cap. Press the cap back into place until it clicks or sits flush.

    Step 4: Open the isolation valves. Slowly turn the isolation valves counterclockwise to restore water pressure. Open them fully.

    Step 5: Test the tap. Turn the tap on and let water run for 10-15 seconds. Check for leaks around the base, under the sink, and at all connection points. If you see drips, turn off the tap and tighten any loose nuts slightly.

    Watch Out
    If leaks persist after reassembly, stop and consult the tap manufacturer’s documentation or call a professional.

    Plumber Cost for Leaking Tap UK: When to Call a Professional

    A professional plumber in the UK typically charges between £80 and £150 for a simple tap repair, depending on location and complexity. Emergency call-outs often cost 50% more.

    For straightforward repairs like washer or O-ring replacement, the DIY approach saves money, parts cost £5-15, and you invest only your time. However, call a professional if: the isolation valves won’t turn or are leaking, the tap body is severely corroded, you can’t identify which part is causing the leak, the tap is a designer model with proprietary parts, or you’re uncomfortable working with water systems.

    DIY is appropriate if: you have basic tools and some confidence, the leak is clearly from the spout, your tap is a standard design from a major manufacturer, and you have time to research your specific model online.

    At Apex Gas & Heating Ltd, we often receive calls from customers who’ve attempted DIY repairs and encountered problems. We’re happy to help, whether providing guidance over the phone or handling the entire job. Our team provides transparent pricing and fast response times across Sussex and Surrey.

    Repair vs. Replace: Sustainability and Long-Term Savings

    Before investing in repairing an older tap, consider whether replacement makes financial sense. A new kitchen tap costs £40-150, and professional installation typically runs £60-100. If your current tap is over 15 years old, has multiple failing components, or requires specialist parts that are difficult to source, replacement may be more economical.

    Modern taps are also more water-efficient than older designs, reducing consumption by 20-30% and lowering utility bills over time. However, if your tap is relatively new (under 10 years old) or only one component is failing, repair is almost always the better choice.


    Leaking kitchen taps are frustrating, but they’re also one of the most manageable household repairs. By identifying your tap type, gathering the right tools, and following a methodical approach, most homeowners can fix a leaking tap in under two hours. If you’d prefer professional help or encounter complications, Apex Gas & Heating Ltd offers fast, reliable plumbing services across Sussex and Surrey. Our team can diagnose the problem, source the correct replacement parts, and complete the repair with minimal disruption to your home. Get a quote today and have your kitchen tap running perfectly again.


    Frequently Asked Questions

    What causes a kitchen tap to leak, and can I fix it myself?

    Kitchen taps leak most often due to worn rubber washers, damaged O-rings, or a faulty ceramic disc cartridge inside the tap body. Most homeowners can fix a leaking kitchen tap themselves if the damage is to the washer or O-ring. You'll need basic tools like an adjustable wrench and hex key, plus replacement parts available from any DIY store. However, if the valve seat is damaged or the cartridge is beyond repair, you may need a plumber. Always isolate the water supply first using the isolation valve beneath the sink.

    How much does it cost to fix a leaking kitchen tap in the UK?

    The cost to fix a leaking kitchen tap in the UK depends on whether you repair it yourself or hire a plumber. DIY repairs typically cost £5-£20 for replacement washers, O-rings, and gaskets from a local plumbing supplier. If you need a new ceramic disc cartridge or monobloc tap assembly, expect £15-£50 for the part. Professional plumber call-outs vary by region and urgency; contact Apex Gas & Heating Ltd for transparent pricing on emergency or routine repairs in Sussex and Surrey.

    What's the difference between fixing a compression tap and a ceramic disc tap?

    Compression taps use rubber washers and a valve seat to control water flow; they leak when the washer wears out or the seat becomes damaged. Ceramic disc taps use a sealed cartridge with ceramic discs instead; they rarely leak but cannot be partially repaired and typically require full cartridge replacement. Monobloc taps often use ceramic disc technology. Compression taps are easier to repair with basic tools, while ceramic disc taps are more durable but costlier to fix. Identify your tap type before starting to ensure you buy the correct replacement parts.

    How do I know which tools and replacement parts I need?

    Start by identifying your tap type: monobloc or traditional. For compression taps, you'll need an adjustable wrench, hex key, and replacement rubber washers and O-rings. For ceramic disc or cartridge taps, you need an adjustable wrench and a replacement cartridge specific to your tap model. Check the tap manufacturer's name on the body or base, then search for the part number online. Bring a photo of your tap to a plumbing supplier, or visit Apex Gas & Heating Ltd for guidance on the correct parts and tools for your specific tap model.


    [EXTERNAL_LINK: Water UK guidance on fixing household leaks | water.org.uk]

    [EXTERNAL_LINK: Plumbing standards and best practices from the Institute of Plumbing | plumbersinstitute.org.uk]

    [EXTERNAL_LINK: Consumer guidance on hiring plumbers and understanding plumbing costs from Which? | which.co.uk]

    Ask us about a plumbing job →