







Table of Contents
- How to Prevent Frozen Pipes Winter: A Step-by-Step Guide
- Step 1: Insulate Pipes with Pipe Lagging UK
- Step 2: Maintain Consistent Indoor Temperature and Thermostat Settings for Winter
- Step 3: Seal Air Leaks and Drafts Around Exterior Walls
- Step 4: Disconnect and Drain Outdoor Hoses and Frost-Proof Faucets
- Step 5: Locate Your Main Water Valve (Stopcock Location)
- Step 6: Use Heat Tape and Heat Cables on Vulnerable Pipes
- What to Do If Pipes Freeze: Emergency Response
Last Updated: July 26, 2026
Understanding how to prevent frozen pipes in winter is one of the most important maintenance tasks homeowners in the UK can undertake during the colder months. Frozen pipes can burst and cause thousands of pounds in damage to your property. At Apex Gas & Heating Ltd, we’ve helped countless homeowners across Sussex and Surrey protect their plumbing systems before winter arrives, and we’re sharing the practical strategies that actually work.
When water inside pipes freezes, it expands with tremendous force until the pipe fails completely. The danger is that frozen pipes often burst inside walls or under floorboards, where damage goes unnoticed until water has already caused serious problems. Preventing frozen pipes is straightforward when you follow the right approach.
Below, we’ll walk you through eight essential steps that cover everything from insulation to emergency response. Some take just minutes to implement, while others require more planning. The key is starting before temperatures drop.
What You’ll Need Before Starting
Gather these basic materials before tackling any prevention method. Most items are available from any DIY store or online retailer.
Essential supplies:
- Pipe lagging or foam insulation sleeves (various diameters)
- Heat tape or heat cables (electric, thermostat-controlled preferred)
- Weatherstripping and caulk for sealing gaps
- Pipe clips and fasteners
- Thermometer to monitor temperatures
- A torch or headlamp for checking pipes in dark spaces
- Basic hand tools: adjustable wrench, screwdriver, utility knife
Step 1: Insulate Pipes with Pipe Lagging UK
Pipe lagging is your first line of defence against freezing temperatures. This insulation wraps around your pipes and significantly slows heat loss, keeping water moving through at warmer temperatures even when outdoor conditions drop below freezing.
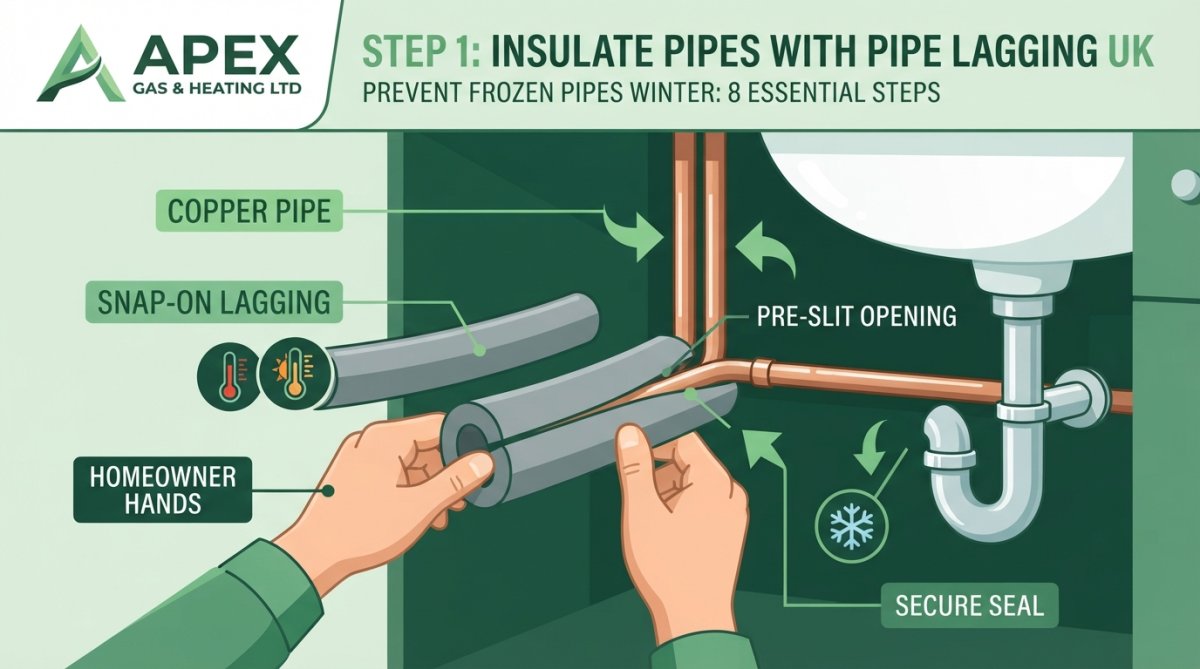
Pipes in unheated areas, attics, crawl spaces, garages, basements, and exterior walls, are most vulnerable. Foam pipe lagging comes in snap-on sleeves that split lengthwise, making installation quick without disconnecting pipes. These typically cost between £2-8 per metre depending on pipe diameter. For specific guidance on pipe insulation thickness, refer to [EXTERNAL_LINK: Building Regulations Part L (Approved Document L, 2021) | squote.org.uk] and BS 5422:2009.
Start with pipes closest to your external walls and work inward. The pipes that feel coldest to touch are losing the most heat.
DIY Difficulty and Tools Required
Installing pipe lagging rates as very easy on the DIY difficulty scale. Most homeowners complete this task in 2-4 hours. You’ll need a utility knife, measuring tape, and your hands. For snap-on foam lagging, measure your pipe diameter, select the matching size, cut the sleeves to length, and snap them around the pipe. Secure them with the adhesive backing or pipe clips. The most common mistake is leaving gaps; insulation only works if it covers the entire pipe run, including bends, joints, and where pipes enter walls.
Product Recommendations for Pipe Insulation
For most UK homes, snap-on foam lagging offers the best balance of cost, ease of installation, and effectiveness. Products like Armacell or Johns Manville foam sleeves are readily available and perform well in typical UK winter conditions, available in diameters from 15mm to 50mm. For pipes in particularly exposed locations, consider thicker insulation or combined foam-and-foil products. United Utilities recommends "closed cell" type insulation that is tubular to ensure equal thickness around the pipe.
Step 2: Maintain Consistent Indoor Temperature and Thermostat Settings for Winter
Temperature control is perhaps the most effective freeze prevention method available. Keeping your home consistently warm throughout winter protects all interior pipes, regardless of insulation.
Pipes freeze when water inside them reaches 0°C. By maintaining adequate indoor heating, you keep pipes above freezing even when outdoor temperatures plummet.
Set your thermostat to a minimum of 12°C, even when away from home. This simple setting prevents most freeze damage while keeping heating costs reasonable.
Optimal Temperature Range to Prevent Bursting
The safest approach is maintaining your home at 15-18°C minimum during winter. This temperature keeps interior pipes well above freezing while remaining economical. If you’re away from home for extended periods, never drop below 12°C. This is your absolute minimum threshold. According to boiler expert Andy Kerr, keeping your home at 10°C and above can stop pipes from freezing.
The relationship between indoor temperature and pipe safety is direct: every degree you lower your thermostat increases freeze risk. During severe cold spells, resist the temptation to save money by dropping your heating. The cost of repairs far exceeds the modest savings. Smart thermostats with frost protection modes automatically maintain minimum temperatures even when you’ve set lower targets.
Step 3: Seal Air Leaks and Drafts Around Exterior Walls
Cold air infiltration is a major factor in pipe freezing. Gaps, cracks, and poorly sealed penetrations allow freezing outdoor air to flow directly past your pipes. Sealing these leaks protects your pipes and improves your home’s overall energy efficiency.
Common locations where cold air enters:
- Where pipes penetrate exterior walls
- Gaps around external door and window frames
- Cracks in mortar or render on brick walls
- Poorly sealed cable and conduit entries
- Gaps between wall and foundation
Use weatherstripping on doors and windows, and caulk for gaps in walls. For larger penetrations, expandable foam sealant works well.
Do NOT seal ventilation vents completely. Your home needs air circulation to prevent moisture buildup and condensation. Seal around vents, not the vents themselves.
Step 4: Disconnect and Drain Outdoor Hoses and Frost-Proof Faucets
Outdoor hoses and external water supplies are among the first things to freeze. Water sitting in a hose freezes solid and expands, potentially cracking the hose attachment point or the external tap itself.
The solution is simple: disconnect all outdoor hoses before the first frost and drain them completely. Don’t leave hoses connected to external taps during winter.
Steps for winterising outdoor water supplies:
- Turn off the external tap’s isolation valve (if fitted)
- Disconnect the hose and drain any remaining water from it
- Store the hose indoors or in a shed
- Open the external tap briefly to release any trapped water
- Leave the tap open slightly to allow any residual water to drain
Step 5: Locate Your Main Water Valve (Stopcock Location)
Every homeowner should know where their main water shut-off valve is located. In an emergency, being able to shut off your water supply quickly can prevent thousands of pounds in damage.
In most UK homes, the stopcock is located under the kitchen sink, in a cupboard, or in the hallway near the front door. It’s usually a small valve with a handle that turns 90 degrees to shut off water flow. Some properties have it outside in a small inspection chamber in the garden or at the boundary.
Why Knowing Your Stopcock Location Matters
When a pipe bursts, you have minutes to stop water flowing before serious damage occurs. Being able to shut off your supply immediately is your emergency response. Beyond burst pipes, knowing your stopcock location is essential for any plumbing work. During a freeze event, if you suspect a pipe has frozen, shutting off your main supply prevents additional water from flowing into the frozen section, reducing pressure buildup and rupture risk.
Write down your stopcock location and take a photo. Share this information with household members and anyone who might need it in an emergency. Consider labelling your stopcock clearly.
Step 6: Use Heat Tape and Heat Cables on Vulnerable Pipes
Heat tape and heat cables provide active protection for pipes in extremely vulnerable locations. Unlike passive insulation, these devices actively warm your pipes, preventing freezing even during severe cold spells.
Heat tape is an electric heating element that wraps around pipes. Self-regulating heat cables are particularly useful; they automatically adjust their heat output based on pipe temperature, switching on when temperatures drop and off when pipes warm up. This approach works exceptionally well for pipes in unheated spaces like attics and crawl spaces, or for outdoor hose bibs and irrigation lines.
Installation considerations:
Wrap heat tape around the pipe in a spiral pattern, maintaining contact along the entire length. Secure it with the adhesive backing or with tape designed for heat cables. Never allow heat tape to touch itself or create bunched sections. Thermostatic heat cables are preferred over simple on-off models, as they reduce energy consumption.
Cost Analysis: Prevention vs. Repair Costs
A burst pipe repair typically costs between £500-2,000 depending on location and severity. Water damage from an undetected burst can easily exceed £10,000 when walls, flooring, and electrical systems are affected. According to 2021 statistics from the Association of British Insurers, the average cost of remedying the impact of burst pipes in domestic properties was £9,300.
Prevention costs are modest by comparison. Pipe lagging for an average home costs £50-150. Heat tape for vulnerable sections runs £30-100. Weatherstripping and caulk costs £20-50. Even comprehensive prevention across an entire property rarely exceeds £300-500. Preventing even a single burst pipe pays for years of prevention efforts.
What to Do If Pipes Freeze: Emergency Response
Despite best efforts, pipes sometimes freeze anyway. Knowing how to respond quickly can prevent rupture and water damage.
The first sign of frozen pipes is usually reduced water pressure or no water flowing from affected taps. If you notice this during cold weather, act immediately.
Immediate steps:
- Turn off your main water supply at the stopcock
- Open affected taps to relieve pressure
- Locate the frozen section by feeling pipes for the coldest area
- Apply gentle heat to thaw the ice
Never use an open flame like a blowtorch or candle. Instead, use safe heat sources like a heat gun, hair dryer, or heating pad. Start thawing from the tap end and work toward the frozen section. This allows water to flow out as ice melts, relieving pressure buildup. Thawing can take 30 minutes to several hours depending on how much ice has formed.
If you cannot locate the frozen section, or if thawing doesn’t restore water flow within a couple of hours, call a professional plumber. Attempting aggressive thawing risks rupturing the pipe.
How to Thaw Frozen Pipes Safely
The safest thawing method uses a heat gun or hair dryer on a low setting. Hold it 15-20cm from the pipe and move it slowly along the frozen section. For pipes in walls or difficult-to-reach locations, heating pads designed for pipe thawing work well. Never use boiling water directly on pipes, as the thermal shock can crack them.
When to Call a Professional Plumber
Contact a professional plumber immediately if you cannot locate the frozen section, thawing doesn’t restore water flow after 2-3 hours, you suspect a pipe has burst, the frozen section is in a wall or inaccessible location, or you’re uncomfortable working with heat sources or electrical equipment.
Professional plumbers have thermal imaging equipment that pinpoints frozen sections instantly. For properties with recurring freeze problems, a plumber can identify underlying issues and recommend permanent solutions. At Apex Gas & Heating Ltd, our 24/7 emergency call-out service means help is available immediately when pipes freeze. Our qualified engineers can assess damage, thaw pipes safely, and implement long-term prevention strategies tailored to your property’s specific vulnerabilities.
Frozen pipes represent one of winter’s most costly threats to your home. The eight strategies covered here address every aspect of freeze prevention. Starting these measures before winter arrives means you’ll sleep soundly through even the coldest nights, knowing your plumbing is protected. Get in touch with Apex Gas & Heating Ltd for a property assessment and personalised prevention plan. Our team can identify your specific vulnerabilities and recommend the most cost-effective protection for your situation.
| Prevention Method | Difficulty | Cost | Effectiveness | Best For |
|---|---|---|---|---|
| Pipe lagging | Very easy | £50-150 | High | Interior pipes in unheated spaces |
| Temperature control | Easy | Minimal | Very high | All interior pipes |
| Sealing air leaks | Easy | £20-50 | High | Pipes entering home |
| Disconnecting hoses | Very easy | Free | Very high | Outdoor water supplies |
| Heat tape | Moderate | £100-200 | Very high | Extremely vulnerable pipes |
| Knowing stopcock | Very easy | Free | Essential | Emergency response |
Protecting your home from frozen pipes requires understanding how water freezes, where your pipes are most vulnerable, and which prevention methods work best for your specific situation. According to [EXTERNAL_LINK: UK Health and Safety Executive guidance on winter maintenance | hse.gov.uk], homeowners who implement multiple prevention strategies see significantly reduced risk during severe cold spells. Research from [EXTERNAL_LINK: Building Research Establishment studies on residential pipe freezing | parliament.uk] confirms that combining insulation, temperature control, and sealing gaps provides the most reliable protection. The [EXTERNAL_LINK: British Plumbing Employers Council winter preparedness guide | bpec.org.uk] recommends starting prevention measures in autumn, before temperatures drop, to ensure all vulnerable sections are protected before freezing weather arrives.
Frequently Asked Questions
What temperature do pipes freeze at in the UK?
Pipes typically freeze when exposed to temperatures below 0°C for extended periods. In the UK, freezing temperatures most commonly occur during December through February. However, pipes in unheated areas like attics, crawl spaces, and garages can freeze at slightly higher temperatures due to reduced air circulation. The risk increases significantly when temperatures drop below -6°C or remain below freezing for several consecutive hours. This is why preventing frozen pipes during winter is essential for UK homeowners.
Should I leave my heating on low to prevent pipes freezing in winter?
Yes, maintaining a consistent minimum temperature is an effective prevention method. Keep your thermostat set to at least 12-15°C, even when away from home for extended periods. This steady indoor temperature prevents water moving through pipes from freezing. Combined with pipe lagging insulation on exposed pipes in unheated areas, low continuous heating significantly reduces burst pipe risk. However, this method alone is insufficient for pipes in exterior walls, attics, or garages; these require additional insulation or heat tape for complete protection.
How do I insulate outdoor pipes and faucets for winter using pipe lagging UK products?
Pipe lagging UK products include foam sleeves, wrap-around insulation, and snap-on covers. Measure your pipe diameter, then slide foam lagging over exposed pipes or wrap foam material around them, securing with tape. For outdoor faucets, use frost-proof faucet covers or insulating boxes. Ensure all joints, valves, and bends are covered, as these areas freeze first. Pay special attention to pipes on exterior walls, in unheated garages, and near outdoor taps. DIY installation typically requires only basic tools (utility knife, tape measure, scissors) and takes 1-2 hours for an average property.
What’s the cost difference between preventing frozen pipes and repairing burst pipes?
Prevention costs are significantly lower than repairs. Pipe lagging materials cost between £15-50 per property, heat tape ranges from £20-100, and professional installation adds labour costs. In contrast, burst pipe repairs typically cost £500-3,000+ depending on location and damage severity. Water damage from burst pipes can exceed £10,000. Emergency call-outs for thawing frozen pipes or repairing burst pipes cost substantially more than preventative measures. For UK homeowners, investing in insulation, thermostat management, and heat cables represents excellent value compared to potential property damage and expensive emergency plumber fees.
Leave a Reply