







Rated Excellent Rating Gas Safe Registered BPEC Certified 25 Years’ Experience 2 Year Guarantee Card Payments AcceptedApple Pay, Mastercard, Visa, Amex, Google Pay Worcester BoschVaillantBaxiGlow-wormAccredited

Category: Blog

  • Is Power Flushing Worth the Money? A 2026 Guide

    Is Power Flushing Worth the Money? A 2026 Guide

    Table of Contents

    Last Updated: August 26, 2026

    What Is Power Flushing and How Does It Work?

    Power flushing is a professional cleaning process designed to remove sludge, corrosion, and debris from your central heating system. Unlike a standard chemical flush, power flushing uses a specialized machine that forces treated water through your pipework at high velocity, dislodging built-up deposits that restrict flow and reduce efficiency.

    The process works by circulating water and chemical cleanser through your heating circuit at controlled pressure, breaking down iron oxide, scale, and contaminants that accumulate over years of operation. The debris is captured in a magnetic filter before the system is refilled with fresh water and inhibitor to protect against future corrosion. A properly executed power flush can add years to your boiler’s lifespan by removing the corrosive deposits that wear down internal components.

    Signs Your Central Heating Needs a Power Flush

    Your heating system sends clear signals when sludge buildup becomes a problem. Cold spots on radiators are the most obvious indicator, when the bottom half stays cold whilst the top warms up, debris is blocking hot water flow to that section.

    Close-up of a cold radiator with frost forming on the lower section while upper portion shows condensation, demonstrating poor heat distribution in a residential bedroom
    Close-up of a cold radiator with frost forming on the lower section while upper portion shows condensation, demonstrating poor heat distribution in a residential bedroom

    Listen for unusual noises from your boiler or pipework. Kettling sounds, distinct rumbling or banging, occur when sludge restricts water flow, causing steam bubbles to form and collapse inside the heat exchanger. Gurgling or hissing from radiators indicates trapped air and sediment blocking circulation.

    Rising energy bills often accompany sludge buildup. When your boiler works harder to push water through a partially blocked circuit, it consumes more fuel to maintain temperature. Check your system pressure gauge regularly; frequent pressure drops suggest internal blockages if pressure remains stable whilst heating performance deteriorates. Discoloured water when bleeding radiators, anything darker than clear or light brown, indicates iron oxide and sludge in circulation.

    Power Flush vs Chemical Flush: Which Is Right for You?

    A chemical flush uses inhibitor-based cleaners circulated at normal operating pressure, typically taking 24 to 48 hours. It’s gentler and less disruptive but less aggressive at removing heavy sludge deposits. Power flushing forces water and chemical cleanser through your pipework at significantly higher velocity using a dedicated machine, typically taking 4 to 8 hours and producing noticeably better results in heavily contaminated systems.

    Chemical flushing works best when:

    • Your system shows only minor sludge accumulation
    • You want a less invasive cleaning process
    • Your pipework is older and potentially fragile
    • Budget is a primary concern

    Power flushing is the better choice when:

    • Cold spots affect multiple radiators
    • Your boiler makes kettling noises
    • Energy bills have risen significantly
    • You’re installing a new boiler and want to protect it
    • Your system is more than 10 years old with heavy sludge buildup

    The key distinction comes down to severity and results. A magnetic filter captures debris during power flushing, physically removing contaminants from your system. Chemical flushing relies on circulation alone, which works for light contamination but struggles with heavy deposits.

    Critical: System Compatibility Check Before Power Flushing

    Not every system is suitable for power flushing. The high-velocity circulation can damage older or fragile components, creating leaks that cost far more to repair than the original service. Before committing to power flushing, your heating engineer should verify:

    • Pipework age and material: Microbore pipework (6-8 mm diameter) installed before the 1990s can be vulnerable to high-pressure flushing. Copper pipework in poor condition, with visible corrosion or pinhole leaks, may rupture under aggressive circulation.

    • Radiator condition: Older cast-iron radiators or those with internal corrosion may have weakened seals at connection points. The force of power flushing can dislodge internal debris that then blocks the radiator outlet.

    • Boiler heat exchanger integrity: If your boiler is already showing signs of internal corrosion, power flushing can dislodge loose scale inside the heat exchanger, causing blockages or leaks.

    • System pressure history: If your system has a history of frequent pressure loss or visible leaks, power flushing may worsen existing weak points.

    When NOT to Power Flush

    If your system meets any of these criteria, power flushing poses genuine risk: pipework installed before 1995 with no recent pressure testing, visible leaks or persistent pressure loss, boiler showing signs of internal corrosion, cast-iron radiators with visible external rust, or plastic pipework of unknown age or condition.

    In these scenarios, a chemical flush with a qualified inhibitor is the safer first step. Many heating engineers recommend power flushing as preventative maintenance when installing a new boiler, even if your current system seems acceptable. This ensures your investment operates in a clean environment from the start, maximizing its lifespan and efficiency.

    How Long Does a Power Flush Take and What’s Involved?

    A typical power flush takes between 4 and 8 hours, depending on your system’s size, complexity, and the severity of sludge buildup. Smaller systems might finish in 4 to 5 hours, whilst larger homes with multiple zones can take the full 8 hours or longer.

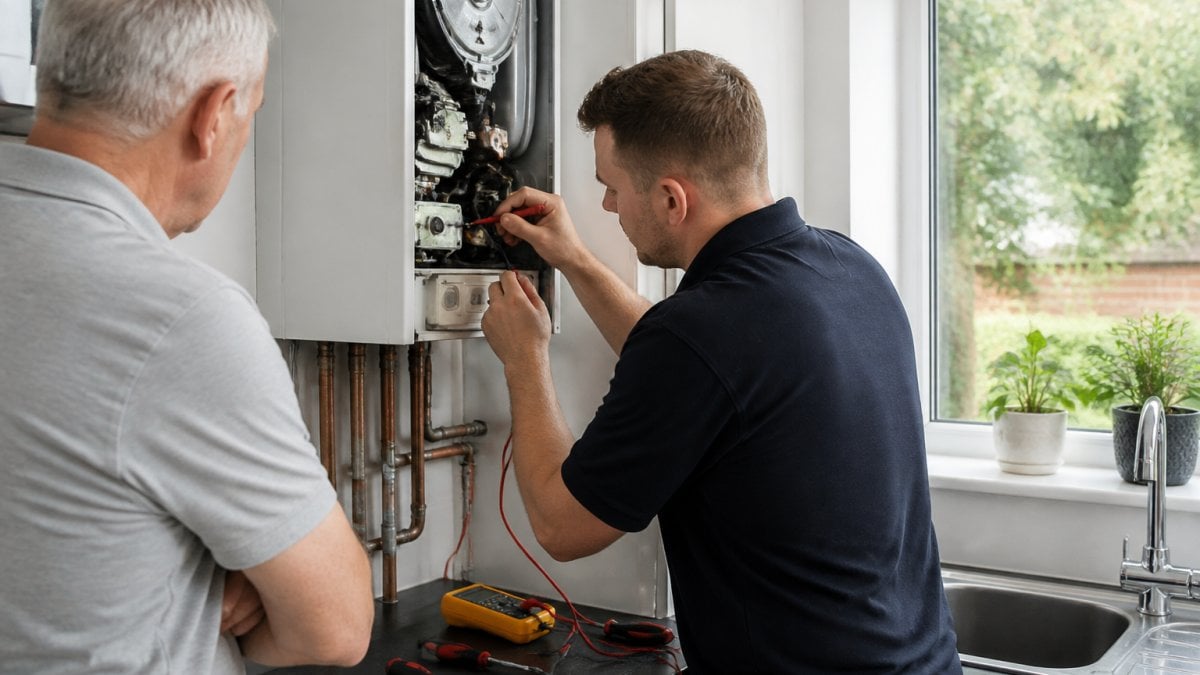
    Professional heating engineer in workwear connecting a power flushing machine to copper pipework in a utility room, with pressure gauges and magnetic filter visible, natural daylight from window
    Professional heating engineer in workwear connecting a power flushing machine to copper pipework in a utility room, with pressure gauges and magnetic filter visible, natural daylight from window

    The process begins with your heating engineer assessing your system, checking boiler condition, radiator layout, and existing sludge levels. They’ll connect the power flushing machine to your pipework, typically at the pump or return line, isolating your boiler to protect it during the initial high-pressure stage.

    The first stage involves circulating treated water and chemical cleanser through your heating circuit at elevated pressure. This aggressive flow breaks down iron oxide, scale, and corrosion deposits. You’ll often see discoloured water emerging from the system, brown, grey, or black discharge indicates debris being dislodged.

    Next comes magnetic filtration. The machine’s magnetic filter captures ferrous particles and sludge as water passes through. A final rinse cycle pushes clean water through your system to remove any remaining debris and chemical residue. Your engineer then refills your heating circuit with fresh water and adds inhibitor, a protective chemical that prevents future corrosion.

    System balancing comes last. Your engineer checks radiator thermostatic valves, adjusts flow rates if needed, and ensures your boiler operates at correct pressure. Before leaving, they’ll verify that heating is distributed evenly and that all radiators reach temperature properly.

    Get a Free Quote Today →

    Real Benefits of Power Flushing Your Heating System

    Improved radiator efficiency is the most immediate benefit you’ll notice. Once sludge is removed, hot water flows freely through all radiators, and cold spots disappear. Rooms that previously struggled to reach temperature now warm consistently.

    Energy consumption drops noticeably once your boiler stops fighting against restricted flow. When your heating system operates cleanly, your boiler reaches target temperature faster and cycles less frequently. This translates to lower fuel bills, a tangible saving that accumulates month after month.

    Boiler longevity improves significantly. Corrosion and sludge inside your heat exchanger cause premature wear, leading to breakdowns and expensive repairs. Power flushing removes these damaging deposits, allowing your boiler to operate in a clean environment. System reliability increases substantially, with blocked radiators, kettling noises, and pressure fluctuations often disappearing after power flushing.

    Quieter operation is another benefit many homeowners appreciate. Kettling sounds, gurgling from radiators, and boiler noise often stem from sludge and air in your system. Once these are removed, your heating runs quietly.

    The Critical Aftercare: Magnetic Filter Installation

    Power flushing alone doesn’t guarantee lasting results. Within weeks or months of flushing, new sludge can form if your system lacks magnetic filtration. This is why professional heating engineers now recommend installing a magnetic filter as part of the power flush service.

    A magnetic filter is a small device installed on the return line of your heating system, typically near the boiler. It contains powerful permanent magnets that capture ferrous particles and sludge as water circulates. Unlike the temporary magnetic filter used during power flushing, this permanent installation continues working indefinitely, preventing sludge recurrence.

    Without a magnetic filter, your system begins accumulating new sludge immediately after flushing because corrosion naturally continues in any heating system, producing iron oxide particles. Within 12 to 24 months, many systems without magnetic filtration show signs of sludge returning: cold spots reappear, boiler noise returns, and energy efficiency drops again (peer-reviewed research).

    Once installed, a magnetic filter requires minimal maintenance. Your heating engineer should inspect it annually (ideally before winter) and clean the magnetic cartridge if it has accumulated particles. This takes 10 to 15 minutes and costs far less than another full power flush. The filter also provides early warning of system problems, if the magnetic cartridge fills with debris quickly, it signals that corrosion is accelerating, possibly due to inhibitor failure or a developing leak.

    When evaluating whether power flushing is worth the investment, factor in the cost of magnetic filter installation and annual maintenance. This transforms power flushing from a one-time service into a complete system restoration with lasting protection.

    Is Power Flushing Worth the Investment?

    The decision hinges on your system’s condition, age, and heating performance. If your central heating system is more than 10 years old and showing signs of sludge buildup, cold spots, kettling noises, or rising energy bills, power flushing delivers measurable improvements that justify the cost.

    Consider your boiler’s age and condition. If you’re planning a new boiler installation within the next year or two, flushing your system beforehand is a smart investment. It protects your new equipment and ensures optimal performance from day one.

    Energy savings provide a financial return over time. Reduced fuel consumption begins immediately after power flushing, with many households seeing improvements in heating efficiency. These savings compound across heating seasons, gradually offsetting the initial investment.

    If you’re experiencing frequent boiler breakdowns or emergency repairs, power flushing often resolves the underlying cause, sludge-related damage to your heat exchanger. Eliminating emergency callouts and repair bills represents genuine financial benefit beyond the immediate service cost.

    However, if your system is relatively new (under 5 years old) and performing well, power flushing may not be necessary. A preventative chemical treatment with inhibitor typically suffices for systems in good condition. Your heating engineer can assess whether your specific system genuinely needs power flushing or whether a gentler approach is sufficient.

    At Apex Gas & Heating Ltd, our heating engineers assess your system thoroughly before recommending any treatment. We’re transparent about whether power flushing will genuinely improve your heating performance or whether a less invasive approach would serve you better.

    Conclusion

    Power flushing is a worthwhile investment when your central heating system shows clear signs of sludge buildup, cold spots, kettling noises, rising energy bills, or poor radiator performance. The process removes corrosion and debris that restrict flow, restoring efficiency and extending your boiler’s lifespan.

    If you’re considering power flushing for your property in Sussex or Crawley, Apex Gas & Heating Ltd can assess your system and recommend the right solution. Our approved heating engineers have the expertise to determine whether power flushing will genuinely improve your heating or whether a different approach suits your needs. Contact us for a transparent assessment, we’re here to keep your home warm and comfortable throughout the year.

    Frequently Asked Questions

    How do I know if my central heating system needs a power flush?

    Look for cold spots on radiators, unusual noises from your boiler or pipework, slow heating response, or discoloured water when bleeding radiators. These signs suggest sludge buildup and corrosion inside your heating circuit. A heating engineer can confirm whether power flushing will help by inspecting your system pressure and flow rate.

    What's the difference between a power flush and a chemical flush?

    A chemical flush uses inhibitor solutions to dissolve scale and corrosion gradually, whilst a power flush machine forces water at high velocity through the entire system to dislodge sludge and iron oxide. Power flushing is more aggressive and effective for heavily blocked systems, but chemical flushing works well for preventative maintenance on newer systems.

    How long does a professional power flush take to complete?

    A typical power flush takes between 4 to 8 hours, depending on your system size and the level of contamination. Larger properties or heavily sludged systems may take longer. Your heating engineer will give you a time estimate before starting work.

    Is power flushing worth the cost for an older boiler?

    Yes, if your boiler is still functioning but struggling with poor radiator efficiency or frequent breakdowns. Power flushing can extend boiler lifespan by removing corrosion and improving heat exchanger performance. However, if your boiler is nearing the end of its life, a new boiler installation may offer better long-term value than repeated repairs.

    Get a Free Quote Today →

  • Is a Carbon Monoxide Detector Worth It?

    Is a Carbon Monoxide Detector Worth It?

    Table of Contents

    Last Updated: August 25, 2026

    What Is Carbon Monoxide and Why It Matters

    Carbon monoxide is a colourless, odourless gas produced when fuel-burning appliances like boilers, cookers, and heating systems don’t burn fuel completely. This toxic gas is often called the "silent killer" because you cannot see, smell, or taste it, making a carbon monoxide detector essential for any property with combustion appliances.

    When faulty appliances, blocked flues, or poor ventilation prevent complete combustion, carbon monoxide accumulates in your home. Breathing it in replaces oxygen in your bloodstream, leading to poisoning symptoms ranging from mild headaches and dizziness to nausea, confusion, and in severe cases, death. The danger escalates quickly, especially at night when you’re sleeping and unable to notice early warning signs.

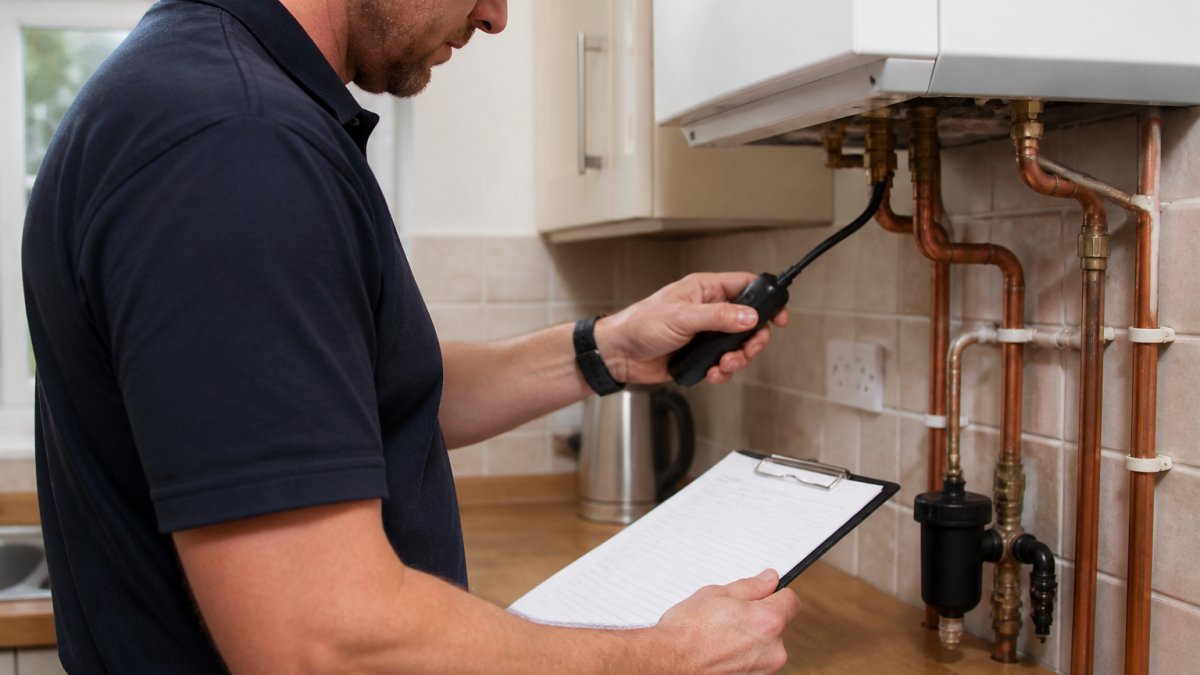
    Close-up of a modern gas boiler mounted on a kitchen wall with visible venting pipes and control panel
    Close-up of a modern gas boiler mounted on a kitchen wall with visible venting pipes and control panel

    Properties with fuel-burning appliances, particularly older homes across Sussex and Surrey, face genuine risk if they lack proper monitoring.

    Early symptoms mimic common illnesses: persistent headaches, fatigue, or nausea that you might dismiss as flu. By the time symptoms become severe enough to warrant hospital attention, significant damage may already have occurred.

    Key Takeaway
    Carbon monoxide is produced by any fuel-burning appliance operating in your home. Without detection, poisoning can occur silently while you sleep.

    Carbon Monoxide Alarm Regulations in the UK

    Building Regulations now mandate CO alarm installation in new buildings and major renovation work where fuel-burning appliances are present. For existing properties, requirements depend on your circumstances as a homeowner, landlord, or tenant.

    Landlords face the most stringent obligations. The Smoke and Carbon Monoxide Alarm (Amendment) Regulations 2022 require that a carbon monoxide alarm is fitted in any room with a fixed combustion appliance (excluding gas cookers) in private and social rented homes (legislation.gov.uk). Landlords are also expected to repair or replace alarms once informed that they are faulty. This is a legal requirement backed by enforcement powers, with potential fines up to £5,000 for non-compliance.

    For homeowners, Building Regulations recommend CO alarms in rooms with solid fuel appliances (wood stoves, fireplaces) and gas appliances. While homeowners aren’t legally compelled to install them in existing properties, any property with combustion appliances benefits from protection.

    Tenants have a right to safe accommodation, which includes protection from carbon monoxide hazards. If your landlord hasn’t installed a detector, you can request one, and if refused, you may have grounds for complaint to local authority enforcement bodies.

    Watch Out
    Landlords who fail to install carbon monoxide detectors in rental properties face significant legal penalties and potential criminal liability if poisoning occurs. This is a statutory requirement under the Smoke and Carbon Monoxide Alarm (Amendment) Regulations 2022.

    Building Regulations specify that electrochemical sensors are the standard for domestic use, detecting carbon monoxide through a chemical reaction that triggers an alarm when CO concentration reaches dangerous levels (gov.uk). These alarms are calibrated to BS EN 50291-1:2018 standards.

    The Real Cost of Not Having a Detector

    A quality detector costs between £20 and £90 depending on features and sensor type. The cost of a hospital visit for carbon monoxide poisoning begins in the thousands and escalates rapidly if intensive care is required.

    If a carbon monoxide incident occurs in a rental property without a detector, you face potential prosecution, unlimited fines, and civil liability claims from affected tenants. Insurance claims may be denied if you failed to meet legal requirements. For homeowners, the reputational and emotional cost of a preventable tragedy is immeasurable.

    Properties with documented safety hazards, including lack of carbon monoxide detection, become harder to sell and may see insurance premiums increase or coverage refused entirely. Buyers increasingly ask about safety systems, and a missing CO alarm raises red flags about overall maintenance standards.

    Battery-powered detectors require occasional battery replacement (typically every 1-2 years for models with replaceable batteries, though sealed-battery units last the full 10-year sensor lifespan). Mains-powered detectors with battery backup draw minimal electricity. Testing is free, most detectors have a test button you press monthly to verify the alarm sounds.

    When you calculate the total cost of ownership against the genuine risk of carbon monoxide poisoning, the financial case becomes overwhelming.

    Pro Tip
    If you operate multiple rental properties across Sussex or Surrey, scheduling [annual detector testing and battery replacement as part of routine maintenance](/2026/08/20/annual-boiler-service-landlords-benefits/) prevents forgotten alarms and ensures consistent compliance.

    Best Place to Install Carbon Monoxide Detector

    Location determines detector effectiveness. The sensor needs to detect gas before it reaches dangerous concentrations in the rooms where you spend the most time.

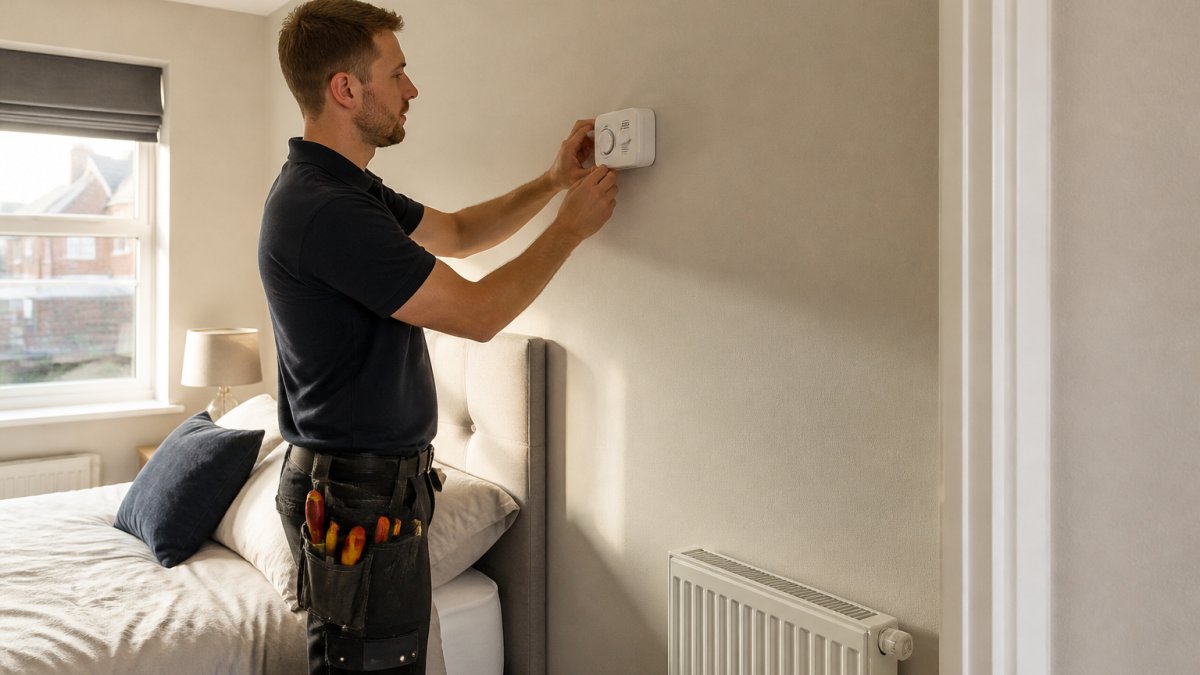
    A carbon monoxide detector mounted at eye level on a bedroom wall near a sleeping area, with visible alarm indicator light
    A carbon monoxide detector mounted at eye level on a bedroom wall near a sleeping area, with visible alarm indicator light

    Install your primary detector in a bedroom or living room, any space where you spend extended periods, particularly where you sleep. Position the detector on a wall at eye level or slightly above, roughly 30 centimetres from the ceiling. Never install it directly above a fuel-burning appliance, where it might detect only localised emissions rather than room-wide concentration.

    If you have multiple fuel-burning appliances in different areas of your home, consider installing detectors in multiple rooms. A boiler in the kitchen warrants a detector nearby; a fireplace in the living room warrants another.

    Avoid placing detectors in kitchens where cooking steam might trigger false alarms, or in bathrooms where humidity could damage the sensor. Keep detectors away from windows, doors, or external walls where drafts might affect sensor accuracy.

    For rental properties, position detectors where tenants can access them for testing and battery replacement. Make sure tenants know where the alarm is located and understand how to test it monthly.

    Apex Gas & Heating Ltd recommends positioning detectors at the same level where occupants breathe during normal activity. If you’re unsure about optimal placement for your specific property layout, our team can advise during a boiler servicing visit or gas safety inspection.

    How Often to Replace Carbon Monoxide Detector

    Most modern detectors use electrochemical sensors calibrated to detect carbon monoxide effectively for 10 years (peer-reviewed research). After that period, sensor sensitivity degrades and the detector becomes unreliable.

    Sealed-battery units simplify this calculation: replace the entire detector when the 10-year mark arrives. Battery-powered models with replaceable batteries require annual battery replacement (typically AA or 9V cells) but keep the same sensor unit for the full decade. Mains-powered detectors with battery backup also operate on a 10-year sensor replacement cycle.

    Many detectors include an end-of-life indicator, a light or chirp that signals when replacement is due. Once the sensor reaches the end of its calibrated life, it’s no longer protecting your property, even if the alarm still sounds during the monthly test.

    For landlords managing multiple properties, a documented replacement schedule prevents costly oversights. Record the installation date on each detector and set calendar reminders for the replacement year. Tenants should be informed when their detector is due for replacement, and landlords should arrange replacement promptly as a legal requirement under Gas Safety Regulations.

    Testing monthly doesn’t extend sensor life. After 10 years, the sensor simply cannot detect carbon monoxide with the same reliability, regardless of how many times you’ve tested it.

    Detector Types and What You Actually Get

    Not all carbon monoxide detectors are equal. Understanding the differences helps you choose the right protection for your property.

    Battery-Powered Standalone Detectors

    These are the most common domestic choice. They operate independently, requiring no installation beyond mounting on a wall or placing on a shelf. Battery-powered models offer portability and work immediately without professional installation.

    The FireAngel FA3322 features a 10-year sealed lithium battery and a digital display showing real-time CO levels, temperature, and humidity readings. It also has a pre-alarm function for sustained low-level CO detection.

    Get a Free Quote Today →

    Battery replacement models cost less upfront but require annual battery changes. Over the 10-year lifespan, battery costs accumulate, and the risk of forgotten replacements increases.

    Mains-Powered Detectors with Battery Backup

    The Kidde K4MCO is a hardwired system designed for new builds or major renovations. These connect to your home’s electrical supply, eliminating battery concerns, and include a rechargeable battery backup for power cuts. Mains-powered detectors can interconnect, meaning when one alarm triggers, all connected units sound simultaneously, providing comprehensive property-wide protection.

    Smart Home Detectors

    The Netatmo Smart Carbon Monoxide Alarm and Google Nest Protect (2nd Gen) bring connectivity into the equation. The Netatmo alarm sends smartphone notifications when CO is detected, allowing you to receive alerts even when away from home. The Nest Protect combines smoke and CO detection in a single unit, reducing the number of devices needed.

    Smart detectors require internet connectivity to deliver full functionality. If your Wi-Fi fails, the alarm still sounds locally, but you lose remote notification.

    Combination Smoke and CO Alarms

    The First Alert SCO5UK combines both smoke and carbon monoxide detection in a single device. This simplifies installation for properties requiring both types of protection. The separate audible tones and LED indicators distinguish between smoke and CO events, so you know immediately which hazard you’re facing.

    Detector Type Battery Life Key Advantage Best For
    Battery-powered (sealed) 10 years Low cost, no maintenance Most homeowners and rental properties
    Battery-powered (replaceable) 10 years (battery annual) Lower upfront cost Budget-conscious buyers
    Mains-powered with backup Continuous Interconnectivity, no batteries New builds, multi-storey homes
    Smart detector 10 years Remote monitoring, smartphone alerts Tech-savvy homeowners, landlords managing multiple properties
    Combination smoke + CO 10 years Dual protection, single device Properties needing both smoke and CO detection

    Is a Carbon Monoxide Detector Worth It for Your Home?

    Yes. A carbon monoxide detector is not optional for any property with fuel-burning appliances. The cost is trivial compared to the risk.

    For homeowners, you’re paying for early warning of a potentially fatal hazard. If you have a boiler, gas cooker, fireplace, or wood-burning stove, carbon monoxide is a genuine risk.

    For landlords, the calculation is even clearer. A detector is your first line of defence against catastrophic liability. If a tenant suffers carbon monoxide poisoning in a property without a detector, you face prosecution, unlimited fines, and civil claims.

    The type of detector you choose depends on your circumstances. If you rent a single property or own a modest family home, a battery-powered sealed-unit detector from FireAngel, Kidde, or Honeywell covers your needs. If you manage multiple rental properties across Sussex or Surrey, smart detectors or mains-powered interconnected systems justify the higher cost through reduced maintenance burden and better compliance tracking.

    False alarms do occur, typically from cooking fumes or steam in poorly ventilated kitchens. This isn’t a reason to avoid detection; it’s a reason to position detectors carefully and understand that occasional false alarms are vastly preferable to missing a genuine emergency.

    Installation is straightforward for battery-powered units: mount on a wall at eye level in a room with fuel-burning appliances or where you spend extended time. Mains-powered hardwired systems require professional installation, which Apex Gas & Heating Ltd can provide during a boiler installation or servicing appointment.

    Monthly testing takes 10 seconds, press the test button and listen for the alarm. Annual battery replacement takes 2 minutes. After 10 years, replace the entire unit or sensor cartridge depending on your model type.

    Key Takeaway
    A carbon monoxide detector is worth the investment for any property with combustion appliances. The investment protects against a silent, potentially fatal hazard. Maintenance is minimal and the peace of mind is invaluable.

    Carbon monoxide poisoning is preventable. The difference between a safe home and a tragedy often comes down to a single device. If your property has a boiler, gas heating, or any fuel-burning appliance, detection is essential.

    At Apex Gas & Heating Ltd, we ensure every boiler installation and annual servicing includes verification that your carbon monoxide detector is functioning correctly. Our team across Sussex and Surrey can recommend the right detector for your property, install mains-powered systems where needed, and verify compliance with Gas Safety Regulations. If you’re uncertain about your current setup or need professional guidance on detector placement and selection, contact Apex Gas & Heating Ltd for a consultation. Your family’s safety depends on it.

    === FAQ ANSWERS (audit these too, same rules) ===

    [1] Q: Do you really need a carbon monoxide detector?
    A: Yes, particularly if your home has fuel-burning appliances like boilers, gas cookers, or fireplaces. Carbon monoxide is a silent killer, colourless and odourless, meaning you cannot detect it without a detector. UK building regulations now require CO alarms in many properties. Even in older homes without mandatory requirements, the risk of poisoning from faulty appliances or blocked flues makes a detector a worthwhile safety investment. A professional boiler service can identify issues, but a detector provides continuous early warning.

    [2] Q: What are the warning signs of carbon monoxide in a house?
    A: Physical symptoms include headaches, dizziness, nausea, confusion, and chest pain, often mistaken for flu. If multiple household members feel unwell simultaneously, suspect CO. A detector will sound an audible alarm at hazardous levels. If you suspect CO exposure, evacuate immediately, ventilate your home, and contact a gas engineer to inspect your fuel-burning appliances.

    [3] Q: How quickly does a carbon monoxide detector detect carbon monoxide?
    A: Response time depends on CO concentration. At high levels (above 100 ppm), most detectors alarm within 10-40 minutes. At lower concentrations, detection takes longer, typically 1-4 hours at 50 ppm. This is why detectors are calibrated to BS EN 50291-1:2018 standards: they provide early warning before poisoning occurs. Regular testing using the test button confirms your detector remains functional.

    [4] Q: Where is the best place to install a carbon monoxide alarm?
    A: Install detectors at least 1-3 metres away from fuel-burning appliances, in sleeping areas and living rooms where you spend the most time. Mount them at eye level or slightly higher on walls, never in corners or near windows where air circulation may interfere with sensor accuracy. If you have multiple fuel-burning appliances on different floors, install a detector near each. Avoid kitchens where cooking fumes can cause false alarms. Battery-powered models offer flexibility; mains-powered options require professional installation but provide continuous protection.

    [5] Q: How often should you replace a carbon monoxide detector?
    A: Replace the entire detector every 7-10 years, depending on the model’s sensor lifespan. Most modern detectors use sealed lithium batteries lasting the full 7-10 years, eliminating battery changes. Some models have replaceable batteries requiring annual checks. An end-of-life indicator (usually a red LED or chirping sound) signals when replacement is needed. Even if the detector appears functional, aged sensors lose calibration accuracy. For rental properties, landlords should maintain records of replacement dates to demonstrate compliance with safety regulations.

    Frequently Asked Questions

    Q: Do you really need a carbon monoxide detector?

    A: Yes, particularly if your home has fuel-burning appliances like boilers, gas cookers, or fireplaces. Carbon monoxide is a silent killer, colourless and odourless, meaning you cannot detect it without a detector. UK building regulations now require CO alarms in many properties. Even in older homes without mandatory requirements, the risk of poisoning from faulty appliances or blocked flues makes a detector a worthwhile safety investment. A professional boiler service can identify issues, but a detector provides continuous early warning.

    Q: What are the warning signs of carbon monoxide in a house?

    A: Physical symptoms include headaches, dizziness, nausea, confusion, and chest pain, often mistaken for flu. If multiple household members feel unwell simultaneously, suspect CO. A detector will sound an audible alarm at hazardous levels. If you suspect CO exposure, evacuate immediately, ventilate your home, and contact a gas engineer to inspect your fuel-burning appliances.

    Q: How quickly does a carbon monoxide detector detect carbon monoxide?

    A: Response time depends on CO concentration. At high levels (above 100 ppm), most detectors alarm within 10-40 minutes. At lower concentrations, detection takes longer, typically 1-4 hours at 50 ppm. This is why detectors are calibrated to BS EN 50291-1:2018 standards: they provide early warning before poisoning occurs. Regular testing using the test button confirms your detector remains functional.

    Q: Where is the best place to install a carbon monoxide alarm?

    A: Install detectors at least 1-3 metres away from fuel-burning appliances, in sleeping areas and living rooms where you spend the most time. Mount them at eye level or slightly higher on walls, never in corners or near windows where air circulation may interfere with sensor accuracy. If you have multiple fuel-burning appliances on different floors, install a detector near each. Avoid kitchens where cooking fumes can cause false alarms. Battery-powered models offer flexibility; mains-powered options require professional installation but provide continuous protection.

    Q: How often should you replace a carbon monoxide detector?

    A: Replace the entire detector every 7-10 years, depending on the model's sensor lifespan. Most modern detectors use sealed lithium batteries lasting the full 7-10 years, eliminating battery changes. Some models have replaceable batteries requiring annual checks. An end-of-life indicator (usually a red LED or chirping sound) signals when replacement is needed. Even if the detector appears functional, aged sensors lose calibration accuracy. For rental properties, landlords should maintain records of replacement dates to demonstrate compliance with safety regulations.

    Get a Free Quote Today →

  • Eco-Friendly Heating Solutions for Rural Homes

    Eco-Friendly Heating Solutions for Rural Homes

    Table of Contents

    Last Updated: August 24, 2026

    Why Eco-Friendly Heating Matters for Rural Properties

    Rural homes face unique heating challenges without access to mains gas, relying instead on expensive oil, LPG, or electric heating with high running costs and significant carbon footprints. Eco-friendly heating solutions offer a practical alternative that reduces fuel bills, accesses government grants, and future-proofs against rising energy costs.

    For homeowners in areas like Crawley and across Sussex, switching to renewable heating delivers measurable benefits: lower carbon emissions, reduced fossil fuel dependency, and significant financial support through schemes like the Boiler Upgrade Scheme. At Apex Gas & Heating Ltd, we’ve worked with numerous rural homeowners making this transition successfully.

    This guide covers eight practical renewable heating options available to rural properties, from air source heat pumps to hybrid systems combining multiple technologies. You’ll understand each solution’s efficiency, installation requirements, and suitability for different property types.

    Air Source Heat Pumps: Efficient Heating for Off-Gas Properties

    Air source heat pumps extract heat from outside air and transfer it indoors for heating and hot water, working effectively even in cold climates. For every unit of electricity consumed, they deliver three to four units of heat, dramatically reducing running costs compared to oil or LPG boilers (peer-reviewed research).

    Installation typically takes three to five days depending on your property’s layout. The compact units mount against external walls, suiting most rural properties.

    Pro Tip
    Air source heat pumps perform best with good insulation and appropriately sized radiators for lower flow temperatures. Modern units maintain efficiency down to minus 15°C, though output declines in extreme cold, with backup electric heaters maintaining comfort ([the NIH](https://pmc.ncbi.nlm.nih.gov/articles/PMC11929890/)).

    The Boiler Upgrade Scheme currently offers grants toward installation costs. Running costs depend on electricity tariff and insulation, but generally air source heat pumps cost significantly less to operate than oil or LPG systems, representing one of the most cost-effective renewable heating solutions for off-grid properties.

    Air source heat pump unit mounted on the exterior wall of a rural cottage with countryside fields visible in the background, morning sunlight catching the frost on the unit
    Air source heat pump unit mounted on the exterior wall of a rural cottage with countryside fields visible in the background, morning sunlight catching the frost on the unit

    Ground Source Heat Pumps: Maximum Efficiency When Space Allows

    Ground source heat pumps extract stable heat from the earth via buried pipework, offering superior efficiency to air source systems. The ground maintains a relatively constant temperature of 10-12°C year-round, enabling peak efficiency throughout winter regardless of external air temperature (usgs.gov).

    Installation involves either horizontal trenching across your garden or vertical boreholes sunk deep underground. Horizontal systems require space equivalent to one-and-a-half times your home’s floor area; vertical boreholes occupy minimal surface space but cost more. Both approaches are disruptive during installation but deliver decades of reliable performance.

    The ground loop lifespan exceeds 50 years, outlasting multiple generations of residents. Combined with minimal maintenance requirements, ground source heat pumps represent a long-term investment delivering exceptional returns.

    Watch Out
    Ground source installation isn’t suitable for properties with shallow bedrock, high water tables, or conservation area restrictions. Check with your local planning authority before proceeding.

    Ground source heat pumps qualify for the Boiler Upgrade Scheme. The higher upfront cost is offset by lower running costs and exceptional long-term efficiency, making them the gold standard in renewable heating technology for rural properties with suitable space and ground conditions.

    Biomass Boilers: Renewable Heating From Sustainable Wood Fuel

    Biomass boilers burn organic material, typically wood pellets, chips, or logs, providing central heating and hot water. Pellet boilers are most practical, using standardised wood pellets with automatic feeding systems, removing manual labour whilst maintaining renewable benefits.

    The carbon footprint depends on fuel sourcing. Sustainably managed forestry produces genuinely carbon-neutral wood fuel over its lifecycle. When trees are replanted after harvest, carbon released during combustion is reabsorbed as new growth occurs.

    Installation requires space for fuel storage, typically a dedicated shed or bunker holding several months’ supply. The boiler occupies similar space to conventional oil boilers, with standard flue installation.

    Pro Tip
    Biomass boilers require [annual servicing](/2026/08/20/annual-boiler-service-landlords-benefits/) and regular ash removal. Budget for maintenance costs and factor in time managing fuel deliveries, as biomass heating demands more active management than oil or gas systems.

    Running costs vary depending on pellet prices in your area. In many rural locations, biomass fuel costs less than oil or LPG, delivering genuine savings. Modern biomass boilers meeting EcoDesign 2022 standards ensure efficient combustion and minimal emissions. The Boiler Upgrade Scheme provides grants toward installation.

    Boiler Upgrade Scheme Eligibility and Government Support

    The Boiler Upgrade Scheme provides grants toward renewable heating system installation, making eco-friendly solutions more accessible to rural homeowners. The scheme offers a flat-rate grant toward heat pump installation or biomass boiler replacement, available to both owner-occupiers and landlords covering primary residences and rental properties.

    Eligibility requires your property currently uses fossil fuel heating, oil, LPG, or natural gas. Properties with electric-only heating are ineligible. Your installer must be registered with the scheme, confirming they meet quality standards and can process grant claims on your behalf.

    The application process is straightforward: your registered installer submits the claim after installation, and the grant is paid directly to them, reducing your final bill. No means testing applies, making the scheme genuinely universal for eligible properties.

    Key Takeaway
    The Boiler Upgrade Scheme represents the most significant government support for renewable heating, often making the difference between renewable heating being affordable or prohibitively expensive for rural properties.

    Timeline matters. The scheme operates on annual budget allocation, and funding can exhaust before the financial year ends. Applying early maximises the chance of securing your grant before funds run out. Landlords should note the scheme applies to rental properties too, with each eligible heating system qualifying for full grant support.

    Benefits of Power Flushing Central Heating Systems

    Power flushing circulates high-velocity water and cleaning chemicals through heating pipework to remove accumulated sludge, rust, and debris. Over time, central heating systems accumulate magnetite, black iron oxide reducing heat transfer and forcing boilers to work harder.

    When installing renewable heating systems, power flushing beforehand is essential. Heat pumps and biomass boilers operate most efficiently with clean pipework. Installing new systems into clogged pipework wastes investment as systems work harder distributing heat through restricted pipes. Our plumbing services include comprehensive power flushing to prepare your system for optimal renewable heating performance.

    Benefits include improved heat distribution, reduced running costs, and extended equipment lifespan. A properly flushed system allows your heat pump or biomass boiler to deliver rated output without overworking.

    Pro Tip
    If upgrading from an oil boiler to a heat pump, power flushing is non-negotiable. Oil boiler systems often contain significant sludge accumulation, and installing a heat pump into contaminated pipework compromises performance immediately.

    Modern power flushing uses magnetic filters capturing debris permanently, protecting your heating system throughout its lifespan. For rural properties switching to renewable heating, power flushing represents excellent value with modest costs compared to efficiency gains delivered.

    Get a Free Quote Today →

    Maintaining Low-Carbon Heating Systems for Long-Term Performance

    Renewable heating systems require different maintenance approaches than conventional boilers. Air source heat pumps need annual servicing to maintain efficiency and check refrigerant levels, with outdoor units kept clear of snow, ice, leaves, and debris.

    Ground source heat pumps require less frequent servicing, typically every three to five years, as the system is largely sealed and protected underground. Servicing focuses on pump performance and system pressure checks.

    Biomass boilers demand more active maintenance. Annual servicing includes cleaning the heat exchanger, checking combustion efficiency, and inspecting the flue. You’ll also arrange regular ash removal, typically monthly during heating season, and ensure fuel storage remains dry and pest-free.

    Watch Out
    Neglecting maintenance on renewable heating systems leads to reduced efficiency, higher running costs, and potential equipment failure. Budget for annual servicing and factor maintenance costs into your decision-making.

    Many installers offer maintenance contracts covering annual servicing and emergency callouts. For rural properties where service response times can be longer, these contracts provide valuable peace of mind. Apex Gas & Heating Ltd provides comprehensive boiler servicing for heating systems across Sussex and Surrey, ensuring your renewable installation maintains peak performance. Keep records of all servicing, repairs, and component replacements to support warranty claims and demonstrate proper maintenance.

    Hybrid Heating Systems and Solar Thermal Integration

    Hybrid heating systems combine multiple renewable technologies, delivering flexibility and resilience that single-technology approaches cannot match. A common configuration pairs an air source heat pump with solar thermal panels. The heat pump handles primary heating and hot water, whilst solar panels supplement hot water production during sunnier months, reducing heat pump reliance and lowering running costs.

    Another effective hybrid combines a biomass boiler with an air source heat pump. The biomass system handles winter heating when fuel is abundant and heating demand is highest, whilst the heat pump provides supplementary heating during milder months, optimising each technology for the season when it performs best.

    Solar thermal panels specifically improve hot water efficiency by preheating water before it enters your heat pump or boiler, reducing energy needed for final heating. For properties with good south-facing roof space, solar thermal integration typically pays for itself within eight to ten years.

    Key Takeaway
    Hybrid heating systems provide resilience. If one component requires maintenance, the other continues operating, ensuring heating continuity. For rural properties where service appointments may take longer to arrange, this redundancy offers genuine peace of mind.

    System integration requires careful design. Your installer must ensure components work harmoniously, with modern smart heating controls optimising hybrid systems automatically. The Boiler Upgrade Scheme supports certain hybrid configurations, particularly those combining heat pumps with solar thermal. Check with your installer whether your proposed system qualifies for grant support.

    Solar thermal panels installed on a rural home's roof with an air source heat pump visible below, demonstrating integrated renewable heating setup in morning sunlight
    Solar thermal panels installed on a rural home's roof with an air source heat pump visible below, demonstrating integrated renewable heating setup in morning sunlight

    Choosing eco-friendly heating for a rural property is a significant decision, but today’s options make renewable heating genuinely practical and affordable. Whether you select an air source heat pump, biomass system, or hybrid configuration, you’re investing in lower running costs, reduced carbon emissions, and energy independence from fossil fuel price volatility.

    The Boiler Upgrade Scheme makes this transition financially accessible. Combined with professional installation from experienced engineers, renewable heating delivers reliable warmth and hot water for decades. Apex Gas & Heating Ltd specialises in new boiler installation and heating system maintenance across Sussex and Surrey. Our Worcester and Glowworm approved installers can assess your property, recommend the most suitable renewable heating solution, and manage installation with full transparency and professional workmanship. Get a quote today to explore how renewable heating can transform your property’s efficiency and comfort.

    === FAQ ANSWERS (audit these too, same rules) ===

    [1] Q: What is the most environmentally friendly heating system for a rural home without mains gas?
    A: Air source heat pumps and ground source heat pumps are the most environmentally friendly options for rural properties off the gas grid. Air source heat pumps extract heat from outside air and work efficiently even in cold climates, reducing carbon emissions significantly compared to oil or LPG boilers. Ground source heat pumps offer even higher efficiency if you have sufficient outdoor space for installation. Both qualify for the Boiler Upgrade Scheme, which provides grants to offset upfront costs. Biomass boilers using sustainably sourced wood pellets are also a strong renewable alternative if fuel supply is accessible.

    [2] Q: How does the Boiler Upgrade Scheme eligibility work for rural homeowners?
    A: The Boiler Upgrade Scheme provides grants towards the installation of heat pumps, biomass boilers, or solar thermal systems. Eligibility depends on your property being off the mains gas grid and having an EPC rating. Rural homes in areas like Crawley and surrounding Sussex typically qualify, as many are not connected to mains gas. You must use an approved installer, and the grant is applied directly to reduce your installation costs. Check with your local authority or an approved installer to confirm your property’s eligibility and the specific grant amount available.

    [3] Q: What are the benefits of power flushing central heating systems before installing new eco-friendly heating?
    A: Power flushing removes sludge, rust, and debris from your existing central heating pipework, improving heat distribution and system efficiency. Before installing a new heat pump or hybrid heating system, power flushing ensures your radiators and pipes are clean, allowing the new system to operate at peak performance. This is particularly important in older rural properties where sediment buildup is common. A clean system reduces the risk of blockages, extends the lifespan of your new heating installation, and can improve energy efficiency. Professional power flushing should be performed by a qualified heating engineer as part of your heating upgrade.

    [4] Q: Are heat pumps suitable for older rural homes that need retrofitting?
    A: Yes, air source heat pumps can be retrofitted into older rural homes, though they perform best in well-insulated properties. Older homes may require radiator upgrades or the addition of underfloor heating to maximise heat pump efficiency, as heat pumps work best at lower flow temperatures. Before installation, conduct a heat loss calculation and consider improving insulation in lofts, walls, and around windows. Ground source heat pumps are also suitable for older properties if you have outdoor space for the ground loop. Many older rural homes have successfully switched to heat pumps, particularly when combined with improved insulation and smart heating controls.

    [5] Q: What maintenance is required to keep low-carbon heating systems running efficiently?
    A: Low-carbon heating systems require regular maintenance to sustain performance. Heat pumps need annual servicing to check refrigerant levels, filter cleaning, and system diagnostics. Biomass boilers require ash removal after each burn cycle and annual professional inspection. Solar thermal systems need periodic checks of pipework and fluid levels. All renewable heating systems benefit from power flushing every 5-10 years to maintain efficiency. Smart heating controls should be checked to ensure they’re optimising your system’s performance. Schedule annual servicing with a qualified heating engineer to catch issues early and maintain your system’s warranty coverage.

    Frequently Asked Questions

    What is the most environmentally friendly heating system for a rural home without mains gas?

    Air source heat pumps and ground source heat pumps are the most environmentally friendly options for rural properties off the gas grid. Air source heat pumps extract heat from outside air and work efficiently even in cold climates, reducing carbon emissions significantly compared to oil or LPG boilers. Ground source heat pumps offer even higher efficiency if you have sufficient outdoor space for installation. Both qualify for the Boiler Upgrade Scheme, which provides grants to offset upfront costs. Biomass boilers using sustainably sourced wood pellets are also a strong renewable alternative if fuel supply is accessible.

    How does the Boiler Upgrade Scheme eligibility work for rural homeowners?

    The Boiler Upgrade Scheme provides grants towards the installation of heat pumps, biomass boilers, or solar thermal systems. Eligibility depends on your property being off the mains gas grid and having an EPC rating. Rural homes in areas like Crawley and surrounding Sussex typically qualify, as many are not connected to mains gas. You must use an approved installer, and the grant is applied directly to reduce your installation costs. Check with your local authority or an approved installer to confirm your property's eligibility and the specific grant amount available.

    What are the benefits of power flushing central heating systems before installing new eco-friendly heating?

    Power flushing removes sludge, rust, and debris from your existing central heating pipework, improving heat distribution and system efficiency. Before installing a new heat pump or hybrid heating system, power flushing ensures your radiators and pipes are clean, allowing the new system to operate at peak performance. This is particularly important in older rural properties where sediment buildup is common. A clean system reduces the risk of blockages, extends the lifespan of your new heating installation, and can improve energy efficiency. Professional power flushing should be performed by a qualified heating engineer as part of your heating upgrade.

    Are heat pumps suitable for older rural homes that need retrofitting?

    Yes, air source heat pumps can be retrofitted into older rural homes, though they perform best in well-insulated properties. Older homes may require radiator upgrades or the addition of underfloor heating to maximise heat pump efficiency, as heat pumps work best at lower flow temperatures. Before installation, conduct a heat loss calculation and consider improving insulation in lofts, walls, and around windows. Ground source heat pumps are also suitable for older properties if you have outdoor space for the ground loop. Many older rural homes have successfully switched to heat pumps, particularly when combined with improved insulation and smart heating controls.

    What maintenance is required to keep low-carbon heating systems running efficiently?

    Low-carbon heating systems require regular maintenance to sustain performance. Heat pumps need annual servicing to check refrigerant levels, filter cleaning, and system diagnostics. Biomass boilers require ash removal after each burn cycle and annual professional inspection. Solar thermal systems need periodic checks of pipework and fluid levels. All renewable heating systems benefit from power flushing every 5-10 years to maintain efficiency. Smart heating controls should be checked to ensure they're optimising your system's performance. Schedule annual servicing with a qualified heating engineer to catch issues early and maintain your system's warranty coverage.

    Get a Free Quote Today →

  • What Happens During Boiler Installation: Step-by-Step

    What Happens During Boiler Installation: Step-by-Step

    Table of Contents

    Last Updated: August 23, 2026

    What Happens During Boiler Installation: The Complete Process

    A new boiler installation is one of the most significant investments a homeowner can make for their heating system. Understanding what happens during boiler installation helps you prepare for the day itself and know what to expect from start to finish. At Apex Gas & Heating Ltd, we provide professional gas, heating, and plumbing services across Sussex and Surrey, ensuring properties remain safe, warm, and comfortable.

    This guide walks you through every stage of boiler installation, from the initial survey through to the final safety checks and commissioning, removing uncertainty and helping you feel confident about your investment.

    Boiler Installation Preparation Checklist

    Preparation is where successful boiler installations begin. The week before your installation appointment, clear the area around your existing boiler completely. Remove any items stored nearby, including cleaning products, tools, or decorative objects. Your Gas Safe engineer needs unrestricted access to the boiler and surrounding pipework. If your boiler is in a cupboard, empty it entirely.

    Protect your floors and furnishings by moving furniture away from the work area if possible. Arrange access to your home and ensure someone will be present throughout the installation day. The engineer needs unrestricted entry and may need to access different areas of your property, including the boiler location, flue route, gas supply point, and potentially your radiators.

    Check your water pressure and note the make and model of your existing boiler if you know it. Ensure your gas supply is accessible, as the Gas Safe engineer will need to inspect your gas supply pipework.

    Pro Tip
    Request a site visit survey before your installation date if you haven’t already had one. This allows the engineer to identify any potential issues, such as flue routing challenges or pipework that needs upgrading, before the installation day itself.

    Initial Survey and Assessment

    The installation process typically begins with a detailed survey. Your Gas Safe engineer will inspect your existing boiler and central heating system, check the age and condition of your current pipework, examine your flue system, and assess whether your gas supply meets current safety standards.

    The engineer will also check your water pressure and system drainage to understand how your current system operates. Building regulations compliance is checked during this phase, confirming that your flue routing meets current safety requirements and that your gas supply and ventilation are adequate for the new boiler. The survey also identifies the best location for your new boiler, though most replacements go in the same location as the old unit.

    How Long Does a Boiler Install Take?

    Most boiler installations take between 4 and 8 hours, depending on the complexity of your system and whether additional work is needed. A straightforward replacement of a like-for-like boiler in the same location typically takes 4 to 6 hours. If your installation involves system flushing, pipework upgrades, or relocating the boiler, expect 7 to 8 hours or potentially a second visit.

    Your engineer will give you a realistic time estimate during the survey or on the morning of installation.

    Key Takeaway
    Most homeowners should expect their boiler installation to take between 4 and 8 hours. Plan your day accordingly and ensure someone is home for the full duration.

    The Installation Day: Step-by-Step

    Installation day is where all the preparation comes together. Here’s what actually happens during boiler installation, stage by stage.

    Removal of the old boiler

    The engineer begins by isolating your old boiler from the gas supply, water supply, and central heating system. This involves closing isolation valves on the gas inlet and the water pipes connected to the boiler. The boiler is then carefully disconnected from the pipework. If your system contains water, it will be drained into a container. Once removed, the engineer will cap off any open pipes to prevent debris from entering the system.

    Professional Gas Safe engineer in uniform carefully disconnecting pipework from an old boiler mounted on a kitchen wall, with protective plastic sheeting visible around the work area and isolation valves clearly shown
    Professional Gas Safe engineer in uniform carefully disconnecting pipework from an old boiler mounted on a kitchen wall, with protective plastic sheeting visible around the work area and isolation valves clearly shown

    System flushing and pipework upgrades

    Before the new boiler is installed, your central heating system may need flushing, especially if it’s more than 10 years old or if the engineer has identified sludge or corrosion during the survey. A system flush removes debris, rust particles, and deposits that can damage the new boiler’s heat exchanger and reduce efficiency.

    System flushing involves circulating a cleaning chemical through your radiators and pipework using a temporary pump, typically taking 1 to 2 hours. The dirty water is then drained and replaced with fresh water. Pipework upgrades happen at this stage if needed, with older copper pipework sometimes requiring replacement or isolation valves needing upgrading to meet current safety standards.

    Installation of the new unit

    Once the system is clean and any pipework is complete, the new boiler is positioned on the wall or stand and securely fixed. The boiler is then connected to the water supply, gas supply, and central heating pipework. Each connection is carefully made and tested for leaks. Your new boiler‘s expansion vessel is also checked and pressurised to the correct level, as this component absorbs pressure changes in the system and is critical for safe operation.

    The condensate pipe is connected next. This small pipe drains acidic condensation that forms when the boiler burns gas and must slope downward slightly to allow proper drainage.

    Flue and gas connection

    The flue system is one of the most critical safety elements of boiler installation. Your engineer will inspect the existing flue route and confirm it meets current safety standards. If the old flue can be reused, it will be carefully connected to the new boiler. If it needs replacing, new flue pipe is installed.

    The flue must be properly supported and routed to exit your property safely, with the flue termination at least 600mm away from windows, doors, and air vents to prevent combustion gases from being drawn back into your home (hse.gov.uk). The gas supply connection is made next, with the engineer connecting the boiler to your gas supply pipework using appropriate fittings. A gas leak test is performed using specialist equipment to confirm there are no leaks anywhere in the system.

    Get a Free Quote Today →

    Testing and commissioning

    Once the boiler is installed and all connections are made, comprehensive testing begins. The engineer fires up the boiler and checks that it ignites properly and operates safely. Water pressure is checked and adjusted if necessary, with most boilers operating best at 1 to 1.5 bar pressure.

    A carbon monoxide test is performed using a CO detector to confirm that combustion is clean and that no dangerous carbon monoxide is entering your home. The thermostat is tested to ensure it controls the boiler correctly. If you’re installing a smart thermostat, the engineer will programme it and show you how to use it. The boiler’s flow temperature is set, controlling how hot the water circulating through your radiators becomes and directly affecting your heating efficiency and comfort.

    All radiators are checked to ensure they’re heating properly and bleeding is performed where needed. Your engineer will provide you with all warranty documentation and explain what’s covered.

    Watch Out
    Never attempt to adjust your boiler’s settings or safety controls yourself after installation. If something doesn’t feel right, unusual noises, poor heating, or water dripping, contact a Gas Safe engineer immediately.

    New Boiler Installation Building Regulations

    Building regulations exist to ensure boiler installations are safe and meet current standards. In England, boiler installations must comply with Building Regulations Part L, which covers conservation of fuel and power (gov.uk). This regulation requires that your new boiler is efficient, with modern condensing boilers typically achieving 90%+ efficiency.

    Gas safety is governed by the Gas Safety (Installation and Use) Regulations. Your Gas Safe engineer is registered with the Gas Safe Register and is legally qualified to work on gas appliances. If your boiler installation involves changes to your building’s structure, such as new flue penetrations through walls or roofs, building regulation approval may be required before work begins.

    Your engineer will provide you with a certificate of installation once the work is complete. This document proves that your boiler has been installed by a qualified Gas Safe engineer and meets all safety and building regulation requirements. Keep this certificate safe for insurance purposes, property sales, or future servicing.

    Post-Installation Troubleshooting and Smart Controls

    After your boiler installation is complete, the first few weeks are important for understanding how your new system operates. Water pressure often drops slightly in the first week as the system finds its equilibrium. Check your boiler’s pressure gauge regularly. If pressure falls below 1 bar, you’ll need to repressurise the system by opening a small valve on the boiler until pressure reaches 1.2 to 1.5 bar, then closing the valve.

    Air in the system can cause radiators to heat unevenly or make gurgling noises. Bleeding radiators (opening the bleed valve at the top of each radiator) releases trapped air. Start with radiators furthest from the boiler and work toward it.

    Strange noises from your new boiler are common initially. A slight humming from the pump or occasional clicking as the boiler cycles on and off is normal. Loud banging, persistent kettling sounds, or unusual vibration should be reported to your engineer.

    Smart thermostat integration is one of the most valuable additions to modern boiler installations. If you’ve installed a smart thermostat, take time to learn its features. Most smart thermostats allow you to control heating remotely via an app, set schedules, and monitor energy usage, potentially reducing your heating bills through better control and awareness.

    Flow temperature adjustment can significantly improve efficiency. Your boiler’s flow temperature determines how hot the water circulating through your radiators becomes. Modern condensing boilers operate most efficiently at lower flow temperatures, typically 55-60°C for systems with good insulation (peer-reviewed research).

    Close-up of an engineer's hands adjusting the flow temperature dial on a new boiler's control panel, with a smart thermostat visible on the wall in the background and digital readout showing temperature settings
    Close-up of an engineer's hands adjusting the flow temperature dial on a new boiler's control panel, with a smart thermostat visible on the wall in the background and digital readout showing temperature settings

    Maintenance after installation is straightforward but essential. Annual boiler servicing keeps your system running safely and efficiently, extending your boiler’s lifespan significantly. Register your boiler’s warranty immediately after installation, as most manufacturers offer 5 to 10-year warranties on parts but require registration within a set timeframe, usually 30 days of installation.


    Understanding what happens during boiler installation removes the uncertainty from one of your home’s most important systems. From the initial survey through to the final safety checks and commissioning, every stage serves a purpose, ensuring your new boiler operates safely, efficiently, and reliably for years to come. At Apex Gas & Heating Ltd, we handle boiler installations across Sussex and Surrey with the attention to detail and transparent communication that homeowners deserve. Our Gas Safe engineers manage every aspect of the process, from system flushing and pipework upgrades through to smart thermostat integration and post-installation support. Get a quote for your new boiler installation and discover why homeowners throughout the region trust us to keep their heating systems running safely and efficiently.

    Frequently Asked Questions

    How long does a boiler installation take?

    A typical boiler installation takes between 4 to 8 hours, depending on the complexity of your heating system and whether pipework upgrades are needed. If your old boiler requires removal and system flushing is necessary, installation may extend towards the upper end. Our Gas Safe engineers will provide a more precise timescale during the initial survey.

    What should I do to prepare my home for a boiler installation?

    Clear the area around your current boiler, ensure access to all radiators, and move any valuables or furniture away from the work zone. Protect carpets and flooring with sheeting. Ensure your home is accessible on the installation day and that someone is present throughout. Confirm water and gas supply isolation points are known and accessible to your engineer.

    Will my heating be turned off during the boiler installation?

    Yes, your heating will be switched off during the installation process for safety reasons. The duration depends on how quickly your engineer completes the work. Most installations are completed within a single day, and your heating will be fully commissioned and operational by the end. Plan accordingly, especially during winter months.

    What safety checks are performed after a new boiler is fitted?

    After installation, your Gas Safe engineer conducts thorough commissioning tests including gas pressure checks, water pressure verification, flue safety inspection, and carbon monoxide alarm testing. The engineer also verifies that all isolation valves, the expansion vessel, and the condensate pipe are functioning correctly. A full safety check ensures your new heating system meets Building Regulations and operates safely.

    Get a Free Quote Today →

  • How to Find Reliable Emergency Plumbers in Surrey

    How to Find Reliable Emergency Plumbers in Surrey

    Table of Contents

    Last Updated: August 22, 2026

    What Counts as a Plumbing Emergency

    A plumbing emergency is any issue that threatens your property’s safety, comfort, or structural integrity and requires immediate attention. The distinction matters because not every plumbing problem demands a 24-hour callout, understanding what truly qualifies helps you avoid unnecessary emergency charges and respond appropriately when time genuinely is critical.

    Common plumbing emergencies include burst pipes, which can flood your home within minutes and cause thousands in water damage. Severe leaks from under-sink pipes, toilet overflows that contaminate living spaces, and complete loss of water supply also fall into this category. Gas-related issues, such as suspected gas leaks detected by smell or audible hissing, demand immediate professional attention for safety reasons. Blocked drains that back sewage into your home pose health hazards and require urgent intervention.

    Less urgent issues include minor dripping taps, slow-draining sinks, or a single running toilet, these can usually wait for a standard appointment during business hours. The key question: is this problem getting worse by the hour, or is it manageable overnight? If your answer is the former, you likely need an emergency plumber.

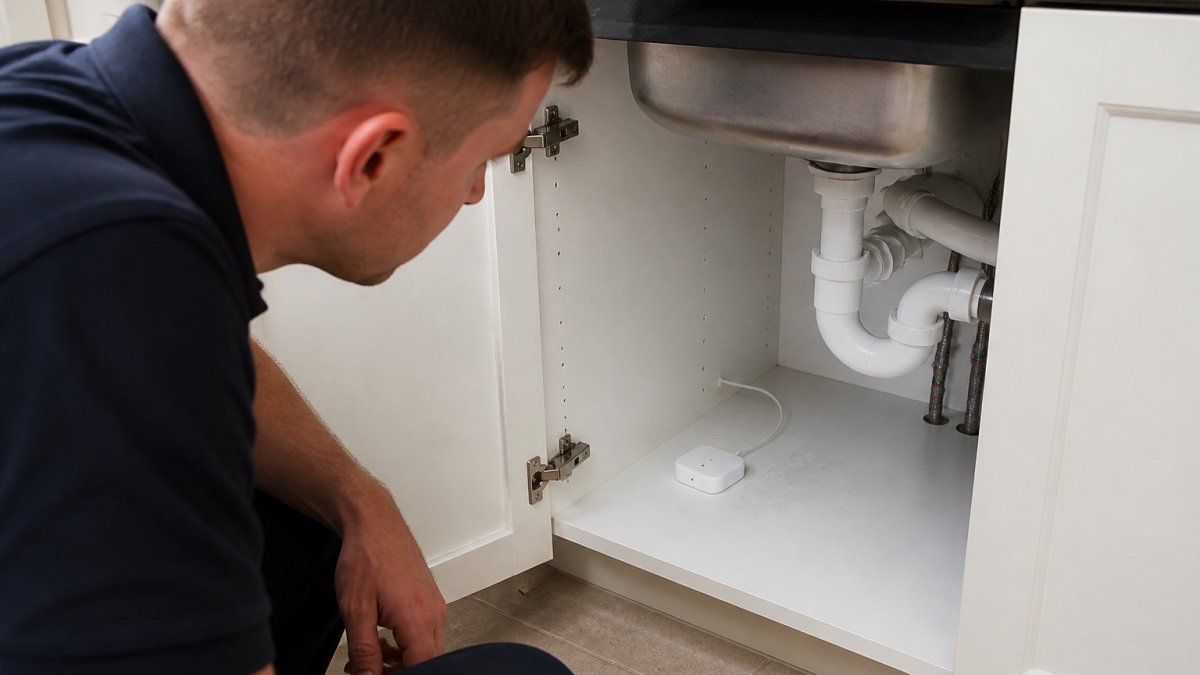
    Homeowner examining a burst pipe under a kitchen sink with water actively dripping, hands visible assessing the damage with concern
    Homeowner examining a burst pipe under a kitchen sink with water actively dripping, hands visible assessing the damage with concern

    When you contact an emergency plumbing service, they’ll ask specific questions to assess urgency. Be ready to describe the issue clearly: where the problem is, how long it’s been happening, and whether water is actively escaping. This information helps the dispatcher prioritise your call and dispatch the right engineer with appropriate tools.

    Immediate Stop-Gap Measures Before Help Arrives

    The minutes between discovering a plumbing emergency and the engineer arriving are crucial. Taking swift action can prevent catastrophic water damage and reduce repair costs significantly.

    Locate and shut off your water supply immediately. Every home has a stopcock, usually under the kitchen sink, in the bathroom, or near the water meter. Turn it clockwise to stop water flowing to the affected area or the entire house. If you’ve never found your stopcock, locate it now before an emergency happens. Knowing its exact position could save you thousands in damage.

    For burst pipes or severe leaks: Turn off the water supply first, then open taps to drain remaining water from the system. Place towels or buckets under the leak to contain water and protect flooring. If water is near electrics, switch off the relevant circuit breaker at your consumer unit.

    For toilet overflows: Stop water entering the cistern by lifting the float arm or turning off the isolation valve (usually found on the pipe entering the toilet). Use a plunger if the blockage is minor, or mop up excess water with towels.

    For suspected gas leaks: Do not use electrical switches, naked flames, anything that might create a spark. Open windows for ventilation, evacuate the property, and call your gas supplier’s emergency line immediately, this takes priority over calling a plumber.

    Close-up of a homeowner's hand turning off a water stopcock valve under a sink, with visible brass fittings and copper pipes, modern kitchen cabinet visible
    Close-up of a homeowner's hand turning off a water stopcock valve under a sink, with visible brass fittings and copper pipes, modern kitchen cabinet visible

    Document the damage with photos if it’s safe to do so. This helps your insurance claim and gives the engineer context when they arrive. Turn off heating if water has affected electrics or boilers, never assume wet electrics are safe.

    Verify Gas Safe Registration and Credentials

    When an emergency plumber arrives at your door, you need absolute confidence they’re qualified and legitimate. Gas Safe registration is the legal requirement in the UK for anyone working with gas appliances or pipework, it’s not optional, and it’s not a suggestion.

    Gas Safe registration is mandatory (gassaferegister.co.uk). Any engineer working on gas boilers, pipework, or appliances must be on the Gas Safe Register. You can verify this instantly online at the Gas Safe Register website by entering the engineer’s name or their registration number. Legitimate engineers carry a Gas Safe ID card, ask to see it before work begins. The card displays their name, registration number, and the specific categories they’re qualified to work on.

    Public liability insurance is equally essential. This protects you if the engineer causes accidental damage to your property during repairs. Request evidence of current insurance before work starts, a certificate or policy document. Reputable services carry full public liability insurance as standard, giving you peace of mind.

    Beyond Gas Safe registration, check whether the engineer holds qualifications specific to your boiler brand. Worcester and Glowworm boilers, for example, have approved installer networks. Approved installers receive manufacturer training and can offer extended warranties on work. Ask directly: "Are you an approved installer for this boiler brand?" If they hesitate or can’t confirm, that’s a red flag.

    Request references from previous customers if you’re unsure. Trustworthy emergency plumbers have no problem providing contact details for recent jobs. A quick call to a previous customer takes five minutes and confirms whether the service delivered what it promised.

    Understanding Emergency Plumbing Call-Out Fees

    Emergency call-out fees vary, and understanding the structure helps you budget and avoid surprises. Most emergency services charge a callout fee, which covers the engineer’s time to attend, diagnose the problem, and provide a quote for repairs.

    The callout fee typically covers the first 30 to 60 minutes of work. After that, you’re charged hourly rates for labour, plus the cost of parts and materials. Some services include a fixed callout fee regardless of how quickly they resolve the issue; others charge hourly from the moment they arrive. Ask which model applies before they begin work.

    Parts and materials are charged separately from labour. Professional plumbing services provide transparent pricing upfront, so you know exactly what you’re paying for before work starts, no hidden charges or surprise invoices.

    Weekend and late-night premiums are common. Calling out an engineer at 2 a.m. on a Sunday costs more than a Monday morning appointment. Some services charge more for out-of-hours work. Budget accordingly if you’re calling during unsociable hours, though genuine emergencies obviously can’t wait.

    Always ask for a quote before authorising repairs. Reputable emergency plumbers will diagnose the problem, explain what needs fixing, and provide a price. If the quote seems high, ask why, sometimes the cost reflects the urgency and complexity, sometimes it reflects the service’s pricing model. Compare quotes from multiple providers if you have time, but don’t delay treatment for a genuine emergency waiting for cheaper quotes.

    Key Questions to Ask Before Booking

    The conversation with an emergency plumber sets expectations and filters out unreliable operators. These questions reveal whether you’re dealing with a professional service or an opportunist.

    "How quickly can you attend?" Legitimate emergency services promise specific response times, typically 1 hour or less. If they say "sometime today" or "probably within a few hours," they’re not operating a true emergency service. A 24/7 emergency call-out service guarantees rapid response, which matters when water is actively damaging your home.

    "Will you provide a quote before starting work?" Professional plumbers diagnose the problem, explain what’s wrong, and quote the repair cost before touching anything. If they refuse to quote upfront or insist on starting work immediately without explanation, walk away. Even in emergencies, a five-minute conversation about costs is reasonable.

    "Are you Gas Safe registered?" This is non-negotiable for any gas or boiler work. They should answer confidently and offer to show their card. Hesitation or vagueness is a warning sign.

    "What’s included in your callout fee?" Does it cover 30 minutes of diagnosis? An hour? Is there a minimum charge if the job takes less time? Understanding this prevents disputes later.

    Get a Free Quote Today →

    "Do you offer any guarantee on your work?" Reputable services guarantee their labour for a period, typically 12 months. If they won’t guarantee work, question why.

    "Can you provide references from recent customers?" A genuine emergency service has happy customers willing to vouch for them. If they can’t or won’t provide references, that’s suspicious.

    "Are you insured?" They should confirm public liability insurance without hesitation. Ask to see the certificate if you’re uncertain.

    These questions take two minutes but reveal a lot about professionalism and reliability.

    How to Find Reliable Emergency Plumbers in Your Area

    Finding a trustworthy emergency plumber before you need one is smarter than searching frantically when disaster strikes. A few practical strategies separate reliable operators from cowboys.

    Start with local recommendations. Ask neighbours, friends, and family who they’ve used for emergency plumbing. Personal referrals carry weight because they’re based on real experience. If three people independently recommend the same plumber, that’s strong evidence of reliability.

    Check online reviews carefully. Google, Trustpilot, and local business directories publish customer feedback. Read recent reviews, not just the star rating, but what customers actually say. Look for patterns: do multiple reviews mention fast response times, fair pricing, and professional behaviour? Or do complaints centre on hidden charges and poor workmanship? A service with dozens of five-star reviews and a handful of one-star complaints is normal; a service with mostly negative feedback is not.

    Verify credentials online. Visit the Gas Safe Register and search for the plumber’s name or registration number before booking. This takes 30 seconds and confirms they’re legitimate. Check their website for evidence of insurance, qualifications, and service guarantees.

    Ask about their local area coverage. Some emergency services cover specific postcodes; others operate across wider regions. Confirm they service your location and understand typical response times for your area. Local teams that know the region well, such as those serving Crawley and across Surrey, provide consistent 24/7 availability.

    Interview multiple services. Call three or four emergency plumbers and compare their answers to the questions outlined above. Note their response times, pricing transparency, and willingness to explain their service. The one that sounds most professional and confident is usually your safest bet.

    Prepare a shortlist before emergencies happen. Save the contact details of two or three reliable emergency plumbers in your phone. When a crisis occurs, you can call immediately rather than searching online under stress. This decision-making in advance leads to better choices than panic-driven calls.

    What to Expect From a Trustworthy Emergency Service

    Understanding what professional emergency plumbing looks like sets realistic expectations and helps you spot red flags.

    A trustworthy service answers your call promptly, ideally within minutes during business hours, and within a reasonable timeframe at night or weekends. They listen carefully to your description of the problem and ask clarifying questions. They provide an honest assessment: "This needs immediate attention" or "This can wait until morning." They don’t manufacture urgency to justify high charges.

    The engineer arrives within their quoted response time, properly equipped and in professional attire. They introduce themselves, confirm your address, and explain what they’ll do before starting work. They protect your property, laying down coverings before working on pipes, using appropriate tools, and cleaning up afterwards.

    They diagnose the problem systematically. A good plumber explains what’s wrong in language you understand, not technical jargon designed to confuse. They show you the problem if possible, pointing out the burst pipe, the blocked drain, or the faulty valve. They explain why it happened and what options exist to fix it.

    They provide a written quote before proceeding, unless you’ve explicitly authorised them to start work immediately (rare, even in emergencies). The quote itemises labour costs, parts, and any additional charges. They answer questions about the quote without becoming defensive.

    They complete the work efficiently and test it thoroughly. A toilet repair isn’t finished until they’ve flushed it multiple times and confirmed it operates correctly. A burst pipe repair isn’t done until they’ve checked for leaks and confirmed water pressure is normal.

    They provide documentation, a receipt, an invoice, details of parts installed, and any guarantees on their work. They leave contact details for follow-up questions or future service needs.

    Throughout the process, they communicate clearly. They don’t disappear for hours without explanation. They update you on progress and flag any complications that might affect cost or timeline. This transparency builds trust and prevents unpleasant surprises.


    Finding a reliable emergency plumber in your area means preparing before crisis strikes. Verify Gas Safe registration, check references, compare response times, and build relationships with local services you trust. When an emergency does occur, and for many homeowners, it will, you’ll have confidence in who you’re calling. A professional team offering 24/7 emergency call-out service with transparent pricing and qualified engineers means you can respond to plumbing emergencies with professional support and peace of mind. Get a quote today and add a reliable emergency contact to your phone.

    Frequently Asked Questions

    Q: How do I verify if a plumber is Gas Safe registered?

    A: Check the Gas Safe Register online using the engineer's name or company registration number. Gas Safe registration is a legal requirement for anyone working on gas appliances or pipework. Ask the plumber directly for their registration number before booking, and cross-reference it on the official Gas Safe website. Never hire someone who cannot provide proof of current registration, as this indicates they are not qualified to work on gas systems safely.

    Q: What should be included in a plumbing emergency checklist?

    A: Your plumbing emergency checklist should include: locating and turning off your main water stopcock, identifying the affected area, checking for visible damage or leaks, documenting the problem with photos, noting the time it started, and gathering information about your property's age and previous plumbing issues. Have this information ready when you call an emergency plumber, it helps them assess the severity and arrive prepared with the right tools and parts.

    Q: What are typical emergency plumbing call-out fees?

    A: Emergency plumbing call-out fees vary depending on the time of day, location, and complexity of the problem. Most emergency services charge a call-out fee to attend your property, with additional charges for labour and materials. Pricing depends on the specific issue, your location within the region, and whether the repair can be completed during the first visit. Always ask for a transparent quote before work begins, and confirm whether the call-out fee is deductible from the final invoice if you proceed with repairs.

    Q: What questions should I ask an emergency plumber over the phone?

    A: Ask: How long until they can arrive? What is the call-out fee? Are they Gas Safe registered? Do they have public liability insurance? Can they provide a quote before starting work? What payment methods do they accept? Are they local to your area? Have they dealt with your type of problem before? Can they guarantee their work? These questions help you assess reliability, confirm credentials, and understand costs before committing.

    Get a Free Quote Today →

  • How to Shut Off Water During a Pipe Burst

    How to Shut Off Water During a Pipe Burst

    Table of Contents

    Last Updated: August 21, 2026

    Act Immediately When a Pipe Bursts

    A burst pipe is one of the most urgent plumbing emergencies you’ll face as a homeowner (the CDC). Water floods into your property at alarming speed, causing structural damage, mould growth, and electrical hazards within hours (hse.gov.uk). The key to minimising damage is knowing how to shut off water during a pipe burst before calling an emergency plumber.

    Your first action must be to locate and turn off the main water supply. This single step stops the flow of water and prevents further damage to your home. Every second counts in this situation, the faster you act, the less water escapes into your walls, floors, and foundations.

    At Apex Gas & Heating Ltd, we’ve responded to countless burst pipe emergencies across Sussex and Surrey. What we’ve learned is that homeowners who know where their stopcock is and how to operate it recover far more quickly than those who don’t. This guide walks you through the exact steps to take when a pipe bursts, from finding your main stopcock to protecting your property while you wait for professional help.

    How to Find the Main Stopcock

    The main stopcock (also called the main water shut-off valve) is the control point for your entire water supply. Finding it quickly during an emergency can mean the difference between a contained incident and catastrophic water damage.

    Common stopcock locations

    Most stopcocks are located inside your property, usually in one of these places:

    • Under the kitchen sink, the most common location in modern homes
    • In a cupboard near the front door, often in the hallway or under the stairs
    • In the bathroom, sometimes under the sink or behind the toilet
    • In the basement or cellar, if your property has one
    • Outside the property, in a small pit or chamber in your front garden or driveway, marked with a cover

    If you haven’t located your stopcock before an emergency, check these areas methodically. Look for a small brass or plastic tap, usually with a handle or oval knob. In older properties, you might find a gate valve (a larger, square-topped valve) instead of a modern quarter-turn stopcock.

    Homeowner's hand pointing to a brass stopcock valve located under a kitchen sink with visible copper pipes and white cabinet interior in bright natural light
    Homeowner's hand pointing to a brass stopcock valve located under a kitchen sink with visible copper pipes and white cabinet interior in bright natural light

    Once you’ve found it, mark its location clearly or take a photo on your phone. During an emergency, you won’t have time to search. If you can’t locate your stopcock before a burst occurs, contact your water supplier, they can tell you exactly where it is, and some will send someone to help you access it.

    Identifying different valve types

    Not all stopcocks look the same, and understanding what you’re looking at prevents costly mistakes during an emergency.

    Quarter-turn ball valves are the modern standard. They have a small handle or lever perpendicular to the pipe. These are quick to operate, a 90-degree turn shuts off the water completely. You’ll feel a definite resistance when the valve is fully closed.

    Gate valves are older and larger, with a square or rectangular knob on top. These require multiple full rotations (usually 4-6 turns) to close completely. They’re slower to shut off but equally effective once fully closed.

    Screw-down stopcocks have a round handle that you turn clockwise to close. These are less common in modern homes but still found in older properties. They require continuous turning until you feel resistance.

    Whichever type you have, never force it. If a valve feels stuck or seized, stop immediately and call an emergency plumber. Forcing a stuck valve can break the handle or damage the valve mechanism, making the situation worse.

    Turning Off the Main Water Supply

    Once you’ve located your stopcock, the actual process of shutting off the water is straightforward, but precision matters.

    Quarter-turn valves versus gate valves

    For quarter-turn ball valves: Turn the handle a quarter-turn (90 degrees) so it sits perpendicular to the pipe. The handle should move from parallel (open) to perpendicular (closed). You’ll feel a slight resistance as you reach the closed position. Don’t over-tighten, a quarter-turn is all that’s needed.

    For gate valves: Turn the handle clockwise slowly and steadily. Count the rotations as you go, typically 4-6 full turns will close the valve completely. Stop when you feel resistance; don’t force it past that point. Forcing a gate valve can damage the internal gate mechanism.

    For screw-down stopcocks: Turn the handle clockwise until you feel firm resistance. This indicates the valve is fully closed. Again, don’t force it.

    The direction matters: clockwise always closes, counter-clockwise opens. If you’re unsure, turn the handle slowly in one direction while watching the water flow from a nearby tap. When the water stops, you’ve closed it correctly.

    Hands in close-up demonstrating a quarter-turn valve being rotated clockwise with a wrench, showing correct hand positioning and the valve lever moving from horizontal to vertical position
    Hands in close-up demonstrating a quarter-turn valve being rotated clockwise with a wrench, showing correct hand positioning and the valve lever moving from horizontal to vertical position

    What to do if the stopcock is stuck

    A seized stopcock is a common problem in older homes, especially if the valve hasn’t been used in years. Mineral deposits and corrosion lock the mechanism in place.

    If your stopcock won’t turn, stop immediately. Forcing it risks breaking the handle or the valve body itself, which could make the emergency worse.

    Try these steps before giving up:

    • Apply penetrating oil, spray WD-40 or a similar penetrating lubricant around the valve handle and let it sit for 10-15 minutes. This can help loosen mineral deposits.
    • Use a wrench or adjustable spanner, grip the handle firmly with a wrench to increase leverage. Turn slowly and steadily, not with sudden jerks.
    • Tap gently with a hammer, sometimes a light tap on the valve body (not the handle) can dislodge corrosion. Tap gently, then try turning again.
    • Apply heat, in cold weather, a burst pipe might be frozen. Warm water (not boiling) poured carefully around the stopcock can help it move.

    If none of these work, call an emergency plumber immediately. They have specialist tools to open stuck valves without damage. In the meantime, if water is still flowing, try to contain it by placing buckets or towels under the burst and turning off individual taps in affected areas.

    How to Drain Down a Plumbing System

    Shutting off the main stopcock stops new water entering your system, but your pipes still contain water under pressure. This water will continue to leak from the burst until you release the pressure and drain the system.

    Opening taps throughout your home allows air into the pipes and lets remaining water drain out. Start with the lowest tap in your property (usually the kitchen sink or an external tap) and work upwards.

    Step-by-step drainage:

    1. Open the lowest tap fully and let water run until it stops
    2. Move to the next highest tap and open it completely
    3. Continue working upwards through your home, bathroom taps, shower, upstairs taps
    4. Leave all taps open for at least 5-10 minutes to ensure the system is fully drained
    5. If you have a boiler or heating system, turn it off before draining (see below)

    This process relieves the water pressure throughout your plumbing system and prevents further water loss from the burst.

    Opening taps to relieve water pressure

    Water pressure in a plumbing system can be 40-60 psi (pounds per square inch) when the main stopcock is closed (fema.gov). This pressure forces water out of any break or weak point in your pipes.

    Opening taps breaks this pressure seal. As you open each tap, you’ll hear air rushing in and water draining out. This is exactly what you want, the air replaces the water and stops the pressure building up again.

    Start with taps nearest to the burst if you know where it is. This drains water from that section first, reducing the flow from the damaged pipe. Then work systematically through the rest of the house.

    Don’t close the taps again until you’ve had the burst repaired. Leaving them open prevents pressure from building if any water somehow enters the system before the repair is complete.

    Protecting Your Home After Shutting Off Water

    Once the water is off and the system is drained, your immediate emergency is contained. But water damage continues even after the flow stops. Quick action in the first few hours prevents mould, structural damage, and costly repairs.

    Immediate steps:

    • Remove standing water, use towels, mops, or a wet vacuum to remove water from floors and carpets. The faster you dry the area, the less damage occurs.
    • Increase ventilation, open windows and doors to dry out the affected area. Turn on any available fans or dehumidifiers.
    • Move furniture and belongings, lift items away from wet areas to prevent water absorption and staining.
    • Document the damage, take photos and videos of all affected areas for insurance purposes.
    • Contact your insurance company, report the burst immediately. Most policies cover burst pipe damage, but you need to report it promptly.
    • Turn off your boiler, if the burst is near your heating system or boiler, turn it off to prevent damage to the appliance.

    If water has entered electrical circuits or appliances, don’t touch them. Turn off the electricity at the consumer unit (fuse box) if water is near any electrical installations, and call a qualified electrician.

    When to Call an Emergency Plumber

    Knowing when to call a professional is as important as knowing how to shut off the water yourself. Some bursts you can manage temporarily; others require immediate professional intervention.

    Call an emergency plumber immediately if:

    • You cannot locate or access your main stopcock
    • Your stopcock is stuck or broken and won’t turn off
    • The burst is in an inaccessible location (inside walls, under floors, in the roof)
    • Multiple pipes have burst or you have widespread water damage
    • The burst is near your boiler, heating system, or electrical installations
    • Water is entering your electrics or you smell gas
    • You have a burst in an external pipe or water meter

    You can wait a few hours if:

    • The burst is in a visible, accessible location (under a sink, for example)
    • You’ve successfully shut off the water and drained the system
    • The damage is contained to one room
    • You’ve documented everything for insurance

    Apex Gas & Heating Ltd operates a 24/7 emergency call-out service for burst pipes and other plumbing services across Sussex and Surrey, including areas like Crawley. Our team can locate and repair the burst, and advise on water damage mitigation. If you’re dealing with a burst near your boiler or heating system, we can assess whether your appliance has been damaged and arrange boiler repair or replacement if needed.

    Don’t delay calling if you’re unsure. The cost of an emergency call-out is far less than the cost of water damage spreading through your property over several hours.

    Conclusion

    A burst pipe demands immediate action, but you’re not helpless. Finding your main stopcock, turning it off, and draining your plumbing system are skills any homeowner can master in minutes. These steps stop the emergency and give you time to call professional help.

    The difference between a contained incident and a disaster is how quickly you act. Knowing where your stopcock is before an emergency happens means you can shut off the water in seconds, not minutes. Practise locating it now, while there’s no pressure. Take a photo. Tell your family where it is.

    When a burst does occur, and for many homeowners, it will, you’ll be ready. Shut off the water, drain the system, protect what you can, and call Apex Gas & Heating Ltd. Our emergency plumbers are available 24/7 to repair the burst, assess any damage to your boiler or heating system, and get your home back to normal.

    Frequently Asked Questions

    Q: Where is the main stopcock usually located in a home?

    A: The main stopcock is typically found under the kitchen sink, in the bathroom, or in a cupboard near the external water meter. Some properties have it in the garage, utility room, or outside in a pit beneath a metal cover. Check your water meter documentation or contact your water supplier if you cannot locate it. Knowing this location before an emergency means you can act fast when a pipe bursts.

    Q: How do I turn off the water supply if the stopcock is stuck?

    A: If the stopcock won't turn, do not force it as you may damage the valve. Wrap a cloth around it for better grip, then apply gentle, steady pressure. For a severely seized valve, use a pipe wrench or adjustable spanner to increase leverage. If it remains stuck, locate your water meter's service valve as a backup shut-off point. Call an emergency plumber immediately if neither option works, as you need the water off quickly during a burst pipe emergency.

    Q: What should I do immediately after a pipe bursts?

    A: First, shut off the water at the main stopcock by turning it clockwise until it stops. Then open all taps to drain remaining water from the system and relieve pressure. Turn off your boiler and heating system to prevent damage. Move furniture and belongings away from the burst area, and place towels or buckets under the leak. Contact an emergency plumber straight away. Document the damage with photos for your insurance claim.

    Q: Should I turn off the electricity if a pipe bursts?

    A: If water is near electrical sockets, switches, or appliances, turn off the electricity at the consumer unit as a precaution. Do not touch electrical equipment if it is wet. If water has entered the boiler or heating system, switch off power to those units immediately. Once you have shut off the water at the main stopcock and drained the system, the electrical risk reduces, but always prioritise safety and contact a qualified engineer if you are unsure.


    If you’re facing a burst pipe right now or need professional plumbing assistance, Apex Gas & Heating Ltd provides rapid emergency response across Sussex and Surrey. Our licensed plumbers can locate and repair burst pipes, assess damage to your heating system, and provide transparent advice on what comes next. Get a Quote or call our 24/7 emergency line to speak with a plumber today.

    Get a Free Quote Today →

  • Annual Boiler Service for Landlords: Key Benefits

    Annual Boiler Service for Landlords: Key Benefits

    Table of Contents

    Last Updated: August 20, 2026

    Why Annual Boiler Service Matters for Landlords

    An annual boiler service for landlords is a legal requirement with serious consequences if neglected. Landlords who skip servicing risk tenant safety, property damage, insurance disputes, and regulatory penalties. At Apex Gas & Heating Ltd, we’ve seen the fallout when boiler maintenance is treated as optional rather than essential.

    Your boiler is a pressurised gas appliance operating in someone else’s home. You’re legally responsible for its safety. A service catches problems before they become emergencies: carbon monoxide leaks, pressure failures, heat exchanger cracks. These aren’t theoretical risks. When they occur, the landlord pays the price.

    This guide covers what an annual service protects, why the legal requirement exists, and how to manage servicing across your rental portfolio.

    Landlord Gas Safety Certificate Requirements

    Your legal obligation is clear: every gas appliance in a rental property must be inspected annually by a Gas Safe registered engineer, and you must provide a copy of the Landlord Gas Safety Record (CP12 certificate) to your tenants within 30 days of inspection.

    The Gas Safety (Installation and Use) Regulations 1998 mandates this. Failure to comply carries fines up to £6,000 per property, potential prosecution, and in worst-case scenarios, criminal liability if a tenant is harmed. Local authorities and letting agents regularly inspect compliance records.

    The certificate covers all gas appliances: boiler, cooker, fire, water heater, or any other gas-powered equipment. The engineer inspects each one and flags safety concerns. You must keep records for at least two years and provide proof to your local authority if asked.

    Many landlords use the annual inspection as their service appointment. A safety certificate confirms the boiler is safe to use; a full service includes cleaning, testing, and adjusting components to maintain efficiency and catch wear before it becomes dangerous.

    Watch Out
    Failing to obtain a Gas Safety Certificate is a criminal offence. Tenants have the right to report you to the Health and Safety Executive, and enforcement action can include prosecution, fines, and prohibition from letting properties. Document everything and keep copies of certificates for at least two years.

    Safety Benefits: Carbon Monoxide Prevention and Fault Detection

    Carbon monoxide is a colourless, odourless gas produced when fuel burns incompletely. A faulty boiler can leak CO into your property without obvious signs. Exposure causes headaches, dizziness, nausea, and in severe cases, death.

    During an annual service, a Gas Safe registered engineer performs a flue gas analysis, measuring combustion efficiency and carbon monoxide levels in the boiler’s exhaust. If CO levels are too high, the engineer identifies the cause, often a cracked heat exchanger or blocked flue, and either repairs it or condemns the boiler. This test prevents silent poisoning.

    A Gas Safe registered engineer performing a flue gas analysis test on a boiler, holding diagnostic equipment near the combustion chamber with a digital meter visible, in a residential kitchen setting with natural light
    A Gas Safe registered engineer performing a flue gas analysis test on a boiler, holding diagnostic equipment near the combustion chamber with a digital meter visible, in a residential kitchen setting with natural light

    The service identifies other faults early: worn components, pressure problems, leaking condensate traps, and inefficient combustion. Many issues develop slowly. A tenant might notice the boiler cycling more frequently or radiators warming slowly but won’t report it because the system still works. By the time it fails completely, damage is extensive.

    The engineer also checks the flue, the pipe venting combustion gases outside. A blocked or damaged flue forces exhaust back into the property, creating a CO risk. Regular servicing keeps the flue clear and functional.

    Pro Tip
    Request a copy of the service report after each annual inspection. It documents the boiler’s condition, any repairs made, and concerns flagged. This record protects you if a tenant later claims the boiler was unsafe, you have proof it was serviced and compliant.

    How Long Does a Boiler Service Take

    A standard boiler service typically takes 60 to 90 minutes. The engineer inspects the boiler externally and internally, cleans components, tests safety controls, performs the flue gas analysis, and documents everything. For straightforward boilers in good condition, you’re at the lower end of that range.

    If the engineer discovers a fault, the appointment extends. A simple fix might add 30 minutes. More complex repairs, like replacing a heat exchanger, can take several hours and may require a follow-up visit.

    Coordinating Tenant Access and Compliance Documentation

    You must give tenants at least 24 hours’ notice of the service visit. You need to coordinate access across multiple properties, ensure tenants are home or arrange key access, and manage paperwork afterwards.

    Once complete, you have 30 days to provide the Landlord Gas Safety Record (CP12) to your tenant. If you manage multiple properties, you’re juggling multiple service dates and deadlines simultaneously. A single missed deadline breaches the Gas Safety (Installation and Use) Regulations 1998 and can result in local authority enforcement action.

    Use a property management system or spreadsheet to log:

    • Service date scheduled
    • Tenant notification date and method
    • Engineer attendance confirmation
    • Certificate received date
    • Certificate provided to tenant date
    • Next service due date (12 months from service date)

    For landlords in areas like Crawley managing multiple rentals, batch scheduling with the same Gas Safe engineer on a single day reduces tenant disruption and simplifies tracking.

    Planning Around Tenant Disruption

    While the service is non-intrusive, tenants don’t need to vacate, heating doesn’t need switching off, schedule during reasonable hours (8 a.m. to 5 p.m. on weekdays). Avoid winter months when tenants rely most on heating, unless the boiler is faulty. Scheduling in summer or early autumn minimises complaints and reduces emergency call-out risk during peak heating season.

    Provide tenants with a brief explanation of what the service involves and how long it takes. Many assume the engineer will drain the system or cause disruption; clarifying that it’s routine and non-invasive improves cooperation.

    Pro Tip
    Send tenants a service reminder two weeks before the scheduled date, then a final confirmation 48 hours before. Include the engineer’s name, company, and contact number. This reduces missed appointments and ensures tenants are prepared to grant access.

    Boiler Maintenance Checklist for Landlords

    Use this checklist to ensure your annual service covers all essential maintenance areas:

    • Flue gas analysis: CO levels tested and recorded
    • Heat exchanger inspection: Checked for cracks, corrosion, or scaling
    • Combustion head cleaning: Burner jets cleaned for efficient fuel combustion
    • Ignition and safety controls tested: Pilot light, ignition system, and safety shutoff mechanisms verified
    • System pressure check: Boiler pressure set to manufacturer specification (usually 1-1.5 bar)
    • Condensate trap inspection: Drain checked for blockages and proper operation
    • Flue blockage check: Flue pipe inspected for debris, damage, or obstruction
    • Gas supply integrity: Connections checked for leaks using gas detection fluid
    • Thermostat and controls calibrated: Temperature sensors and controls verified for accuracy
    • Boiler exterior cleaned: Casing wiped down to remove dust and debris
    • Documentation completed: Safety certificate issued and provided to tenant within 30 days
    A professional technician inspecting a boiler's heat exchanger and internal components during an annual service, with maintenance records and a clipboard visible on a workbench beside the boiler
    A professional technician inspecting a boiler's heat exchanger and internal components during an annual service, with maintenance records and a clipboard visible on a workbench beside the boiler

    Keep a record of each service for every property. Document the date, engineer’s name, any repairs completed, and the next service date. This record protects you if a dispute arises and proves to local authorities that you’re meeting your legal obligations.

    Many landlords use a spreadsheet or property management system to track servicing dates across multiple properties. Setting a reminder three months before the anniversary of the previous service ensures you don’t miss the deadline.

    Get a Free Quote Today →

    Key Takeaway
    The annual service checklist isn’t optional, it’s the standard set by Gas Safe and enforced by local authorities. A thorough engineer will work through every item. If an engineer claims a service takes 15 minutes, they’re not doing it properly.

    Extending Boiler Lifespan and Reducing Heating Bills

    A well-maintained boiler lasts longer and runs more efficiently. Regular servicing removes scale and debris that accumulates inside the heat exchanger, improving heat transfer and reducing energy consumption. A boiler never serviced gradually loses efficiency, working harder to deliver the same heat and consuming more gas.

    A boiler serviced annually maintains 90% of its original efficiency for years. One neglected drops to 70-80% within five years. Over a decade, the difference in gas consumption is substantial.

    Annual servicing extends the boiler’s working life by several years. Worn components are identified and replaced before they cause cascading damage. For example, a worn seal in the heat exchanger allows water to leak into the combustion chamber. Caught early during a service, it’s a simple repair. Ignored, it leads to corrosion and eventual boiler failure. The difference between a minor repair and a full replacement is the annual service.

    Many boiler manufacturers, including Worcester and Glowworm, recommend annual servicing to maintain warranty validity. If you skip a service and the boiler fails, the manufacturer may refuse to cover the repair.

    Protecting Your Warranty and Managing Insurance Implications

    Most boiler warranties require annual servicing by a Gas Safe registered engineer as a condition of cover. If you claim a warranty repair and the manufacturer discovers the boiler hasn’t been serviced, they can deny the claim.

    Check your boiler’s warranty documentation. It will specify servicing requirements, the type of engineer who can perform the service, and any exclusions. Worcester and Glowworm boilers typically require annual servicing by an approved installer to maintain full warranty coverage. Baxi and Vaillant have similar clauses. Proof of servicing protects you against future disputes.

    Insurance Claims and Service Records as Evidence

    Your landlord insurance policy likely includes boiler breakdown cover, but most policies include a servicing condition. The insurer requires proof of annual servicing to validate claims. If a boiler fails and you can’t produce a service record, the insurer may refuse to pay for repairs or replacement.

    When you submit a claim, the insurer will ask for:

    • Copies of all Gas Safety Certificates (CP12s) for the past two to three years
    • Service reports from the engineer
    • Proof of tenant notification
    • Photographs of the boiler and any visible damage

    If you can’t produce these documents, the insurer has grounds to deny the claim based on non-compliance with policy terms. Keep service records in a dedicated folder, digital and physical copies, alongside your insurance policy documents and warranty paperwork.

    Linking Service Records to Property Value and EPC Ratings

    A well-serviced, efficient boiler improves your property’s Energy Performance Certificate (EPC) rating; a neglected boiler running inefficiently lowers it. When you sell or refinance the property, the EPC rating affects its market value and your ability to secure favourable mortgage terms.

    Maintaining annual service records demonstrates to potential buyers, lenders, and valuers that the property has been properly maintained. This is particularly valuable if you’re selling a rental property or refinancing a portfolio.

    Documenting Your Compliance for Local Authority Inspections

    Local authorities conduct periodic inspections of rental properties to verify compliance with housing standards, including gas safety. If an inspector visits and asks for your Gas Safety Certificates, you must produce them on demand. Failure to do so can result in an enforcement notice, fines, or prohibition from letting properties.

    Organise your records by property and by year. Keep at least two years of certificates for each property. If you’re managing properties in areas like Crawley, maintain a master spreadsheet listing all properties, service dates, certificate issue dates, and expiry dates. This allows you to quickly verify compliance during an inspection.

    If an inspector finds that you’ve missed a service or failed to provide a certificate to a tenant, they can issue a compliance notice requiring you to remedy the breach within a specified timeframe.

    Watch Out
    If your insurance requires annual servicing and you skip a year, you may void your boiler cover entirely. Even if the boiler failure is unrelated to the missed service, the insurer can use non-compliance as grounds to deny the claim. If a local authority discovers you’ve missed a service, they can issue an enforcement notice and impose fines. Service records are your primary defence against both insurance disputes and regulatory action.
    Key Takeaway
    Service records are not just maintenance documentation, they are legal evidence of compliance. Keep them organised, accessible, and backed up digitally. When you need them for an insurance claim, local authority inspection, or property sale, they protect you and demonstrate responsible landlordship.

    Conclusion

    An annual boiler service is the intersection of legal obligation, tenant safety, and financial protection. Landlords who treat it as a tick-box exercise miss the real value: the service catches problems before they become emergencies, extends the boiler’s lifespan, and keeps your insurance and warranty valid.

    Apex Gas & Heating Ltd provides comprehensive boiler servicing and Gas Safety Certificates for landlords across Sussex and Surrey. Our Gas Safe registered engineers perform the full maintenance checklist, issue your CP12 certificate, and provide detailed service reports. For landlords managing multiple properties, we coordinate scheduling to minimise disruption. Get a quote for your annual boiler service and ensure your rental properties remain safe, compliant, and efficient.

    Frequently Asked Questions

    Is it a legal requirement for landlords to have an annual boiler service?

    Landlords must provide a Gas Safety Certificate (CP12) annually under the Gas Safety (Installation and Use) Regulations 1998. While the legal requirement is specifically for the safety certificate, an annual boiler service is the standard way to obtain it. The Gas Safe registered engineer performing the service inspects all gas appliances, including the boiler, and issues the certificate if everything meets safety standards. Failure to provide this certificate can result in fines up to £6,000 and criminal liability.

    What should a professional boiler service include for a rental property?

    A comprehensive annual boiler service includes visual inspection of the boiler and flue, checking the combustion process through flue gas analysis, inspecting the heat exchanger for wear, testing system pressure and safety controls, examining the condensate trap, and checking all gas connections for leaks. The engineer will also inspect any other gas appliances in the property. After completion, they issue the Landlord Gas Safety Record (CP12), which documents that all safety checks have passed and the system is safe to operate.

    How does regular servicing prevent boiler breakdowns in rental properties?

    Annual servicing identifies worn components, scale buildup, and early fault signs before they cause complete system failure. During the service, engineers clean internal parts, test safety controls, and check system pressure and efficiency. By catching problems early, landlords avoid costly emergency repairs during winter months when tenants rely on heating most. Preventative maintenance also extends the boiler's operational lifespan, reducing the likelihood of unexpected breakdowns that could leave tenants without heating and create emergency repair costs.

    Can regular boiler maintenance extend the lifespan of a heating system?

    Yes. Annual servicing maintains boiler efficiency, prevents scale and sludge accumulation, and ensures all components operate within manufacturer specifications. Regular maintenance helps keep the heat exchanger clean, reduces strain on the pump and controls, and identifies wear before it becomes critical. Most boilers last 10-15 years with proper maintenance, compared to shorter lifespans when servicing is neglected. Maintaining the manufacturer warranty through annual servicing also protects your investment, as many warranty terms require regular professional servicing.

    Get a Free Quote Today →

  • How to Reduce Home Energy Bills: A 2026 Guide

    How to Reduce Home Energy Bills: A 2026 Guide

    Table of Contents

    Last Updated: August 19, 2026

    Quick Energy-Saving Wins You Can Start Today

    The fastest way to reduce home energy bills is to fix what’s broken right now, not wait for a full system overhaul. Most homeowners waste money on habits they could change in an afternoon.

    Start with the obvious: turn off appliances at the wall instead of leaving them on standby. Standby power drains money silently, a television left on standby uses roughly the same energy as watching it for an hour each week. Next, check your hot water cylinder. If it’s uninsulated, wrapping it in a cheap insulation jacket cuts heat loss by up to 75%. Finally, seal obvious draughts around doors and windows with weatherstripping or foam excluders. These three steps typically cost under £50 combined and show results on your next energy bill.

    At Apex Gas & Heating Ltd, we recommend tackling these quick wins first because they require no engineer visits and deliver immediate savings. The psychological win matters too, seeing your bills drop motivates you to tackle the bigger projects.

    | Quick Win | Cost | Time | Estimated Saving |
    | — | — — — |
    | Standby power elimination | £0 | 30 mins | £10-20/year |
    | Hot water cylinder jacket | £15-25 | 1 hour | £20-40/year |
    | Door and window sealing | £20-40 | 2 hours | £30-60/year |
    | LED bulb replacement | £30-50 | 1 hour | £15-30/year |

    The real energy drain, though, lives in your heating system. That’s where the serious savings happen.

    Boiler Efficiency Tips That Lower Your Heating Costs

    Your boiler accounts for roughly 60% of your annual energy bill. A poorly tuned boiler wastes thousands of pounds over its lifetime. The good news is that three simple adjustments can reclaim much of that waste without replacing the unit.

    Flow Temperature and Boiler Settings

    Flow temperature is the temperature of the water leaving your boiler into the radiators. Most boilers ship with a default flow temperature of 80°C, which is excessive for modern homes with decent insulation. Reducing it to 60°C or even 55°C cuts fuel consumption noticeably whilst maintaining comfort.

    Here’s why this works: lower flow temperature means your boiler runs more efficiently because it doesn’t waste energy pushing water hotter than necessary. The trade-off is that your radiators take slightly longer to warm up, but in a well-insulated home, you won’t notice the difference. Test it by lowering the flow temperature by 5°C and living with it for a week. If the house stays warm, lower it another 5°C.

    Check your boiler’s control panel for the flow temperature setting. Many modern boilers display it on the screen. Older models may require a manual adjustment, consult your boiler manual or contact a qualified engineer. This single adjustment typically saves 8-10% on heating costs annually.

    Regular Servicing and Maintenance

    A boiler service is the difference between a system that limps along and one that runs at peak efficiency. During a service, an engineer cleans internal components, checks for carbon monoxide leaks, and ensures all safety features work properly.

    Boilers lose efficiency gradually. After five years, an unserviced boiler can lose 15% of its efficiency compared to a newly serviced one. The cost of an annual service (typically £120-200) pays for itself within months through reduced fuel consumption. For landlords, an annual boiler service is also a legal requirement under Gas Safety Regulations, you must have a CP12 certificate to prove it.

    At Apex Gas & Heating Ltd, our boiler servicing helps maintain your boiler’s efficiency and safety. A properly maintained boiler keeps your home warm reliably whilst protecting your energy budget.

    How to Bleed Radiators and Improve Heat Distribution

    Radiators with trapped air refuse to heat properly, forcing your boiler to work harder and longer. Bleeding radiators, releasing trapped air, is a five-minute job that restores full heating performance.

    You’ll need a radiator bleed key (about £3 from any hardware shop). Start with the radiator furthest from the boiler. Turn off your heating system. Locate the small bleed valve at the top of the radiator, usually a small square socket. Insert the key and turn it anticlockwise slowly. Air hisses out. Once water starts trickling, stop immediately and close the valve. Move to the next radiator and repeat.

    Close-up of hands using a radiator bleed key on a white radiator valve, showing proper technique and positioning with clear view of the square socket and key insertion
    Close-up of hands using a radiator bleed key on a white radiator valve, showing proper technique and positioning with clear view of the square socket and key insertion

    Do this once a year, ideally before winter. Many homeowners never bleed radiators and wonder why some rooms stay cold whilst others overheat. Trapped air creates uneven heat distribution, forcing your boiler to compensate by running longer cycles. Bleeding radiators typically improves heat distribution by 20-30%, meaning your boiler reaches the target temperature faster and uses less fuel.

    If radiators require bleeding more than once yearly, you likely have a water leak or a problem with the system’s air release valve. Contact a heating engineer to investigate. For rental properties, this is a maintenance issue the landlord must address, tenants shouldn’t need to bleed radiators repeatedly.

    Smart Thermostat Benefits and Temperature Control

    A smart thermostat learns your schedule and adjusts heating automatically, eliminating the guesswork of manual control. Unlike a basic thermostat that simply turns the boiler on or off at a set temperature, a smart thermostat can lower the temperature when you’re away and restore it before you arrive home.

    The benefit is measurable: households using smart thermostats typically reduce heating energy consumption by 10-15% annually. The device costs £150-400 upfront, but the energy savings often cover the cost within three years. Beyond savings, you gain convenience, adjusting your heating from your phone whilst at work or on holiday removes the temptation to leave the system running unnecessarily.

    Look for models that offer:

    • Scheduling by day and time
    • Geolocation awareness (adjusts based on whether you’re home)
    • Radiator-level control (some systems let you heat only occupied rooms)
    • Integration with your energy supplier’s data (shows real-time consumption)

    Set your thermostat to 19-20°C during the day when occupied and 15-16°C at night or when away. Each degree of reduction saves roughly 3% on heating costs. A family reducing their daytime temperature from 21°C to 19°C saves approximately £80-120 annually on heating alone.

    Draught-Proofing and Insulation to Stop Heat Loss

    Heat escapes through gaps and poor insulation. Draught-proofing seals the gaps; insulation slows the heat loss through walls, lofts, and floors.

    Draught-proofing targets visible air leaks: gaps around doors, windows, letterboxes, and pipework. Foam excluders, weatherstripping, and caulk cost little and work immediately. A gap of just 3mm around a door frame loses as much heat as leaving a window open. Seal all gaps and your heating system doesn’t fight a losing battle against cold air pouring in.

    Homeowner installing white foam draught excluder around a window frame, with daylight visible through the gap being sealed and clear view of the installation technique
    Homeowner installing white foam draught excluder around a window frame, with daylight visible through the gap being sealed and clear view of the installation technique

    Insulation is the bigger project. Loft insulation is the highest priority, heat rises, and an uninsulated loft loses 25% of your home’s warmth. Upgrading loft insulation from 100mm to 250mm costs £300-600 and saves £150-250 annually. Wall insulation and floor insulation follow in priority, depending on your home’s construction.

    Get a Free Quote Today →

    The Government’s energy efficiency schemes sometimes fund insulation upgrades. Check whether you qualify for support through current programmes. Even without grants, the payback period for loft insulation is typically three to four years.

    Understanding Your Smart Meter and Energy Tariffs

    A smart meter measures your energy consumption in real time and sends readings to your supplier automatically. This removes the guesswork from billing, you pay for what you actually use, not estimates.

    Most importantly, a smart meter shows you how your consumption changes hour by hour. This data reveals your energy habits. You might discover that your morning routine uses more energy than you thought, or that certain appliances drain far more than expected. Armed with this insight, you can shift usage to off-peak hours if your tariff offers cheaper rates during specific times.

    Time-of-use tariffs charge different rates depending on when you consume energy. Heating water, running the washing machine, or charging devices during off-peak hours (typically 9pm-7am) costs significantly less than during peak times. Families with flexibility can reduce their bills by 10-20% simply by shifting usage to cheaper hours.

    Check your supplier’s tariff options. Some offer fixed rates (same price all day), others offer time-of-use rates (cheaper at night), and some offer economy-7 rates (seven hours of cheap electricity nightly). The best tariff depends on your consumption pattern. A smart meter’s data helps you choose the right one.

    Appliance Usage Habits and Standby Power Management

    Appliances on standby consume power even when off, televisions, microwave ovens, computer monitors, and chargers all draw electricity waiting for you to use them. Collectively, standby power accounts for 5-10% of a typical household’s energy bill.

    The fix is simple: switch appliances off at the wall or use power strips. A power strip lets you cut standby power to multiple devices with one switch. This is especially effective for entertainment systems (television, sound system, streaming device) and home office equipment.

    Larger appliances demand attention too. Tumble dryers are energy-intensive, a typical cycle uses as much electricity as running a refrigerator for two days. Air-drying clothes saves £40-80 annually per household. Washing machines should run full loads only; two full loads use less energy than three half-loads. Dishwashers are efficient if full, but wasteful if half-empty.

    Refrigerators and freezers run continuously. Ensure they’re set to the correct temperature (3-5°C for fridges, -18°C for freezers). A fridge set to 0°C uses roughly 25% more energy than one at 5°C. Defrost manual-defrost freezers regularly, ice buildup forces the compressor to work harder.

    Government Grants and Financial Support for Energy Efficiency

    The Government offers several schemes to help homeowners improve energy efficiency. Eligibility depends on your income, property type, and current energy performance.

    The Energy Company Obligation (ECO) scheme requires energy suppliers to fund energy efficiency improvements for eligible households. Typical support includes loft insulation, wall insulation, boiler upgrades, and heating controls. You don’t repay this support, it’s a grant. Contact your energy supplier to ask about ECO eligibility and available improvements.

    The Warm Home Discount scheme provides a one-off payment (typically £140-150) on your winter energy bill if you’re on a low income or over 60. Application opens in autumn each year. Check the Government’s website for current eligibility criteria and application deadlines.

    For landlords, the Minimum Energy Efficiency Standards (MEES) require rental properties to achieve an Energy Performance Certificate (EPC) rating of E or above. Properties below this rating cannot be let legally. If your property falls short, you must upgrade insulation, heating, or controls to meet the standard. Some grants exist for landlords making these improvements, check your local authority’s website.

    At Apex Gas & Heating Ltd, we can assist landlords in understanding MEES compliance and recommend suitable solutions. Our approved boiler installations and heating controls can help ensure your rental properties meet legal standards whilst potentially reducing tenant energy bills.


    Reducing home energy bills doesn’t require expensive technology or major renovations. Start with boiler efficiency, lower your flow temperature and schedule annual servicing. Bleed radiators, seal draughts, and upgrade insulation in stages. Use a smart thermostat to automate temperature control based on your schedule. Shift appliance usage to off-peak hours if your tariff allows it. These steps, taken together, typically reduce annual energy bills by 20-30%.

    If your boiler is over 15 years old or requires frequent repairs, replacement becomes more cost-effective than ongoing fixes. Get a quote from Apex Gas & Heating Ltd for a new boiler installation, our Worcester and Glowworm approved engineers deliver reliable, efficient systems with transparent pricing and 24/7 support. A modern boiler, combined with the habits above, maximises your savings and ensures your home stays warm and comfortable through winter.

    Frequently Asked Questions

    What appliances run up your electric bill the most?

    Tumble dryers, electric showers, and space heaters consume the most kilowatt-hours. Older fridges and freezers left running 24/7 also add significantly to bills. Switching to air-drying clothes and reducing shower time can cut consumption noticeably. Checking your appliance rating labels helps identify which items drain the most energy.

    How can regular boiler servicing help lower energy bills?

    A well-maintained boiler burns fuel more efficiently, converting more of it to heat rather than waste. During servicing, engineers clean internal components, check the burner, and verify the boiler is running at the correct flow temperature. A boiler running inefficiently can waste 10-15% of fuel. Annual servicing catches problems early and keeps your heating system operating at peak efficiency, directly reducing your utility bills.

    What impact does smart thermostat installation have on heating costs?

    Smart thermostats learn your heating patterns and adjust temperatures automatically, preventing unnecessary heating when you're away or asleep. Many users report 10-15% reductions in heating costs by managing peak demand more effectively. They provide real-time energy consumption data, helping you understand which behaviours drive up bills. Remote control via smartphone also means you can avoid heating an empty property.

    Are there government grants available for home energy efficiency improvements?

    The Energy Company Obligation (ECO) and various regional schemes offer support for insulation, heating upgrades, and draught-proofing. Eligibility depends on your property type, income, and energy performance certificate rating. Grants may cover cavity wall insulation, loft insulation, or boiler replacements. Contact your local council or visit the government's energy support pages to check what schemes apply to your situation and property.

    How does insulation affect long-term energy expenditure?

    Proper insulation reduces heat loss through walls, roofs, and floors, meaning your heating system works less hard to maintain thermal comfort. Homes with good insulation can save 20-30% on heating costs annually. The initial investment in loft or cavity wall insulation typically pays for itself within 5-10 years through lower bills. Better insulation also improves comfort in winter and reduces reliance on peak demand heating periods.

    What is the best way to reduce energy costs at home?

    A combination of quick wins and long-term investments works best. Start by adjusting thermostat settings, bleeding radiators, and checking for draughts around windows and doors. Then move to draught-proofing and insulation upgrades. Install a smart thermostat to automate heating control. Finally, upgrade to a modern, efficient boiler if yours is over 15 years old. Monitoring your smart meter and understanding your energy tariff also helps identify peak-cost periods to avoid.

    What is the 4pm rule on heating?

    The 4pm rule refers to avoiding peak demand periods when electricity rates are highest. Shifting energy use away from 4-9pm (when demand peaks) to off-peak hours can reduce bills if you're on a time-of-use tariff. This means running appliances like washing machines, dishwashers, and tumble dryers outside peak times. Smart meters make it easier to track when you're using most energy and adjust habits accordingly to lower your overall costs.

    Get a Free Quote Today →

  • What to Do During a Boiler Breakdown: Step-by-Step Guide

    What to Do During a Boiler Breakdown: Step-by-Step Guide

    Table of Contents

    Last Updated: August 18, 2026

    Immediate Safety Steps During a Boiler Breakdown

    When your boiler stops working, stay calm and follow a clear sequence of safety checks before anything else.

    Start by checking for gas leaks. If you smell gas (a distinctive rotten-egg odour), do not attempt repairs yourself. Open windows and doors immediately, leave the property, and call your gas supplier’s emergency number from outside.

    Next, locate your emergency shut-off valve, typically found near your boiler or where gas enters your property. If you suspect a leak, turn this valve clockwise to stop the gas supply.

    Check your boiler’s pressure gauge. Normal pressure is typically between 1 and 2 bar. If the needle has dropped to zero, your system may have lost pressure, one of the most common reasons for a boiler breakdown.

    Ensure the area around your boiler is clear and well-ventilated. Boilers need adequate airflow to operate safely. If your boiler is in a cupboard, check that vents are not blocked.

    Do not attempt to disassemble or repair your boiler yourself. Modern boilers contain complex components and working on them without proper training can be dangerous and may invalidate your warranty. Gather information instead: note any error codes on the control panel, check whether the pilot light is lit, and record when the problem started.

    Close-up of a homeowner's hand checking a gas meter and emergency shut-off valve location in a residential property, showing the correct valve position
    Close-up of a homeowner's hand checking a gas meter and emergency shut-off valve location in a residential property, showing the correct valve position

    Check Your Boiler Troubleshooting Checklist

    Before assuming you need an emergency repair, work through this systematic checklist. Many boiler breakdown situations resolve with simple checks that take minutes.

    Check the thermostat and control panel

    Confirm your thermostat is set to the desired temperature and heating mode is switched on. If your thermostat has a battery, check it’s not dead and replace if needed.

    Look at your boiler’s control panel. Most modern boilers display error codes when something is wrong. Write down any code you see, it’s a diagnostic tool engineers use to identify the exact problem. Your boiler’s manual or the manufacturer’s website can help you decode these.

    Check that the boiler’s power switch is turned on. The switch is usually a simple on/off button near the base of the unit. If it’s off, turn it on and wait 30 seconds for the boiler to initialise.

    Inspect the pilot light

    The pilot light is a small flame inside your boiler that ignites the main burner. Look through the boiler’s inspection window to see if the pilot light is burning. It should be a steady, blue flame about the size of a pea.

    If the pilot light is out, some boilers have a reset button (usually marked with an "r" or spark symbol) that you can press to reignite it. Press and hold this button for 10-15 seconds while listening for a clicking sound. If the pilot light reignites, hold the button for another 30 seconds before releasing it. If it goes out again immediately, do not keep trying, this suggests a faulty thermocouple or ignition system that needs professional repair.

    Check for tripped switches or blown fuses

    Your boiler’s electrical supply is protected by a switch or fuse. Check your home’s fuse box or circuit breaker panel for any switches in the "off" position or fuses that appear blackened or damaged. If you find a tripped switch, flip it back to "on". If a fuse has blown, replace it with one of the same amperage.

    After resetting a tripped switch, wait a minute for the boiler to restart. If the switch trips again immediately, this indicates an electrical fault requiring professional diagnosis.

    Some boilers also have a reset button on the electrical control box. Press this button once and wait 10-15 seconds for the boiler to ignite. If it doesn’t restart or restarts but stops again within minutes, you have a persistent fault needing professional attention.

    How to Repressurise a Boiler

    A loss of pressure is one of the most common reasons for a boiler breakdown, and it’s one of the few issues you can often resolve yourself.

    Before you repressurise, identify whether you have a slow leak. Check under your boiler and around radiators for drips or damp patches. If you find active leaking, do not repressurise, call a [heating engineer for boiler repair](https://apexgasandheating.com/services/boiler-repair-service/).

    If there’s no visible leak, you can repressurise using the filling loop, a flexible pipe with shut-off valves at each end, usually located beneath the boiler. Open both valves slowly and watch the pressure gauge on your boiler as it rises. Stop when the pressure reaches 1 to 1.5 bar. Do not exceed 2 bar, as this can damage seals.

    Close both valves on the filling loop, then wait 10 minutes. Check the pressure gauge again. If the pressure has dropped, you have a leak needing professional repair. If it holds steady, your system is repressurised and should work normally.

    Some older boilers have a screw-down valve rather than a filling loop. If you’re unsure which type you have, consult your boiler’s manual or contact a heating engineer.

    When to Call a Gas Safe Registered Engineer

    Knowing when to stop troubleshooting and call a professional is crucial. A Gas Safe registered engineer has the training, tools, and legal authority to work on gas appliances safely.

    You must call a Gas Safe registered engineer immediately if you suspect a gas leak, smell gas, see carbon monoxide warning signs (dizziness, nausea, headaches), notice the pilot light won’t stay lit after multiple reset attempts, see water leaking from your boiler or pipes, or if your boiler displays an error code you cannot resolve.

    You should also call an engineer if your boiler has lost pressure multiple times within a short period, if it keeps shutting down unexpectedly, or if you’ve completed all troubleshooting steps and the boiler still won’t start.

    Gas Safe registration is a legal requirement. Any engineer working on a gas boiler must be registered with Gas Safe Register. You can verify an engineer’s credentials by asking for their Gas Safe ID card or checking the register at Gas Safe Register’s online verification tool. Never allow an unregistered person to work on your boiler.

    A Gas Safe registered heating engineer in uniform examining a boiler control panel with diagnostic tools and meter in a residential home kitchen
    A Gas Safe registered heating engineer in uniform examining a boiler control panel with diagnostic tools and meter in a residential home kitchen

    Apex Gas & Heating Ltd employs Gas Safe registered engineers trained to diagnose and repair all common boiler faults. With 24/7 emergency call-out availability across Sussex, including Crawley and surrounding areas, you won’t be left without heat for long. A professional engineer can also identify whether your boiler needs boiler repair or new boiler installation.

    Staying Warm While Your Boiler Is Down

    A broken boiler in winter is uncomfortable and stressful. While you wait for an engineer, you need to keep your home warm and safe.

    Use portable heaters as a temporary measure, but do so carefully. Electric fan heaters are safe when placed on a flat surface away from flammable materials. Gas heaters should only be used in well-ventilated spaces and never in bedrooms. Never use your oven or stovetop as a heating source; this is a fire and carbon monoxide hazard.

    Insulation is your best friend during a breakdown. Close doors to unused rooms to concentrate warmth in living areas. Hang heavy curtains or blankets over windows at night to reduce heat loss. Wear layers and use blankets on sofas and beds.

    If you have friends or family nearby, consider staying with them temporarily. This is especially important if you have young children, elderly relatives, or anyone with health conditions that make cold exposure risky.

    Run hot water from your taps regularly. This keeps pipes from freezing and prevents additional damage to your heating system.

    If your boiler breakdown occurs during winter and you’re a tenant, your landlord is legally required to provide adequate heating. If they fail to do so, contact your local authority’s environmental health team.

    Emergency Repair vs. Replacement: What You Need to Know

    When an engineer assesses your boiler, they’ll recommend either repair or replacement. This decision depends on the boiler’s age, repair cost, likelihood of future breakdowns, and your budget.

    Boilers typically last 10-15 years. If your boiler is over 12 years old and the repair cost exceeds 50% of a new boiler‘s price, replacement is usually more economical. Older boilers are also less efficient, costing more to run each year.

    If your boiler is younger than 10 years and the repair is straightforward, repair makes sense. Consider the boiler’s repair history. If it has broken down multiple times in the past two years, it’s showing signs of age-related wear.

    New boilers come with warranties, typically 5-10 years depending on the model and installer. This warranty covers parts and labour, giving you peace of mind. Older boilers have no warranty.

    Apex Gas & Heating Ltd can assess your boiler and give you an honest recommendation. If repair is viable, they’ll do it quickly. If replacement is the better choice, they’ll explain the options and help you select a new boiler suited to your home’s size and heating needs.

    Your Rights as a Tenant or Homeowner

    Your rights during a boiler breakdown depend on whether you own your home or rent it.

    As a homeowner: You are responsible for maintaining your boiler and paying for repairs or replacement. You have the right to choose any qualified engineer you wish. If you have a boiler service plan or insurance, check your policy to see what’s covered.

    As a tenant: Your landlord is legally required to provide a safe, habitable home with adequate heating. They must repair or replace a broken boiler promptly. You have the right to request repairs in writing, and your landlord must respond within a reasonable timeframe. If they do not, contact your local authority or seek legal advice.

    Landlords must also provide a Gas Safety Certificate (CP12) annually. This certificate proves the boiler and gas appliances have been inspected by a Gas Safe registered engineer. If your landlord cannot produce a current CP12, they are breaking the law.

    If your landlord is unresponsive to repair requests, document everything: dates you reported the problem, temperatures in your home, any communication.

    For landlords: You are legally required to have all gas appliances, including boilers, inspected annually by a Gas Safe registered engineer. You must provide tenants with a copy of the Gas Safety Certificate within 30 days of the inspection. Failure to do so can result in significant fines. Emergency repairs must be addressed promptly to avoid tenant disputes and legal issues.

    Apex Gas & Heating Ltd provides Gas Safety & CP12 certification and landlord and letting agent services across Sussex. They understand the legal requirements and can help landlords maintain compliance whilst keeping tenants warm and safe.

    Frequently Asked Questions

    What should I do first if my boiler breaks down?

    First, check for safety hazards. If you smell gas, turn off the gas supply at the meter and leave the property immediately, call the National Gas Emergency Service on 0800 111 999. If there's no gas smell, check your thermostat settings, pilot light, and whether the boiler has lost pressure. Look for error codes on the control panel. If basic checks don't restore heating, contact a Gas Safe registered engineer for a professional diagnosis.

    Can I repressurise my boiler myself during a breakdown?

    You can repressurise a boiler yourself if the pressure has simply dropped below the minimum (usually around 1 bar). Locate the filling loop, a flexible pipe with isolation valves beneath the boiler, and slowly open both valves to increase pressure to 1.5 bar. Close the valves once complete. However, if pressure drops repeatedly, this signals an internal leak requiring a professional engineer. Never attempt to fix anything beyond repressurising; other repairs need Gas Safe certification.

    When should I call a Gas Safe registered engineer instead of trying DIY fixes?

    Call a Gas Safe registered engineer immediately if you smell gas, see water leaking, the boiler won't ignite after you've checked the pilot light, error codes persist after a reset, or pressure keeps dropping. Gas Safe registration is a legal requirement for anyone working on gas appliances, attempting repairs without certification is dangerous and may invalidate your boiler warranty. Engineers are trained to diagnose faults safely and ensure your heating system meets safety standards.

    Can I use my heating system at all if the boiler is broken?

    No, if the boiler is broken, you cannot use central heating or hot water from that system. You can use an immersion heater if your property has one (usually in the hot water cylinder), which provides hot water independently. For heating, use portable heaters in occupied rooms, but ensure they're kept away from curtains and furniture. Landlords must provide a working heating system; tenants should report breakdowns to their landlord immediately, as this may qualify as an emergency repair.


    A boiler breakdown is stressful, but most issues can be resolved quickly with the right approach. Start with safety checks, work through the troubleshooting checklist, and call a Gas Safe registered engineer if the problem persists. Whether you need emergency repair or are considering replacement, Apex Gas & Heating Ltd offers fast, professional service with transparent pricing and a 24/7 emergency call-out line. Get a quote today and ensure your home stays warm and safe year-round.

    Get a Free Quote Today →