






Rated Excellent Rating Gas Safe Registered BPEC Certified 25 Years’ Experience 2 Year Guarantee Card Payments AcceptedApple Pay, Mastercard, Visa, Amex, Google Pay Worcester BoschVaillantBaxiGlow-wormAccredited

Category: Blog

  • How to Find a Gas Safe Boiler Engineer

    How to Find a Gas Safe Boiler Engineer

    Table of Contents

    Last Updated: September 23, 2026

    What Makes a Gas Safe Boiler Engineer Different

    A gas safe boiler engineer is a heating technician certified and registered with the Gas Safe Register, the official body responsible for regulating gas engineers in the UK. This certification is not optional, it’s the legal requirement for anyone working on gas appliances in residential properties. When you hire a gas safe boiler engineer, you’re hiring someone who has passed rigorous competency assessments, maintains current technical knowledge, and carries proper insurance to protect your home.

    The difference between a gas safe boiler engineer and an uncertified tradesperson is substantial. Gas Safe engineers have demonstrated expertise in boiler installation, repair, servicing, and safety protocols. They understand the risks associated with gas work, including carbon monoxide hazards, and follow strict procedures to keep your home and family safe. At Apex Gas & Heating Ltd, our engineers are registered with the Gas Safe Register and approved installers for leading brands including Glow-worm and Worcester, giving you confidence that your boiler is in capable hands.

    An unregistered engineer, no matter how experienced they claim to be, cannot legally work on gas appliances. Beyond the legal issue, an unqualified tradesperson may miss critical safety faults or install equipment incorrectly, creating hazards that could have serious consequences. Your boiler is not a place to compromise on expertise.

    Pro Tip
    Always ask to see a gas safe boiler engineer’s Gas Safe Register card before any work begins. It should display their registration number, the types of work they’re qualified to do, and their expiry date. This takes 30 seconds and protects you completely.

    How to Verify a Gas Safe Register Check

    Verifying a gas safe boiler engineer’s credentials is straightforward and essential. The Gas Safe Register maintains a searchable database on its official website where you can check any engineer’s registration status, qualifications, and work history in real time. Simply enter their name or registration number, and the system will confirm whether they’re currently registered and what types of work they’re authorised to perform.

    When you contact an engineer, whether through a local recommendation or an online search, ask for their Gas Safe Register number immediately. A legitimate gas safe boiler engineer will provide this without hesitation. Once you have the number, visit the Gas Safe Register website and search for it. The results will show you their registration status, the date their registration expires, and any disciplinary history. If an engineer refuses to provide their number or becomes defensive when asked, that’s a red flag.
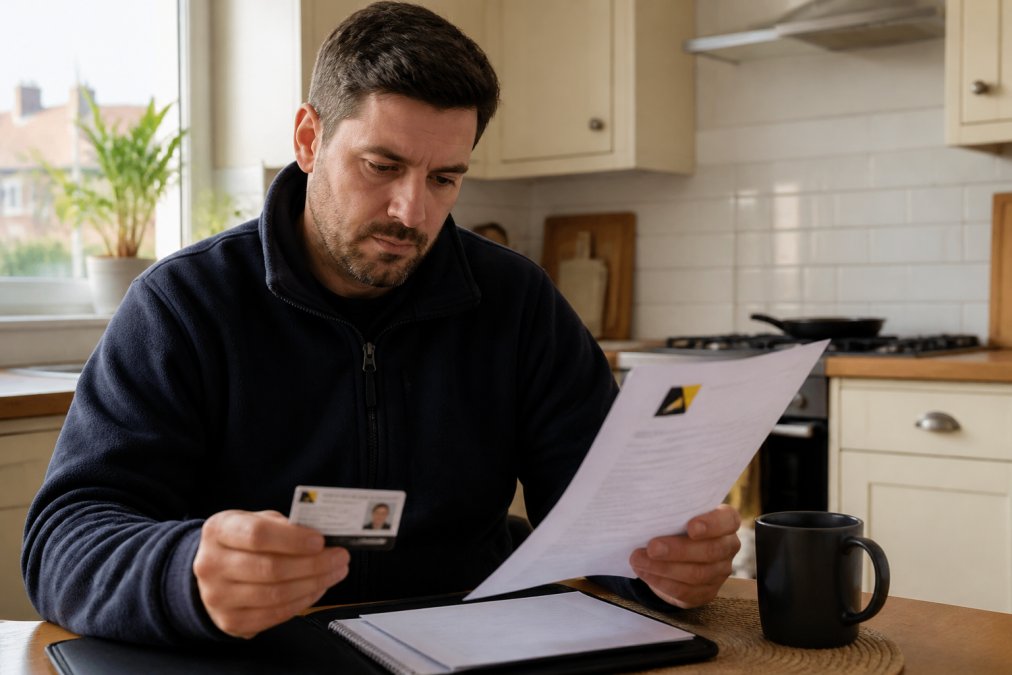
    Professional reviewing Gas Safe Register certification document while holding an ID card at a kitchen table with natural lighting
    Professional reviewing Gas Safe Register certification document while holding an ID card at a kitchen table with natural lighting

    Beyond checking the register, ask for evidence of public liability insurance. A professional gas safe boiler engineer will carry insurance that covers accidental damage to your property during work. Request a copy of their insurance certificate, not just a verbal confirmation. This protects you if something goes wrong during the job.

    You can also ask whether the engineer is an approved installer for specific boiler brands. Apex Gas & Heating Ltd, for example, is an approved Glow-worm and Worcester installer, which means we’ve been vetted by those manufacturers and meet their installation standards. This approval is an additional layer of quality assurance beyond basic Gas Safe registration.

    Key Takeaway
    Never proceed with any gas work without verifying the engineer’s Gas Safe Register number first. This single step eliminates the risk of hiring an unqualified tradesperson.

    Signs of a Faulty Boiler That Need Professional Attention

    A faulty boiler doesn’t always announce itself with a complete breakdown. Learning to recognise early warning signs means you can call a gas safe boiler engineer before a minor issue becomes a safety hazard or an expensive repair. Some signs are obvious; others are subtle but equally important.

    Strange noises are often the first indicator something is wrong. A boiler that bangs, whistles, or makes grinding sounds when it fires up is signalling internal stress. These noises typically point to limescale build-up, a faulty pump, or a failing heat exchanger, all issues that require professional diagnosis. Ignoring them usually means the problem worsens and repair costs climb.

    Inconsistent heating is another common warning. If radiators in different rooms heat unevenly, or if your hot water temperature fluctuates unexpectedly, the boiler’s internal mechanisms may be failing. Pilot light problems fall into this category too. A pilot light that won’t stay lit, or one that burns yellow instead of blue, indicates incomplete combustion and potential carbon monoxide risk.

    Leaks demand immediate attention. Any water pooling around the boiler, even a small drip, should trigger a call to a gas safe boiler engineer. Leaks can lead to rust, electrical hazards, and reduced efficiency. Similarly, if your boiler is over 10 years old and showing any of these signs, professional servicing becomes even more critical because older units are more prone to failure.

    The most dangerous sign, one you may not notice, is a boiler producing carbon monoxide. You won’t smell it or see it, but exposure causes headaches, dizziness, nausea, and in severe cases, death. Modern boilers have safety features that shut them down if carbon monoxide levels are unsafe, but a faulty boiler may bypass these protections. This is why annual servicing by a gas safe boiler engineer is non-negotiable, especially if anyone in your home has unexplained flu-like symptoms during winter months.

    What to Expect from an Annual Boiler Service Checklist

    An annual boiler service is preventative maintenance designed to keep your system running safely and efficiently. When a gas safe boiler engineer arrives for your service, they’ll follow a structured checklist that covers all critical components. Understanding what they check helps you appreciate the value of the service and spot any shortcuts.

    Get a Free Quote Today →

    The engineer will start by visually inspecting the boiler’s external casing for signs of damage, corrosion, or leaks. They’ll then access the internal components, something only a qualified gas safe boiler engineer can safely do. Inside, they’ll check the heat exchanger for limescale and corrosion, inspect the burner for proper flame colour and combustion quality, and test the safety devices that shut the boiler down if something goes wrong.

    Gas pressure testing is a critical part of the service. The engineer will measure the gas pressure entering the boiler and compare it to the manufacturer’s specifications. Incorrect pressure reduces efficiency and can cause incomplete combustion. They’ll also test the boiler’s ability to ignite reliably and check that the pilot light operates correctly.

    Water pressure and system integrity come next. The engineer checks the pressure gauge to ensure it’s within the safe operating range, typically between 1 and 2 bar when the system is cold. They’ll also inspect visible pipes and joints for leaks or signs of corrosion. For combination boilers, they’ll test the domestic hot water supply to confirm it reaches the correct temperature.

    Finally, a gas safe boiler engineer will test the flue to ensure exhaust gases are safely vented outside. A blocked or damaged flue is a serious safety issue because it allows carbon monoxide to accumulate indoors. They’ll also check that any safety cutouts, devices designed to shut the boiler down if something fails, are functioning correctly.

    Component What’s Checked Why It Matters
    Heat exchanger Limescale, corrosion, cracks Prevents efficiency loss and leaks
    Burner Flame colour, combustion quality Ensures safe, complete burning
    Safety devices Activation and response times Protects against dangerous faults
    Gas pressure Pressure levels and consistency Maintains efficiency and safety
    Flue system Blockages, damage, ventilation Prevents carbon monoxide build-up
    Water pressure System pressure and stability Prevents leaks and system damage

    When it’s complete, the engineer will provide a detailed report covering any issues found, recommendations for repairs, and confirmation that the boiler is safe to use. This report is valuable, it documents the boiler’s condition and proves you’ve maintained it properly, which is important for insurance and if you ever need to claim a warranty.

    Watch Out
    If your annual service reveals a significant fault, don’t delay repairs. A gas safe boiler engineer may recommend that you stop using the boiler until the issue is fixed. This isn’t overcaution, it’s protection against carbon monoxide poisoning and other serious hazards.

    Emergency Boiler Repair: When to Call and What to Ask

    Not every boiler problem can wait for a scheduled appointment. Knowing when to call for emergency repair, and what questions to ask, helps you respond appropriately and avoid unnecessary panic or unnecessary expense.

    Call a gas safe boiler engineer immediately if your boiler stops producing hot water or heating entirely during winter, if you smell gas, if you hear a loud bang when the boiler ignites, or if anyone in your home develops unexplained symptoms like headaches or nausea that ease when you leave the property.

    Questions to Ask Before Hiring Your Gas Safe Boiler Engineer

    Before committing to any boiler work, you should ask several key questions that reveal the engineer’s professionalism and whether they’re the right fit for your needs. These questions are your due diligence.


    Frequently Asked Questions

    How do I verify if a boiler engineer is Gas Safe registered?

    Visit the official Gas Safe Register website and search for the engineer’s name or registration number. A genuine Gas Safe boiler engineer will have an active registration that you can confirm instantly. Always ask to see their ID card in person, it shows their registration number, expiry date, and the types of work they’re qualified to perform. Never proceed with an engineer who cannot provide proof of current registration.

    What are the signs of a faulty boiler that need immediate professional help?

    Watch for unusual noises like banging or whistling, visible leaks, pilot light that won’t stay lit, or a significant drop in heating performance. If you smell gas, see yellow flames instead of blue, or notice carbon monoxide detector alerts, stop using the boiler immediately and call an emergency engineer. A qualified Gas Safe boiler engineer can diagnose these problems safely and prevent dangerous breakdowns during winter.

    Why should I use a Gas Safe registered engineer instead of an unregistered one?

    Gas Safe registration means the engineer has passed rigorous training and background checks. They’re insured, bound by a code of conduct, and legally permitted to work on gas appliances. Unregistered engineers put your home and family at risk, faulty gas work can cause carbon monoxide poisoning, fires, or explosions. Using a certified Gas Safe boiler engineer protects your property, your safety, and your warranty coverage.

    How often should I have my boiler serviced by a professional?

    Annual boiler servicing is recommended for most residential systems. A yearly check-up catches wear and tear early, maintains efficiency, and keeps your warranty valid. If your boiler is older or has a history of problems, more frequent servicing may be needed. A Gas Safe boiler engineer can advise on the right schedule for your specific system during your first visit.

    Get a Free Quote Today →

  • Choose the Right HVAC Filter for Allergies

    Choose the Right HVAC Filter for Allergies

    Table of Contents

    Last Updated: September 22, 2026

    How HVAC Filters Help with Allergies

    When allergens circulate through your home, they settle on surfaces, trigger symptoms, and make indoor living miserable. HVAC filter allergies are a common cause of discomfort. A quality HVAC filter traps these particles before they spread. The right filter choice makes a genuine difference to air quality and your health.

    Your heating and cooling system pulls air through filters constantly. Each time air cycles, the filter captures dust, pollen, pet dander, and mould spores. Over time, this prevents allergens from building up in your home. But not all filters work equally; some catch far more particles than others.

    Choosing the right HVAC filter for allergies starts with understanding what you’re filtering for. Seasonal pollen counts spike in spring and autumn. Pet owners face year-round dander. Mould thrives in damp conditions. Your filter needs to handle your specific allergen load.

    A well-maintained heating system with the right filter is one of the simplest ways to improve indoor air quality.

    Pro Tip
    Replace your filter on schedule, even if it looks clean. Filters clogged with allergens work harder, strain your system, and let particles slip through. Set a calendar reminder so you never miss a replacement.

    MERV Rating Explained for Homeowners

    What MERV Ratings Mean

    MERV stands for Minimum Efficiency Reporting Value. It’s a rating system that measures how effectively a filter captures particles between 0.3 and 10 microns in size. According to ASHRAE Standard 52.2, this is the standard for filter efficiency.

    The scale runs from 1 to 16. A higher MERV number means the filter catches more particles. MERV 1 filters trap only large dust; MERV 16 filters capture nearly everything, including bacteria and some viruses.

    Think of MERV like a net. A loose net (low MERV) lets small fish through. A tight net (high MERV) catches nearly everything, but it also slows water flow. Your HVAC system has to work harder to push air through a dense filter.

    Best MERV Ratings for Allergy Sufferers

    To address HVAC filter allergies effectively, aim for MERV 8 to MERV 13 in most homes. Industry benchmarks suggest these ratings offer a good balance between filtration and system strain.

    MERV 8 catches common household dust, pollen, and pet dander. This is a solid starting point if you have mild allergies or just want better air quality than a basic filter provides.

    MERV 11 to MERV 13 filters trap smaller particles, including fine dust, mould spores, and some bacteria. These suit homes with multiple pets, smokers, or people with moderate to severe allergies.

    MERV 16 filters are hospital-grade and rarely needed at home. They restrict airflow significantly, which can strain your system and reduce heating or cooling efficiency. Use them only if your doctor specifically recommends them for a serious respiratory condition.

    Check your system’s documentation or ask your installer what MERV rating your unit can handle. Pushing too high a MERV rating through an older system can damage it. A MERV 11 filter that your system actually uses beats a MERV 16 that chokes your airflow.

    Watch Out
    Using a filter higher than your system is rated for can cause the motor to overwork, reduce efficiency, and shorten the life of your heating system. Always verify compatibility before upgrading.

    Types of Filters That Reduce Allergens

    Electrostatic Filters

    Electrostatic filters use an electrical charge to attract and trap particles. They work like a magnet for dust and pollen.

    These filters are reusable; you wash them instead of replacing them.

    The catch: electrostatic filters need regular cleaning to work. A clogged electrostatic filter loses its charge and becomes nearly useless.

    For allergy sufferers, electrostatic filters work best in homes with light to moderate allergen loads. They handle pet dander and seasonal pollen well.

    Close-up of various HVAC filter types lined up side by side, showing pleated, electrostatic, and standard filters in natural daylight on a workbench
    Close-up of various HVAC filter types lined up side by side, showing pleated, electrostatic, and standard filters in natural daylight on a workbench

    Pleated Filters

    Pleated filters have a folded, accordion-like design that increases surface area. More surface means more particle capture.

    These filters are disposable. You replace them every 1 to 3 months depending on use. They require no maintenance beyond installation.

    Pleated filters typically range from MERV 8 to MERV 13, making them ideal for allergy sufferers. They catch pollen, dust, pet dander, and mould spores effectively.

    The main drawback: they’re single-use. But for most homeowners, the convenience and allergen-trapping power make pleated filters a good choice.

    Signs of a Clogged Air Filter

    A clogged filter reduces airflow and forces your heating system to work harder. Watch for these warning signs:

    • Reduced heating or cooling power: your rooms don’t warm or cool as quickly.
    • Higher energy bills: your system runs longer to reach the target temperature.
    • Dust around vents: particles bypass the clogged filter and enter your home.
    • System noise: the motor strains and sounds louder than normal.
    • Visible dirt on the filter: you can see dust and debris caked on the surface.

    If your filter looks dark or feels stiff, it’s time to replace it. Don’t wait for symptoms to appear; swap it out on schedule.

    Get a Free Quote Today →

    How Often to Change HVAC Filters

    Factors That Affect Replacement Frequency

    Standard pleated filters typically need replacement every 1 to 3 months. But several factors change this timeline:

    Pets in the home: fur and dander accelerate filter clogging. Homes with dogs or cats may need filter changes every 4 to 6 weeks.

    Allergies or respiratory conditions: if someone in your home has asthma or severe allergies, change filters more often. A fresher filter means better air quality.

    Air quality: homes in areas with high pollen counts or pollution may need more frequent changes.

    System usage: if you run your heating or cooling constantly, the filter clogs faster than in homes that use the system seasonally.

    Filter type: electrostatic filters last longer between cleanings if you wash them regularly. Pleated filters have a fixed lifespan.

    A practical approach: check your filter every month. If it looks dirty, replace it. If it still looks clean, wait.

    Key Takeaway
    Set a monthly filter check into your calendar. It takes 30 seconds and prevents the air quality problems that come with clogged filters.

    Choosing the Right Filter Size for Your System

    Your HVAC system uses a specific filter size. Common sizes include 16×25×1, 20×25×1, and 16×25×4 inches. Using the wrong size defeats the purpose; air bypasses the filter and allergens enter your home.

    Find your filter size by:

    • Checking the side of your current filter; the size is printed on the frame.
    • Looking at your system’s documentation or manual.
    • Asking your installer or a technician.

    Once you know your size, buy filters that match exactly. Don’t try to force a slightly smaller or larger filter into place; the gaps will leak unfiltered air.

    Maintaining Your System for Better Air Quality

    Clean filters are just one part of the equation. A well-maintained heating system performs better and protects your health.

    Annual servicing keeps your system efficient and catches problems early. A technician checks airflow, cleans components, and ensures everything runs safely. Regular servicing also extends the life of your equipment.

    Ductwork inspection reveals leaks and blockages that reduce airflow. Leaky ducts let unfiltered air into your home, undoing the work of your filter.

    Thermostat settings matter too. Running your system continuously cycles more air through the filter, which clogs it faster, but also improves air quality. Running it only when needed saves energy but may let allergens accumulate.

    For homeowners in Crawley, Three Bridges, and across the region, professional servicing ensures your system works at peak efficiency. Apex Gas & Heating Ltd provides comprehensive boiler servicing that keeps your home warm.


    Allergies make home life uncomfortable, but the right HVAC filter traps the particles that trigger symptoms. A MERV 11 or MERV 13 pleated filter suits most allergy sufferers; it balances allergen capture with system efficiency. Replace it every 1 to 3 months, check it monthly, and pair it with annual servicing to keep your system running smoothly.

    If your heating system isn’t delivering the comfort it should, or if you’re unsure whether your current filter is the right choice, our team at Apex Gas & Heating Ltd can help. We provide expert advice on boiler servicing and can recommend the best filtration approach for your home. Get a quote today and breathe easier this winter.

    Frequently Asked Questions

    What MERV rating is best for allergies?

    For allergy sufferers, look for MERV 11 to MERV 13 filters. These capture allergens like pollen, pet dander, and dust mites effectively without restricting airflow too much in standard residential systems. MERV 13 offers superior filtration but may require your heating system to work harder, so check your system’s specifications before upgrading.

    How often should I change my HVAC filter if I have allergies?

    If you have allergies, change your filter every 30 days rather than the standard 90 days. More frequent changes prevent allergen build-up and maintain consistent air quality. If you have pets or live in a dusty area, monthly replacement is especially important for keeping allergens under control.

    Can the right HVAC filter help reduce dust and pet dander?

    Yes. High-efficiency filters with MERV 11 or higher ratings capture dust, pet dander, and other airborne particles effectively. Pleated and electrostatic filters are particularly good at trapping these allergens. Combined with regular replacement, the right filter significantly reduces what circulates through your home.

    Do high-efficiency filters restrict airflow in my heating system?

    Higher MERV filters do create slightly more resistance than standard filters, but MERV 11-13 filters work well with most residential systems. If you notice reduced heating performance after upgrading, your system may need professional inspection. Our heating engineers can assess whether your boiler can handle a higher-efficiency filter without strain.

    Get a Free Quote Today →

  • Benefits of Whole House Water Filtration Systems

    Benefits of Whole House Water Filtration Systems

    Table of Contents

    Last Updated: September 21, 2026

    What Is a Whole House Water Filtration System?

    A whole house water filtration system is a point-of-entry installation that filters all water entering your home before it reaches any tap, shower, or appliance, protecting your entire plumbing network from contaminants and sediment at the source.

    The system draws water from your mains supply through filter stages, typically activated carbon, sediment filters, or reverse osmosis membranes, before distributing treated water throughout your property, ensuring consistent quality across every outlet.

    Most whole house water filtration systems are installed at the point where water enters your home, either in the basement, under the stairs, or outside near the water meter. The micron rating of the filters determines what they can remove: sediment filters typically handle particles down to 5-20 microns, whilst activated carbon reduces chlorine, volatile organic compounds, and odours. More advanced systems using reverse osmosis can address heavy metals, total dissolved solids, and PFAS contamination.

    Key Takeaway
    A whole house water filtration system treats all water at the point of entry, providing consistent contaminant removal and protection across your entire home’s plumbing network.

    How Whole House Water Filtration Protects Your Plumbing and Appliances

    Unfiltered water damages pipes, boilers, and appliances. Scale buildup from hard water reduces flow rate, forces your heating system to work harder, and shortens equipment lifespan.

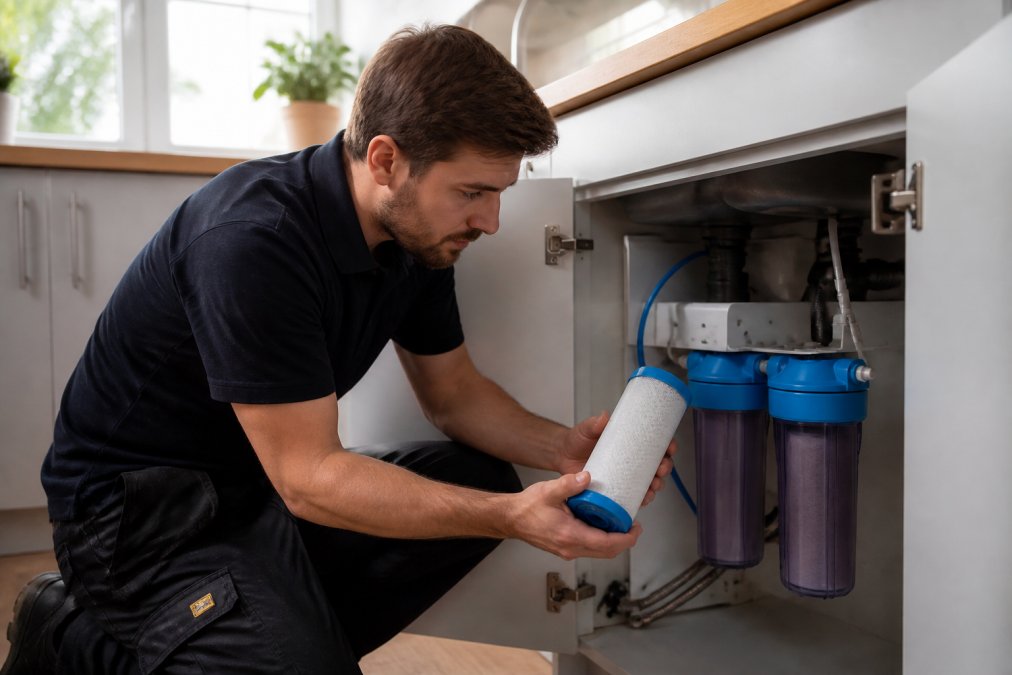
    Professional technician inspecting water filter cartridge and connections at point-of-entry installation beneath kitchen sink with natural light
    Professional technician inspecting water filter cartridge and connections at point-of-entry installation beneath kitchen sink with natural light

    Sediment and mineral deposits restrict water pressure and accelerate corrosion. Limescale on boiler heating elements reduces efficiency and can cause system failure. A whole house water filtration system intercepts these contaminants before they enter your system, protecting pipes and appliances from premature wear. If you’re experiencing boiler efficiency issues or need advice on protecting your heating system, our boiler servicing team can assess whether water quality is affecting your equipment’s performance.

    Filtration prevents damage to washing machines and dishwashers by reducing mineral deposits that coat internal components and increase repair costs.

    Pro Tip
    If you notice reduced water pressure or discoloured water from older taps, sediment filtration is often the first step to improving both water quality and plumbing longevity.

    Health Benefits: Contaminant Removal and Water Quality Improvements

    Filtered water reduces exposure to chlorine and disinfection byproducts (DBPs), particularly trihalomethanes (THMs), which have been linked to long-term health concerns. Activated carbon filtration removes these byproducts before they reach your taps, reducing cumulative exposure across all water use.

    Lead, commonly found in older plumbing systems, accumulates in the body and affects neurological development in children and cognitive function in adults. Copper becomes toxic at elevated concentrations. Reverse osmosis and multi-stage systems remove these metals. Test your water through your local supplier’s quality report or professional analysis before choosing a system.

    PFAS (per- and polyfluoroalkyl substances), known as “forever chemicals,” persist in the environment and accumulate in human tissue. Detected in water supplies across the region, they’re linked to immune system effects. Whole house filtration using activated carbon or reverse osmosis removes PFAS before it reaches your home, providing protection point-of-use filters cannot match.

    Many people report improved skin condition after installing whole house filtration. Chlorine strips natural oils and triggers irritation in people with eczema or psoriasis. Filtered water eliminates this irritant, and households often notice reduced skin dryness and improved hair condition within weeks.

    Match your filtration system to your actual water quality. A sediment filter alone won’t remove chemical contaminants; activated carbon won’t remove heavy metals. Check your supplier’s annual water quality report or arrange a professional test to select the right technology.

    Pro Tip
    Request your local water supplier’s annual water quality report (available free online) before choosing a filtration system. This report identifies which contaminants are present in your supply, allowing you to select the right filter type rather than guessing.

    Water Softener vs Whole House Filter: Understanding the Difference

    A water softener removes calcium and magnesium using ion exchange, addressing scale buildup and improving appliance efficiency. However, it does not remove sediment, chlorine, heavy metals, or PFAS.

    A whole house water filtration system removes sediment, chlorine, and other contaminants through mechanical and chemical filtration. It improves taste, odour, and safety but does not soften hard water. Both hard water and chlorine concerns may require both systems.

    Choose based on test results. Scale buildup and reduced flow rate require a water softener; contaminant removal and chlorine reduction require a whole house filter. Many properties benefit from both systems.

    Best For
    Homes with tested hard water and chlorine concerns benefit most from combining both systems, a water softener for scale prevention and a whole house filter for contaminant removal.

    Whole House Water Filter Maintenance: What You Need to Know

    Filter cartridge replacement is the primary maintenance task. Most activated carbon and sediment filters require replacement every 6-12 months. Neglecting maintenance reduces effectiveness and can damage the system through clogged filters.

    Maintenance schedules vary by filter type. Sediment filters clog faster in high-sediment areas; activated carbon filters last longer but lose effectiveness when saturated; reverse osmosis systems require multi-stage replacement at different intervals.

    Get a Free Quote Today →

    Regular filter changes maintain system capacity and water pressure. A clogged filter forces water to bypass filtration entirely. Replacement cartridges are an affordable expense compared to appliance damage or plumbing repairs. Some systems include pressure gauges or filter-change indicators. If yours lacks these, mark replacement dates on a calendar. Professional installation includes guidance on maintenance schedules specific to your system.

    How to Choose a Whole House Water Filter for Your Home

    Step 1: Obtain and Interpret Your Water Quality Data

    Request your local water supplier’s annual water quality report (free), which details all tested contaminants. This report lists turbidity, chlorine residual, hardness, pH, and detected heavy metals. If turbidity exceeds 0.5 NTU, prioritise sediment filtration; if chlorine residual exceeds 0.5 mg/L, use activated carbon; if hardness exceeds 200 mg/L, consider both softening and filtration.

    For private boreholes or more detailed analysis, arrange a professional water test. These provide comprehensive results including heavy metals, PFAS, and bacteria. This investment is worthwhile if you’ve experienced water quality issues like discolouration, metallic taste, or appliance scaling.

    Step 2: Match Filter Type to Your Test Results

    Select the appropriate filtration technology:

    • Sediment filters (5-20 micron): Choose if your report shows elevated turbidity or visible particles. These are typically the first stage and protect downstream filters and appliances.
    • Activated carbon filters: Select if chlorine residual exceeds 0.5 mg/L or you notice chlorine taste or odour. These remove VOCs and some pesticides.
    • Reverse osmosis systems: Necessary if your report identifies heavy metals, PFAS, or TDS above 500 mg/L. Most comprehensive but produces wastewater and requires more maintenance.
    • Multi-stage systems: For multiple concerns (sediment, chlorine, hardness), a multi-stage system provides comprehensive protection across all issues.

    Step 3: Assess Your Plumbing Type and Installation Space

    Whole house systems connect at your point of entry, typically where the mains supply enters your home. Identify this location: it’s usually in your basement, under the stairs, in a utility room, or outside near your water meter. Measure the available space and note your plumbing material (copper, PEX, or older lead pipes). PEX plumbing is more flexible and easier to work with during installation; copper requires soldering connections, which may take longer. If you have older lead pipework, this is another reason to prioritise filtration, as lead leaches into water over time.

    Check your incoming water pressure (typically 2-3 bar for mains supply). Whole house systems require adequate pressure to function effectively; if your pressure is below 2 bar, you may need a pressure-boosting pump, which adds to installation cost. Our plumbing services team can measure this during a site survey and advise on the best installation approach for your property.

    Step 4: Calculate Flow Rate Requirements

    Flow rate determines whether your system maintains adequate water pressure during peak usage.

    Step 5: Budget for Total Cost of Ownership

    Best For
    For homes in areas with tested chlorine concerns and moderate sediment (common in many regions), a dual-stage sediment and activated carbon system provides the best balance of protection, cost, and maintenance simplicity.

    Environmental and Cost Benefits of Filtration Systems

    Installing a whole house water filtration system reduces reliance on bottled water, eliminating plastic waste from your household. A family purchasing bottled water regularly generates significant plastic packaging waste annually. Home filtration provides unlimited tap water without environmental impact from single-use bottles or the energy cost of bottled water production and transport.


    Filter Type Best For Maintenance Frequency Key Benefit
    Sediment Filter Visible particles, cloudiness Every 6-9 months Protects pipes and appliances
    Activated Carbon Chlorine, taste, odour Every 9-12 months Improves water quality
    Reverse Osmosis Heavy metals, PFAS, total dissolved solids Every 6-12 months (multi-stage) Comprehensive contaminant removal
    Multi-Stage System Combined sediment, chemical, mineral concerns Varies by stage (6-12 months) Broadest protection across all issues

    Frequently Asked Questions

    What contaminants does a whole house water filtration system remove?

    A whole house water filtration system removes sediment, chlorine, volatile organic compounds, heavy metals, and PFAS depending on the filtration type. Activated carbon filters excel at chlorine and odour reduction, whilst sediment filters trap particles. Reverse osmosis systems remove up to 99% of total dissolved solids and provide the most comprehensive contaminant removal for improved water quality throughout your home.

    Do I need a water softener if I have a whole house filter?

    Not necessarily. A whole house water filter and water softener serve different purposes. Filters remove contaminants and improve water quality, whilst softeners address hard water by reducing mineral content like calcium and magnesium that cause scale buildup. If your water is hard, you may benefit from both systems working together, or consider a filter with sediment and carbon stages combined with a separate softening stage.

    How often do I need to replace filter cartridges in a whole house system?

    Filter cartridge replacement depends on your water quality and system type. Sediment filters typically need changing every 6-12 months, whilst activated carbon filters last 12-18 months. The micron rating and your household’s water usage affect replacement frequency. Regular maintenance schedules prevent reduced flow rate and ensure optimal contaminant removal. Check your system’s specifications for exact intervals.

    Will a whole house water filter remove limescale and hard water?

    Standard whole house filters remove sediment and some chemicals but do not soften hard water. However, some multi-stage systems include water softening capabilities to address scale buildup on appliances and plumbing. If limescale is your primary concern, a dedicated water softener or a hybrid filtration system combining both filtration and softening technologies will be more effective at preventing appliance efficiency loss.

    Get a Free Quote Today →

  • DIY Plumbing Maintenance Tips for Renters

    DIY Plumbing Maintenance Tips for Renters

    Table of Contents

    Last Updated: September 20, 2026

    Why Plumbing Maintenance Matters for Renters

    Keeping your rental property’s plumbing in good condition protects your deposit and prevents costly emergency repairs. Learning DIY plumbing maintenance tips for renters helps you understand what you can maintain yourself and what requires professional help, protecting both your home and your finances.

    Basic Plumbing Tools for Renters You Should Keep at Home

    Essential tools every renter should own:

    • Plunger, The most important tool. A standard cup plunger clears blocked sinks and toilets quickly.
    • Adjustable wrench, Tightens or loosens nuts on pipes and fittings. Buy one around 20-25cm model.
    • Pipe wrench, Grips round pipes firmly. Useful for minor leaks at connections.
    • Drain snake, A flexible tool that removes hair and debris from drain blockages without harsh chemicals.
    • Bucket, Catches water during repairs and prevents spills on your floors.
    • Plumber’s tape, Seals threaded connections to stop minor leaks.
    • Torch or headlamp, Helps you see pipes under sinks and in dark cupboards.
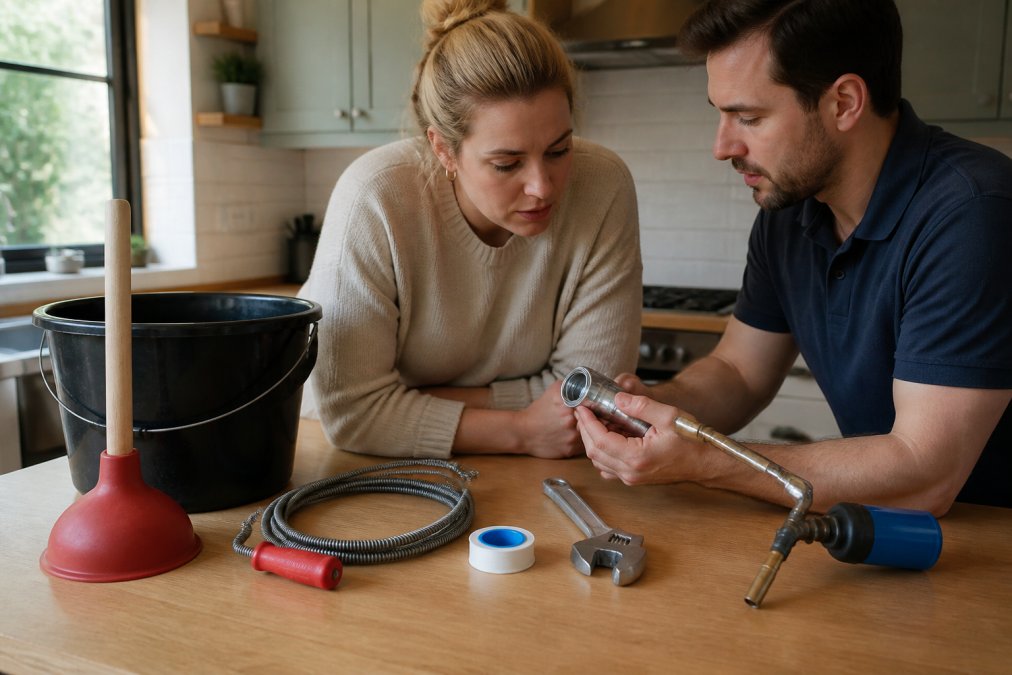
    Close-up of essential plumbing tools arranged neatly on a clean kitchen counter: red plunger, adjustable wrench, drain snake, bucket, plumber's tape, and torch with natural morning light streaming across the surface
    Close-up of essential plumbing tools arranged neatly on a clean kitchen counter: red plunger, adjustable wrench, drain snake, bucket, plumber’s tape, and torch with natural morning light streaming across the surface

    How to Unblock a Sink Drain Without Damaging Pipes

    Step-by-step drain clearing method:

    1. Fill the sink with 10cm of water, This creates pressure needed to dislodge the blockage.

    2. Place the plunger over the drain hole, Make sure it covers the opening completely. Block the overflow hole with a wet cloth if your sink has one.

    3. Push down and pull up rapidly 15-20 times, Use firm, quick movements. You should feel resistance as the plunger works.

    4. Check if water drains, If it does, run hot water for 30 seconds to flush debris. If not, repeat the plunging process.

    5. Use a drain snake if plunging fails, Insert the snake into the drain and turn the handle clockwise. The spiral end catches hair and debris. Pull it out and rinse the drain with hot water.

    6. Try baking soda and vinegar, Pour 100g of baking soda down the drain, followed by 250ml of white vinegar. Cover the drain for 15 minutes, then flush with hot water. This eco-friendly method works for minor blockages and mineral buildup.

    What NOT to do:

    • Don’t use chemical drain cleaners. They damage old pipes and can burn your skin.
    • Don’t force a blocked pipe with excessive pressure. You risk cracking fittings.
    • Don’t ignore slow drains. They worsen quickly and become harder to clear.

    If the drain remains blocked after trying all steps, contact your landlord or call a professional plumber. Document the issue with photos and a written message.

    Preventing Frozen Pipes and Water Damage

    Frozen pipes are a serious winter risk. When water freezes inside pipes, it expands and can crack them, causing water damage to your property.

    How pipes freeze and why renters are vulnerable:

    Prevention steps for winter months:

    • Insulate exposed pipes, Wrap foam pipe insulation around any pipes visible in unheated areas like under sinks, in lofts, or along external walls. Pay special attention to the water shut-off valve and the main incoming water pipe.

    • Keep cabinet doors open, If pipes run under kitchen or bathroom sinks, open the cabinet doors during freezing weather. Warm air from your home circulates around the pipes and keeps them above freezing point. This is especially important if your sink is on an external wall.

    • Maintain steady heating, Keep your heating on at least 15°C even when you’re away for a few days. If you’re away for more than a week during winter, ask your landlord about leaving heating on or draining the system.

    • Drip taps slightly during freezing nights, If temperatures drop below -5°C, let cold taps drip slowly. Moving water is harder to freeze than still water. A single tap dripping overnight uses minimal water but can prevent a burst pipe.

    • Check your boiler pressure, If pressure is below 1 bar on the gauge, your landlord needs to know immediately, as this often indicates a leak.

    • Address hard water mineral buildup, In areas with hard water, mineral deposits reduce water flow and increase freeze risk. Run hot water for 30 seconds each morning during winter. If your showerhead or tap aerator is clogged, soak it overnight in white vinegar and rinse thoroughly.

    Signs of frozen pipes:

    • No water comes from one or more taps
    • Water pressure drops suddenly across the whole house
    • You hear banging, clanking, or gurgling sounds in pipes when you turn on a tap
    • Visible frost on exposed pipes, fittings, or the water shut-off valve
    • Water pooling or dripping from pipes in unheated spaces

    What to do if you suspect frozen pipes:

    Tenant Plumbing Responsibilities UK: What You Must Know

    What you’re responsible for as a tenant:

    Get a plumber out to you →

    • Basic maintenance, Cleaning aerators on taps, unblocking drains caused by your use, and reporting leaks promptly.
    • Fixture care, Not damaging taps, shower heads, or toilet seats through negligence.
    • Preventative action, Keeping pipes insulated in winter and reporting issues before they worsen.
    • Prompt reporting, Telling your landlord about any plumbing problems within 24 hours of discovering them.

    What your landlord must handle:

    • Structural repairs, Burst pipes, cracked pipework, or damage to the water shut-off valve.
    • Major leaks, Water damage to walls, ceilings, or floors caused by faulty plumbing.
    • Boiler and hot water cylinder issues, These are the landlord’s responsibility under UK law.
    • Gas safety, Any problems with gas pipes or connections must be handled by a Gas Safe registered engineer.

    Your tenancy agreement matters. Some agreements place more responsibility on tenants than others. Read your agreement carefully and ask your landlord to clarify any unclear points before signing.

    Reporting Plumbing Repairs to Landlords: The Right Way

    Proper documentation protects your deposit. Many renters lose deposits because they didn’t create a clear paper trail proving they reported problems promptly.

    The correct reporting process:

    1. Report in writing within 24 hours, Send an email or text message to your landlord or letting agent. Include the date, time, and specific description of the problem.

    2. Be specific and factual, Write “the kitchen sink drains slowly and water pools around the base of the tap. I first noticed this on [date] at [time].” Include which room and which fixture.

    3. Take photos and videos immediately, Photograph any visible damage, leaks, water stains, or pooling water from multiple angles. Include the date stamp. Store copies in cloud storage so you have a backup.

    4. Keep copies of everything, Save all emails, text messages, photos, videos, and repair requests in a labelled folder.

    5. Request a response timeline, Ask when the repair will be done. Landlords must carry out repairs within a reasonable time, usually 7-14 days for non-emergency issues, 24-48 hours for emergencies.

    6. For emergencies, call immediately and follow up in writing, Phone your landlord right away, then send a follow-up email the same day with the time you called and what you reported.

    Template for your first report:

    Copy and adapt this for your situation:

    “Hi [Landlord/Agent name],*

    Thank you.
    [Your name]
    [Property address]
    *[Your phone number]”

    Building your deposit-protection evidence file:

    • Move-in photos: Take photos of plumbing fixtures on your first day to prove their condition when you arrived.
    • Maintenance log: Keep a simple list with dates and descriptions of any plumbing work you do.
    • Repair request copies: Save every email or message reporting a problem.
    • Before-and-after photos: If you fix something minor yourself, photograph the problem first, then after the fix.

    Protecting yourself at the end of your tenancy:

    Common Plumbing Issues and When to Call a Professional

    DIY plumbing maintenance tips for renters, issues you can handle yourself:

    • Slow drains caused by hair or soap buildup
    • Dripping taps (usually just needs a new washer)
    • Running toilets (often a faulty fill valve)
    • Blocked overflow holes on sinks or baths
    • Mineral buildup on aerators or showerheads

    Issues requiring a professional:

    • Burst or cracked pipes, Water damage spreads quickly. Call your landlord immediately.
    • Water pressure problems, If all taps have low pressure, there’s a problem with the main water shut-off valve or the water supply itself.
    • Leaking pipes under floors or in walls, You can’t access these safely. Water damage gets worse if ignored.
    • Boiler or hot water cylinder faults, These need a qualified engineer. Never attempt DIY repairs.
    • Gas-related issues, Any problem involving gas pipes must be handled by a Gas Safe registered engineer.
    • Sewage or drainage smells, This indicates a problem with the main drain. Professional equipment is needed to diagnose and fix it.

    Frequently Asked Questions

    What plumbing maintenance are tenants responsible for?

    Tenants are typically responsible for minor, non-structural maintenance that prevents damage. This includes clearing minor drain blockages, checking for leaks under sinks, cleaning aerators on taps, and ensuring exposed pipes aren’t damaged. However, your rental agreement defines your exact responsibilities. Major issues like burst pipes, boiler faults, or structural water damage are your landlord’s responsibility. Always check your tenancy agreement and report any significant problems to your landlord promptly to protect your deposit.

    Are renters allowed to perform DIY plumbing repairs?

    Most renters can perform basic maintenance tasks like using a plunger, cleaning drains with baking soda and vinegar, or tightening loose connections. However, check your rental agreement first, as some landlords prohibit DIY repairs. Never attempt work that affects water pressure systems, boiler pressure, hot water cylinders, or structural pipes. If you’re uncertain whether a repair is within your scope, contact your landlord or request a certified professional. Unauthorised work that causes damage could result in deposit deductions.

    How can I prevent blocked drains in a rented property?

    Prevent drain blockage by using drain strainers to catch hair and debris, avoiding pouring grease down drains, and regularly flushing pipes with hot water. Once monthly, pour baking soda followed by vinegar down drains to clear mineral buildup naturally. Don’t use harsh chemical drain cleaners, as they can damage older pipes and violate some rental agreements. If blockages persist despite preventative maintenance, document the issue and report it to your landlord, as it may indicate a structural problem requiring professional drain maintenance.

    When should a renter call a professional plumber?

    Contact a professional immediately if you notice a leaking faucet that won’t stop, running toilet that wastes water continuously, frozen pipes, water pressure issues affecting multiple fixtures, or signs of water damage on walls or ceilings. Also call if a drain remains blocked after using a plunger and drain snake, or if you suspect a leak inside walls or under floors. Never delay reporting these issues to your landlord, as water damage can spread quickly and affect structural integrity. Professional assessment prevents costly damage claims against your deposit.

    Book online, it takes a minute →

  • Cost of an Annual Boiler Service Plan: 2026 Guide

    Cost of an Annual Boiler Service Plan: 2026 Guide

    Table of Contents

    Last Updated: September 19, 2026

    What an Annual Boiler Service Plan Includes

    An annual boiler service plan covers a yearly inspection, safety check and efficiency tune-up of your boiler by a Gas Safe registered heating engineer.

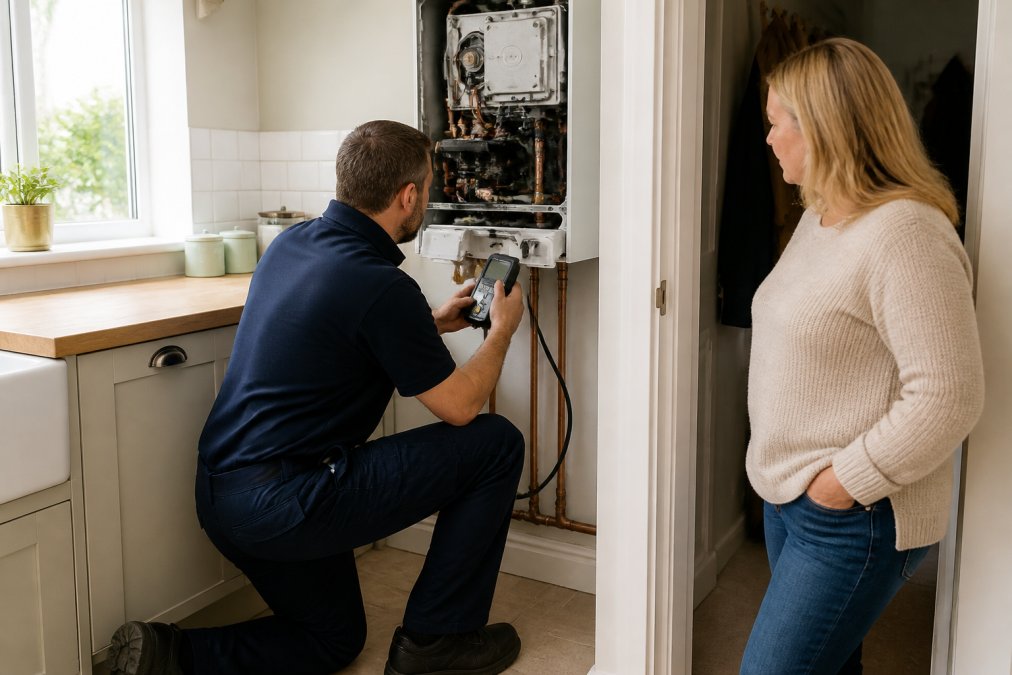
    Gas Safe engineer checking a combi boiler during an annual boiler service plan in a bright kitchen
    Gas Safe engineer checking a combi boiler during an annual boiler service plan in a bright kitchen

    Boiler Service Checklist: What Engineers Check

    The boiler service checklist is the list of tasks an engineer works through during a visit, and a good engineer will walk you through it.

    A standard service covers:

    • Visual inspection of the boiler, pipework and flue
    • Flue gas and combustion analysis to confirm safe burning
    • Carbon monoxide safety check on the appliance and surrounding area
    • Pressure check and top-up of the central heating system
    • Inspection of the heat exchanger for corrosion or debris
    • Cleaning of components where access allows
    • A written service record signed by the engineer
    Pro Tip
    Ask the engineer to show you the combustion analyser readings before they leave. A reading that has drifted since last year tells you more about your boiler’s health than any verbal summary.

    What Affects the Cost of an Annual Boiler Service Plan

    Pricing for an annual boiler service plan depends on your boiler type, system size, fuel, access and how you pay. There is no single national figure, and any provider quoting one flat number for every home is simplifying heavily.

    Boiler Type and System Size

    A combi boiler serving a two-bedroom flat is a different job from a system boiler feeding a five-bedroom house with a pressurised cylinder. Larger systems take longer to inspect and involve more components, and older boilers with limited heat exchanger access add labour time.

    Fuel Type: Gas, Oil and Electric

    The fuel feeding your boiler changes both the equipment used and the time needed:

    • Gas, the most common setup in Sussex homes, and the cheapest to service because parts and analysers are widely available.
    • Oil, needs additional checks on the tank, filter, nozzle and burner, plus a combustion test with oil-specific equipment. Expect a longer visit.
    • Electric, no flue or combustion analysis, but the inspection focuses on the immersion, controls and safety cut-outs, which is a different skill set.

    Access, Location and System Condition

    Two homes with identical boilers can attract different prices purely because of access. A boiler in a kitchen cupboard with clear space is quick to work on; one boxed into a tight airing cupboard, or with an awkward flue terminal, adds time and sometimes a second pair of hands.

    Payment Structure: Monthly vs One-Off

    The choice between a monthly direct debit plan and a single visit comes down to how you prefer to budget.

    Payment Method How It Works Best For Watch Out For
    Monthly plan Fixed monthly direct debit, service included Households wanting predictable costs Ongoing commitment, even if you move
    One-off service Pay per visit, no contract People who service ad hoc No priority booking in winter
    Service plus cover Monthly payment, service and repairs included Older boilers, landlords Exclusions on wear-and-tear parts

    Why Regional Pricing Varies

    Most guides give a single national average and stop there. In practice, pricing shifts with the local market. Areas with older housing stock and hard water, common across parts of Sussex, including Crawley and the surrounding towns, see more scale-related and sludge-related work, which nudges servicing time upwards. Dense urban areas also have more engineers competing for the same jobs, keeping prices keener than in rural postcodes where travel time is built into the quote.

    Pro Tip
    Ask any provider whether the price covers a full combustion analysis and a written service record. Those two items separate a genuine annual service from a visual once-over.

    How to Compare Quotes Fairly

    Before you commit to any plan, check the following:

    • Is the engineer Gas Safe registered, and is the registration number on the quote?
    • Does the price include the combustion analysis or is that an add-on?
    • Is a written service record provided after the visit?
    • Are there call-out charges for a missed appointment?
    • If cover is bundled, what parts and labour are excluded?
    • Can you cancel the plan, and what notice is required?

    Our boiler servicing team covers homes across Sussex, including Crawley, and will confirm exactly what a visit includes before you book.

    Boiler Service vs Boiler Cover: What’s the Difference?

    Boiler service vs boiler cover catches most people out. A boiler service is a scheduled safety and efficiency inspection. Boiler cover, sometimes called boiler breakdown cover, is an insurance-style product that pays for repairs and parts when something fails.

    Watch Out
    Buying breakdown cover and assuming it includes the annual service is the single most common mistake we see. Many policies treat servicing as an add-on. Check the wording, or you may go two winters without a safety inspection.

    How Often Should a Boiler Be Serviced?

    Once a year, without exception. Manufacturers require an annual service to keep the warranty valid, and Gas Safe guidance points the same way. The service interval is not flexible: twelve months between visits is the standard for domestic boilers.

    There are cases where you should book sooner:

    See our boiler repair and servicing →

    • After any boiler fault or lockout, even if it reset itself
    • If you notice soot, a yellow rather than blue flame, or a smell of gas
    • When you move into a property with no service history
    • Before the heating season starts, ideally late summer or early autumn

    Landlord Gas Safety Requirements and Service Records

    Landlords carry a legal duty that homeowners do not. Under the Gas Safety (Installation and Use) Regulations 1998, you must have every gas appliance in a rented property checked annually by a Gas Safe registered engineer and give tenants a copy of the record. The rules are set out in full by the Health and Safety Executive’s landlord gas safety guidance.

    A practical asset for landlords managing several properties:

    • Diary the certificate expiry date, not the visit date
    • Keep the previous two years of records on file
    • Give new tenants a copy before they move in
    • Display or hand over the record within 28 days of the check
    • Book servicing and the certificate in the same visit to save a call-out fee
    Key Takeaway
    A boiler service and a gas safety certificate are two different documents. Landlords need both, and booking them together saves a second visit.

    Warranty Implications: DIY vs Professional Servicing

    Servicing your own boiler is not worth considering, and the reason is not just safety. Almost every manufacturer warranty requires the appliance to be serviced annually by a Gas Safe registered engineer, with the service record kept as proof. Skip that, and a claim for a failed heat exchanger in year four can be refused outright.

    How Manufacturers Actually Verify Servicing

    The mechanism is simpler than most homeowners expect. When you make a warranty claim, the manufacturer or its approved engineer will typically ask for the service history before agreeing to any parts or labour. That history is the written service record, the signed document the engineer leaves after each visit. If the record is missing, or there is a gap of more than twelve months between entries, the claim can be declined.

    What the Warranty Terms Usually Require

    While the exact wording varies between manufacturers, the common requirements are consistent:

    • An annual service carried out by a Gas Safe registered engineer
    • A written record of each service, kept for the life of the warranty
    • Servicing carried out within twelve months of the previous visit
    • Any repairs or part replacements carried out by a competent, registered engineer

    Why DIY Servicing Is Not a Shortcut

    Working on a gas appliance without being Gas Safe registered is a criminal offence, not just a warranty issue. The registration scheme is administered by Gas Safe Register, and you can check an engineer’s registration before letting anyone near your boiler.

    Where DIY Does Have a Place

    Where DIY does have a place is the small stuff around the service: bleeding radiators, checking the pressure gauge, and keeping the area around the boiler clear. Those habits support the annual check without touching the gas side, and make the engineer’s visit faster.

    Watch Out
    If you cannot produce a service record for the last twelve months, assume the warranty is at risk. Book a service before any fault develops, because a claim made after a gap in servicing is far harder to win.

    What to Keep After Each Visit

    A simple file, paper or digital, is enough:

    • The signed service record from each annual visit
    • The Gas Safe registration number of the engineer who attended
    • Any parts replaced, with the date
    • The original warranty document and its expiry date
    • The installation date and commissioning record

    Our landlord and letting agent services cover multiple properties on one schedule, which avoids the mess of tracking different renewal dates across a portfolio.

    Conclusion: Choosing the Right Boiler Service Plan

    The right annual boiler service plan matches your boiler, your budget and your legal position, not the lowest headline number. If you own your home and your boiler is under warranty, a straightforward annual service is usually enough. If you rent out property, you need the service and the gas safety certificate on a schedule you will not forget.

    Frequently Asked Questions

    What should an annual boiler service include?

    A full service covers a visual inspection of the boiler and flue, a combustion analysis to check flue gas readings, a pressure check, inspection of the heat exchanger and key components, and a carbon monoxide safety check. The engineer should also test controls and safety devices, then provide a written service record. If your plan includes a boiler service checklist, ask for it upfront so you know exactly what is covered before booking.

    How does a boiler service plan differ from boiler cover?

    A boiler service plan covers routine annual maintenance only. Boiler cover, sometimes called boiler breakdown cover, includes repairs and parts if your boiler fails, often with an emergency call-out. Some plans combine both. If your boiler is older or has broken down before, cover may be worth it. For a newer, reliable combi boiler, a service-only plan is often enough to protect efficiency and your manufacturer warranty.

    Do I need a service plan if my boiler is still under warranty?

    Yes. Most manufacturer warranties require an annual service by a Gas Safe registered engineer to stay valid. Skipping it can void your warranty, meaning you pay for repairs that would otherwise be covered. A service plan keeps a dated service record, which is what manufacturers ask for if you make a claim. It also catches small faults early, before they become expensive breakdowns.

    What are the benefits of choosing a local heating engineer for your service plan?

    A local engineer can reach you faster for emergency repairs, knows the boiler models common in your area, and builds a long-term record of your central heating system. You also avoid call centre queues and get consistent pricing. Check the engineer is Gas Safe registered and ask what the plan includes, such as annual maintenance, a pressure check, and a carbon monoxide safety inspection.

    Book your visit online →

  • Signs Your Radiators Need Power Flushing

    Signs Your Radiators Need Power Flushing

    Table of Contents

    Last Updated: September 18, 2026

    What Is a Power Flush and Why It Matters

    A power flush is a professional cleaning process that removes sludge, magnetite, and corrosion deposits from your central heating system. Over time, these contaminants build up inside your pipes, radiators, and boiler, restricting water flow and reducing heating efficiency.

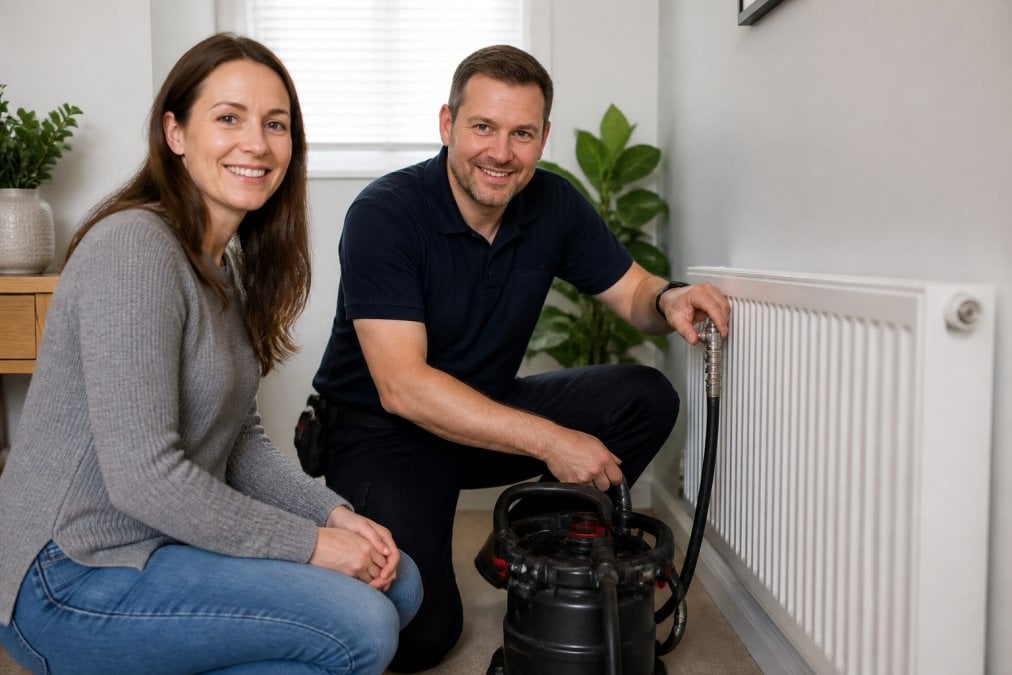
    At Apex Gas & Heating Ltd, we see this problem regularly across Sussex and Surrey properties. The debris circulates through your system, settling in radiators and the heat exchanger. This causes cold spots, poor heating performance, and eventually boiler breakdowns.

    The process uses specialist equipment to force cleaning chemicals and water through your entire heating circuit at high pressure. This dislodges the accumulated sludge and flushes it out safely. A magnetic filter then captures any remaining particles before they can cause further damage.

    Think of it like a deep clean for your heating system. Without it, your boiler works harder, uses more energy, and fails sooner.

    Cold Spots on Radiators: A Clear Warning Sign

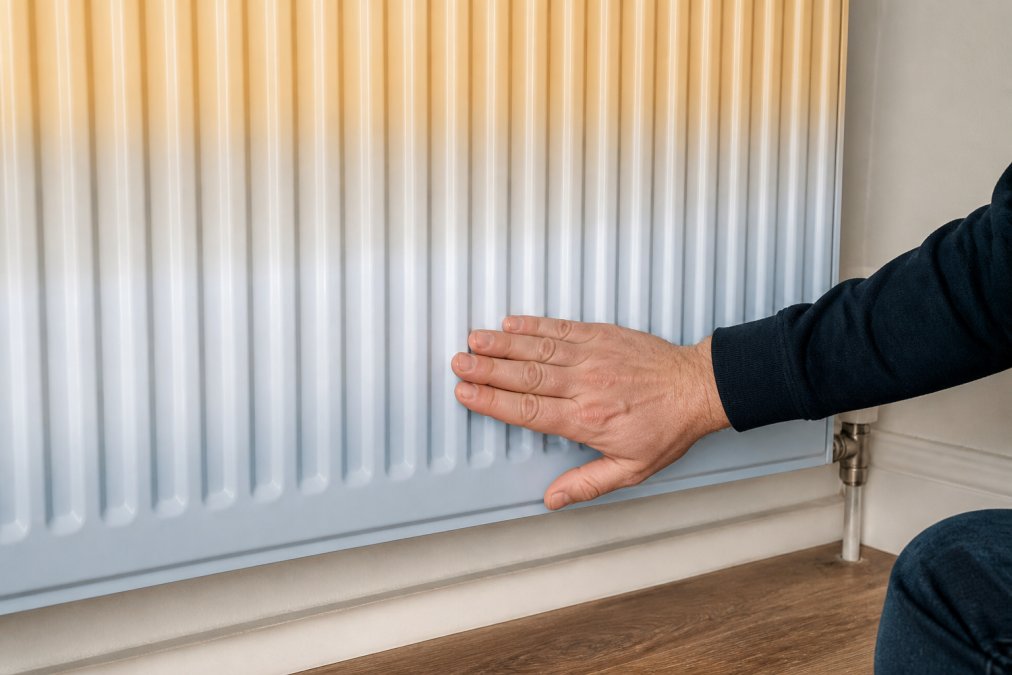
    Cold spots on radiators are one of the most obvious signs your radiators need power flushing. If the bottom of a radiator stays cold while the top warms up, sludge is blocking the water flow inside.

    Close-up of a hand touching the bottom half of a radiator showing cold spots while the top section is warm, demonstrating uneven heat distribution in a domestic setting
    Close-up of a hand touching the bottom half of a radiator showing cold spots while the top section is warm, demonstrating uneven heat distribution in a domestic setting

    This happens because sludge settles at the lowest point of each radiator. The hot water enters at the top but cannot reach the bottom section. You’ll notice one radiator cold, or multiple radiators affected unevenly across your home.

    Bleeding your radiators might help temporarily. You release trapped air, and the radiator warms briefly. But if it goes cold again within days or weeks, the problem is sludge, not air. Repeated bleeding is a sign you need professional help.

    A power flush clears these blockages completely. Water flows freely through every radiator again, heating your home evenly.

    Central Heating Sludge Symptoms You Shouldn’t Ignore

    Central heating sludge builds up silently for years. Early signs are easy to miss, but catching them early saves money and prevents emergencies.

    Common central heating sludge symptoms include:

    • Radiators need frequent bleeding (more than once a year)
    • Uneven heating between rooms
    • Boiler making unusual noises or struggling to start
    • Water coming out black or discoloured when you bleed radiators
    • Heating takes longer to reach comfortable temperatures
    • Some radiators stay cold no matter how high you set the thermostat

    Black or dark grey water when bleeding a radiator is a clear indicator. This discoloured water contains magnetite and corrosion particles. If you see this, your system contamination is significant.

    Sludge also reduces system pressure. Your boiler pressure gauge may drop faster than normal. You’ll find yourself topping up the system more often than you should.

    Left untreated, sludge eventually blocks the pump or damages the heat exchanger. At that point, you’re facing expensive repairs or a full boiler replacement.

    Other Signs Your System Needs Attention

    Slow Heating and Poor System Efficiency

    When your central heating system takes ages to warm up, or rooms stay cold despite high thermostat settings, sludge is often the culprit. Contaminated water circulates slowly through blocked pipes and radiators.

    Your boiler works harder to push water through the debris. This increases fuel consumption and your energy bills. Over a heating season, the extra cost adds up significantly.

    Poor system efficiency also affects comfort. You’re paying more to stay cold. A power flush restores normal water circulation and heating performance within hours.

    Noisy Boiler and Unusual Heating Sounds

    A boiler that kettles, bangs, or grinds is struggling. These noises usually mean sludge is causing turbulence in the system or blocking the heat exchanger.

    Kettling sounds like a kettle coming to boil inside your boiler. Banging occurs when pressure builds behind blockages. Both indicate your boiler is working against resistance it shouldn’t face.

    These noises are early warnings. Ignoring them leads to component failure. A power flush removes the obstruction and stops the noise.

    Frequent Radiator Bleeding and Discoloured Water

    If you’re bleeding radiators more than once a year, your system is collecting air consistently. This happens when sludge creates turbulence and causes air pockets to form.

    Each time you bleed, you release trapped air. But the sludge causing the air pockets remains. The air comes back.

    Discoloured water, black, brown, or grey, confirms sludge contamination. Clean systems produce clear water. Dark water means magnetite and corrosion particles are circulating.

    Frequent bleeding combined with discoloured water is a strong indicator that radiators need power flushing.

    How Long Does a Power Flush Take

    A typical power flush takes between 4 to 8 hours, but the actual duration depends on several factors specific to your heating system. Your engineer will confirm the timeframe during an initial assessment.

    Variables that affect duration:

    • System size: A small flat with 4-6 radiators may complete in 4 hours. A three-bedroom house with 10-12 radiators typically takes 6-8 hours. Larger properties or those with multiple zones can extend beyond 8 hours.
    • Contamination level: Systems with light sludge (caught early) flush faster. Heavily contaminated systems, where black water continues to discharge after several hours, require extended circulation and multiple chemical passes.
    • Pipe configuration: Older microbore systems (narrow-bore copper pipework common in properties built before the 1990s) restrict flow and take longer to clear than modern 15mm or 22mm pipework. Gravity-fed systems (where the boiler relies on natural convection rather than a pump) cannot be power flushed safely due to pressure incompatibility; these require alternative cleaning methods.
    • System age and condition: Systems with corroded sections or partially blocked valves may need isolation or replacement during the flush, adding time.

    What happens during the process:

    The engineer first isolates your system and connects specialist flushing equipment to the heating circuit. Initial circulation with cleaning chemicals typically takes 1-2 hours. The engineer monitors water colour and pressure throughout. As sludge dislodges, the discharge water changes from black to grey to brown to clear, this visual progression indicates progress.

    Once water runs clear, the system is flushed with clean water for a final rinse (30-60 minutes). The engineer then refills the system, bleeds air from radiators and the boiler, and tests pressure and temperature at multiple points.

    Planning around downtime:

    Your heating system will be offline during the entire flush. If you have young children, elderly relatives, or health conditions sensitive to cold, schedule the work during warmer months (April-September) or ensure alternative heating is available. Some engineers can complete work early morning to minimise disruption.

    After completion, allow 24 hours before the system reaches full efficiency. Radiators may heat unevenly for the first few hours as air pockets settle and inhibitor circulates.

    Benefits of Power Flushing Central Heating Systems

    Power flushing delivers measurable improvements to your home comfort and system reliability.

    Key benefits include:

    • Even heating throughout your home
    • Faster warm-up times
    • Reduced boiler noise and strain
    • Lower energy bills from improved efficiency
    • Extended boiler lifespan
    • Fewer breakdowns and emergency repairs
    • Better water quality in the system
    • Restored system pressure stability

    The most noticeable benefit is comfort. Every radiator heats properly. No more cold bedrooms or uneven temperatures between floors.

    System reliability improves significantly.

    DIY Versus Professional Power Flushing: What You Need to Know

    Power flushing is not a DIY undertaking. The risks to your heating system, boiler, and warranty are substantial, and the equipment and expertise required are beyond domestic reach.

    Why professional flushing is essential:

    When professional flushing is genuinely necessary:

    Alternative to power flushing: Magnetic filtration:

    What a professional engineer does that DIY cannot replicate:

    • Assesses your specific system type (microbore, standard, gravity-fed, combi) and determines safe flushing parameters
    • Tests water quality before and after to confirm contamination levels and chemical neutrality
    • Monitors pressure continuously and adjusts flow to prevent damage
    • Identifies additional issues (leaks, failing valves, corroded sections) during the flush
    • Adds system inhibitor correctly and documents the work for warranty purposes
    • Provides a certificate of completion, which some insurers and future buyers may request

    Protecting Your System After a Power Flush

    After power flushing, your system is clean but vulnerable. Sludge can form again without preventative measures.

    Essential post-flush protection:

    • Add a system inhibitor to the water
    • Install a magnetic filter if not already present
    • Maintain regular boiler servicing
    • Bleed radiators only when necessary
    • Monitor system pressure monthly
    • Schedule annual servicing

    Frequently Asked Questions

    What are the most common signs that radiators need power flushing?

    The clearest indicators include cold spots at the bottom of radiators whilst the top remains warm, slow heating throughout your home, discoloured or black water when bleeding radiators, and unusual noises from your boiler. If you’re frequently bleeding radiators to maintain pressure or notice your energy bills rising without explanation, your central heating system likely has sludge build-up requiring professional attention.

    How long does a power flush take to complete?

    A typical power flush takes between 4 to 8 hours, depending on your system’s size and the extent of contamination. Larger properties or systems with significant sludge accumulation may require longer. Most installations can be completed in a single working day, though your engineer will confirm the timeframe during an initial assessment of your central heating pipework and radiator configuration.

    What are the main benefits of power flushing central heating?

    Power flushing removes magnetite and corrosion deposits that restrict water flow, restoring heating efficiency and reducing energy bills. It eliminates cold spots on radiators, extends boiler lifespan by reducing strain on the pump, and improves overall system performance. The process also prevents future blockages and pump failures, meaning fewer breakdowns and lower maintenance costs over time.

    Is power flushing safe for older heating systems?

    Power flushing can benefit older systems, but compatibility depends on pipe condition and system age. Systems over 15 years old may have corroded pipework that could be damaged by the high-pressure flush. A qualified engineer should inspect your system first to assess whether power flushing is suitable or if alternative chemical cleaning methods would be safer. Always use a professional service to evaluate your specific central heating setup.


    If your radiators show cold spots, your water looks discoloured, or your boiler sounds strained, your system likely needs professional attention. Apex Gas & Heating Ltd provides expert power flushing and boiler servicing across Sussex and Surrey. Our approved engineers restore heating efficiency and protect your system long-term. Get a quote today and stop paying to stay cold.

    Get your boiler looked at →

  • Top 5 Boiler Maintenance Tips for Winter

    Top 5 Boiler Maintenance Tips for Winter

    Table of Contents

    Last Updated: September 17, 2026

    1. Schedule Your Annual Boiler Service Before Winter Arrives

    Following the top 5 boiler maintenance tips for winter, an annual boiler service is the single most important step you can take to prevent winter breakdowns. This preventative maintenance catches problems before they become emergencies, keeps your heating system running efficiently, and maintains your boiler’s warranty coverage.

    A professional engineer will inspect your heat exchanger, check your flue, test your pilot light, and verify all safety systems are functioning correctly. This comprehensive check takes around an hour and should happen every year, ideally in autumn before demand peaks.

    At Apex Gas & Heating Ltd, we recommend booking your boiler servicing in September or October. Our Gas Safe registered engineers carry out a full system safety inspection, providing complete documentation for your peace of mind.

    Delaying servicing until something breaks means paying for emergency repairs instead of preventative maintenance, a professional service costs significantly less than an emergency call-out.

    Pro Tip
    Book your annual service early in autumn. Winter call-outs are busier, and you risk being without heating during the coldest weather if you wait until December.

    2. Check and Manage Boiler Pressure Regularly

    Boiler pressure is one of the easiest things to monitor yourself, yet many homeowners ignore it entirely. Low boiler pressure is the most common reason heating systems fail during winter, and it’s often something you can fix without calling an engineer.

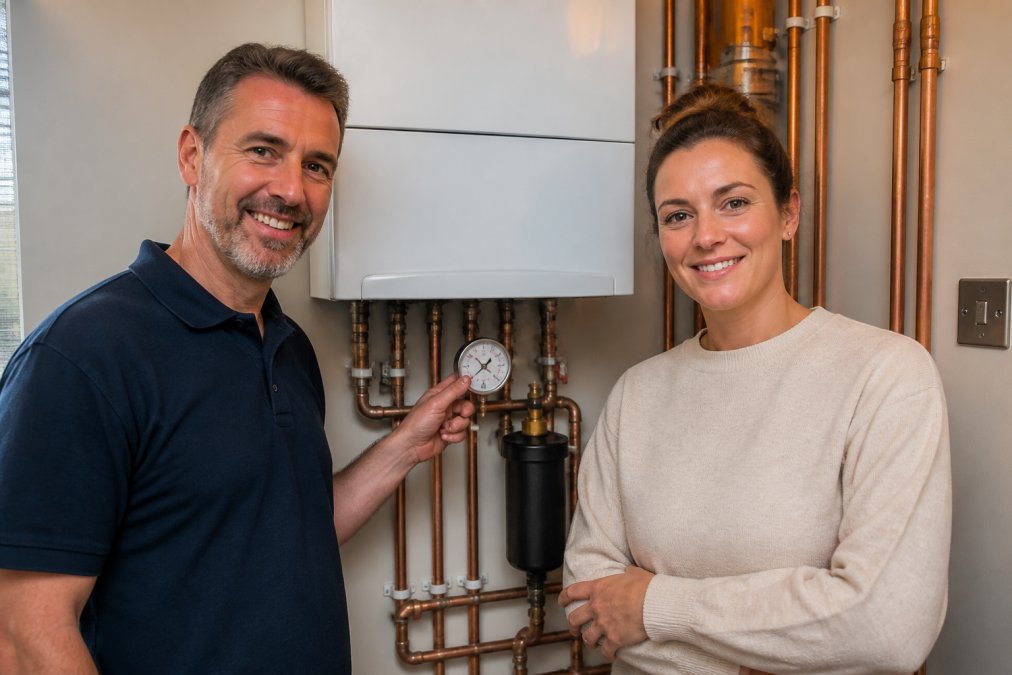
    Your boiler has a pressure gauge on the front panel. The needle should sit between 1 and 1.5 bar when the system is cold. If it drops below 1 bar, your heating will struggle to reach all radiators, leaving you with cold spots and uneven warmth throughout your home.

    Understanding Your Pressure Gauge

    The pressure gauge shows how much water is circulating through your heating system. A slow drop over weeks is normal; a sudden drop suggests a leak in your pipework or radiators.

    Check your pressure gauge weekly during winter. If pressure is consistently dropping, you have a leak needing professional attention. If it’s simply low but stable, you can repressurize the system yourself.

    When to Repressurize Your System

    Most modern boilers have a filling loop (a flexible hose with two small valves) underneath or behind the unit. Opening both valves allows mains water to flow into your heating system, raising pressure to the correct level.

    Close the valves once pressure reaches 1.2 bar. Never over-pressurize your boiler. If you’re unsure how to use your filling loop, your boiler manual will have clear instructions, or you can ask your engineer during your annual service to show you how.

    Watch Out
    If pressure drops again within days of repressurizing, you have a leak. Do not keep topping up the pressure yourself, contact a professional to locate and repair the leak. Continuing to add water will eventually cause damage to your boiler’s heat exchanger.

    3. Bleed Your Radiators to Improve Heat Distribution

    Air trapped inside radiators prevents hot water from circulating properly, leaving you with cold spots at the top while the bottom stays warm. Bleeding radiators removes this trapped air and restores full heat output.

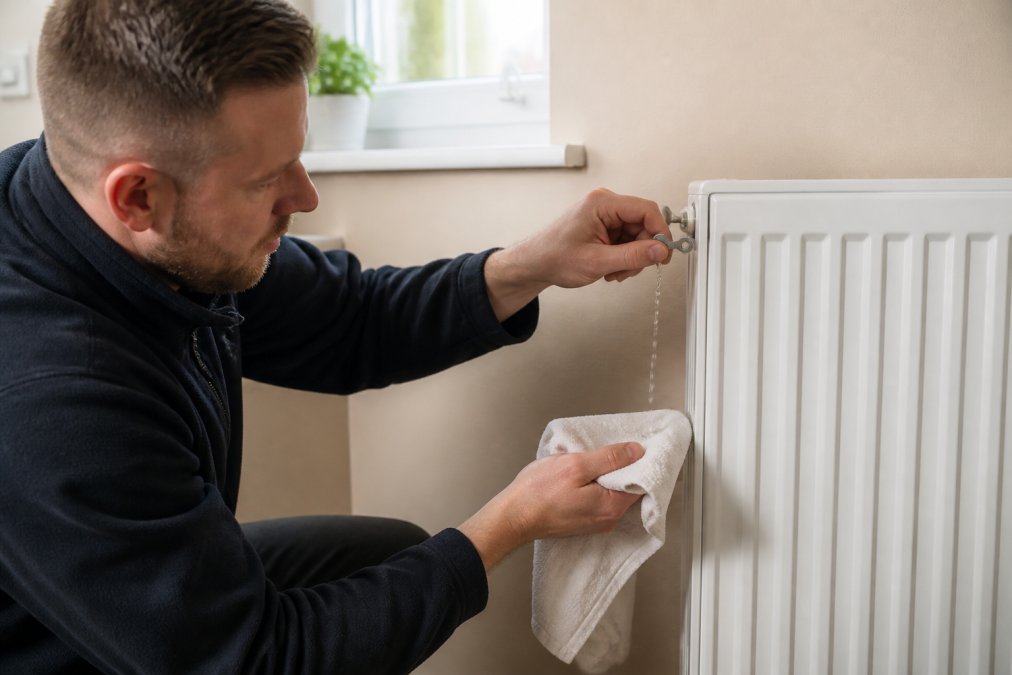
    Close-up of a hand using a radiator bleed key on a white radiator valve, releasing air with a cloth catching water droplets below
    Close-up of a hand using a radiator bleed key on a white radiator valve, releasing air with a cloth catching water droplets below

    You’ll notice radiators needing bleeding when the top stays cold while the bottom is hot, or entire radiators produce no heat. Bleeding is a simple DIY task taking 10 minutes per radiator.

    Step-by-Step Radiator Bleeding Process

    What you’ll need:

    • A radiator bleed key (available from any hardware shop for a few pounds)
    • A cloth or small container to catch water
    • Your boiler system switched off and cooled slightly

    The process:

    1. Turn off your boiler and wait 15 minutes for the system to cool.

    2. Locate the small valve at the top corner of your radiator.

    3. Place your cloth underneath to catch water drips.

    4. Insert the bleed key and turn it anticlockwise slowly until water flows steadily (not air).

    5. Turn the key clockwise to close the valve firmly.

    6. Turn your boiler back on and check your boiler pressure.

    Bleed all cold radiators, starting with those furthest from your boiler. After bleeding, check your boiler pressure and repressurize if needed.

    If radiators remain cold after bleeding, the problem is likely insufficient boiler pressure or a blockage deeper in your heating circuit. Contact a professional heating engineer to diagnose the issue.

    4. Protect External Pipes and Condensate Lines from Freezing

    Frozen pipes are one of the most common winter heating emergencies. When water inside external pipes freezes, it expands and can crack the pipe, causing leaks that damage your property and leave you without heating.

    Your boiler’s condensate pipe runs from the heat exchanger to an external drain and is vulnerable to freezing. A frozen condensate pipe stops your boiler from operating, leaving you without heating or hot water.

    Insulate all external pipes with foam pipe lagging, paying particular attention to pipes in unheated spaces like lofts, under porches, or on external walls.

    Book a boiler repair or service →

    For your condensate pipe, consider installing a specialist condensate pipe heater or insulation jacket. These are designed specifically for boiler condensate lines and prevent freezing without damaging the pipe.

    Check external pipes weekly during winter for frost or ice. If frozen, wrap the pipe in warm towels or use a heat gun on a low setting, never pour boiling water on it.

    Pro Tip
    Lagging your pipes in autumn takes an hour and costs very little. It’s far cheaper than emergency repairs for burst pipes or a boiler that won’t start because the condensate line is frozen.

    5. Test Your Boiler and Heating Controls Before Peak Winter

    As part of the top 5 boiler maintenance tips for winter, test your entire heating system in late autumn to catch any issues before winter peaks.

    Turn your thermostat up to trigger the boiler. Listen for the fan starting, then a click as ignition lights the pilot light. Heat should build in your radiators within a few minutes.

    If your boiler makes unusual noises, fails to ignite, or produces no heat, contact a professional immediately. Do not wait until December when engineers are busiest and response times are longer.

    What to Check on Your Thermostat and Timer

    Check that your thermostat responds correctly by setting it higher than your current room temperature. Your boiler should fire up within seconds.

    Check your timer or programmer by manually triggering heating at an unusual time and confirming it responds.

    Smart heating controls like Tado thermostats detect open windows and prevent heat loss. If upgrading, autumn is ideal before winter demand peaks.

    Check that your boiler’s fault code display is clear. If you see any error codes, consult your manual or contact a professional. Fault codes are your boiler’s way of telling you something needs attention before it becomes a breakdown.

    Common Winter Boiler Issues and When to Call a Professional

    Some boiler problems you can address yourself; others require a qualified Gas Safe engineer. Knowing the difference saves time and money.

    Use this decision matrix to determine whether to troubleshoot yourself or contact a professional:

    Low Boiler Pressure

    Symptom: Pressure gauge reads below 1 bar; heating is weak or absent.

    DIY action: Check your pressure gauge. If it’s below 1 bar, try repressurizing using your filling loop (the flexible hose underneath or behind your boiler with two small valves).

    Cold Radiators

    Symptom: Top of radiator is cold, bottom is warm; or entire radiator produces no heat.

    Boiler Won’t Ignite

    Symptom: You hear the fan start but no click or ignition; no heat or hot water.

    Strange Noises

    Symptom: Kettling sounds (like a kettle boiling inside pipes); banging or clunking from the boiler or pipework.

    No Hot Water But Heating Works

    Symptom: Your radiators are warm but your taps produce only cold water.

    Visible Leaks

    Symptom: Water dripping from your boiler, pipework, or radiators; wet patches on walls or ceilings.

    Decision Summary

    Call a professional immediately if:

    • Your boiler won’t ignite and reset doesn’t work
    • You see any visible leak
    • Pressure drops repeatedly after repressurizing
    • You smell gas
    • Your boiler locks out repeatedly
    • You’re unsure whether a fault is safe to address

    Safe to attempt yourself:

    • Repressurizing (one attempt only)
    • Bleeding radiators
    • Checking thermostat and timer settings
    • Tightening loose pipe clips

    When in doubt, contact a professional. At Apex Gas & Heating Ltd, our Gas Safe registered engineers diagnose issues quickly and provide transparent advice on whether boiler repair or replacement is the most cost-effective option. We serve Crawley and surrounding areas with 24/7 emergency support, so you’re never left without heating during winter.

    Frequently Asked Questions

    Should a boiler be serviced every 12 months?

    Yes, annual boiler servicing is essential for safety, efficiency, and warranty compliance. A Gas Safe registered engineer checks the heat exchanger, flue, pilot light, and pressure during servicing. This prevents carbon monoxide risks and catches problems before they develop into costly breakdowns during winter. Most boiler warranties require annual servicing to remain valid.

    How do I know if my boiler pressure is too low?

    Check your boiler’s pressure gauge, usually located on the front panel. The needle should sit between 1.0 and 1.5 bar when the system is cold. If it drops below 1.0 bar, your heating system won’t work efficiently and radiators may stay cold. Common causes of low boiler pressure include small leaks, a faulty expansion vessel, or air in the system. You can repressurize manually using the filling loop, but persistent pressure loss requires professional inspection.

    How do I bleed radiators to remove trapped air?

    Use a radiator bleed key to open the small valve at the top corner of each radiator. Hold a cloth underneath to catch water, then turn the key slowly anti-clockwise until air hisses out, then water flows. Close the valve immediately. Start with radiators furthest from the boiler and work backwards. Bleeding radiators improves heat distribution and eliminates cold spots. If radiators remain cold after bleeding, the issue may be system pressure or circulation problems requiring professional attention.

    What temperature should I set my boiler to in winter?

    Set your boiler flow temperature between 60-80°C for most modern condensing boilers. Lower settings (around 60°C) improve efficiency and reduce energy consumption, while higher settings provide faster heat-up times. Your thermostat should be set to your comfort level, typically 18-21°C. Using a smart thermostat or timer allows you to programme heating schedules, reducing waste during periods when you’re away or asleep. Check your boiler manual for manufacturer recommendations.

    Book online, it takes a minute →

  • How to Maintain Gas Boiler Pressure: A 2026 Guide

    How to Maintain Gas Boiler Pressure: A 2026 Guide

    Table of Contents

    Last Updated: September 16, 2026

    What Is Boiler Pressure and Why It Matters

    Boiler pressure is the water pressure inside your central heating system, and it is the most common reason homeowners in Crawley and across Sussex wake up to no heating. This guide from Apex Gas & Heating Ltd explains how to maintain it.

    Key Takeaway
    Pressure loss is a symptom, not a problem. Fixing the symptom without finding the cause means you will be topping up again next month.

    How to Check Your Boiler Pressure

    Checking boiler pressure takes under a minute and needs no tools. Locate the gauge, read it cold, and compare it against your boiler manual.

    Homeowner checking the boiler pressure gauge on a wall-mounted unit during a sunny morning
    Homeowner checking the boiler pressure gauge on a wall-mounted unit during a sunny morning

    Reading the Pressure Gauge

    The gauge is usually a small circular dial on the front of the boiler, behind the control panel flap, or under the casing on older models. Many modern Worcester and Glowworm units show it digitally.

    Visual Identification Guide: Which Gauge Do You Have?

    Use this quick reference to identify your gauge type before you read it:

    Gauge Type What It Looks Like Where to Find It How to Read It
    Analogue dial (most common) Circular face, numbered 0-4 bar, black needle Front panel, behind flap, or under casing Read where the needle points when cold
    Digital display LCD or LED screen showing numbers Front control panel Press the info or pressure button if not always visible
    Dual-scale dial Two number rings (bar and psi) Same as analogue Read the bar scale only
    Remote or app gauge No physical gauge; reading in app Smartphone app or wall thermostat Check the manufacturer’s app

    What the Correct Pressure Should Be

    Most sealed heating systems want 1.0 to 1.5 bar cold. How to interpret your reading:

    Gauge Reading (Cold) What It Means Action
    Below 1.0 bar Pressure too low, lockout likely Top up using the filling loop
    1.0 to 1.5 bar Correct operating range No action needed
    1.5 to 2.0 bar Slightly high but often fine Monitor for changes
    Above 2.5 bar Pressure too high Check filling loop is closed, call an engineer

    Fault Code Interpretation Table

    When pressure drops, many boilers also show a fault code. This table covers the codes most commonly seen alongside low pressure on Worcester, Glowworm, Vaillant and Ideal models. Always confirm against your own manual, as codes vary.

    Code Common Meaning Likely Cause DIY Action
    F1 / E1 Ignition lockout Low pressure, gas supply issue, or flame sensor fault Check pressure; if below 1.0 bar, top up. If pressure is fine, call an engineer
    F22 / E22 Low water pressure Pressure below minimum Top up via filling loop; if it drops again within days, call an engineer
    F28 / E28 Flame loss during operation Air in system, blocked condensate, or pressure fluctuation Check pressure and bleed radiators; if code returns, call an engineer
    F75 / E75 No pressure change detected Filling loop left open, sensor fault, or blocked pressure sensor pipe Close filling loop; if code persists, call an engineer
    F0 / E0 Flow or return temperature sensor fault Sensor or wiring issue Call an engineer
    F29 / E29 Flame extinguished too often Pressure instability or flue issue Check pressure; if stable, call an engineer
    Key Takeaway
    A fault code is a starting point, not a diagnosis. Use it to decide whether you can safely top up or whether the next step is a phone call.

    Common Causes of Low Boiler Pressure

    Low boiler pressure almost always traces back to water escaping the system, or to air introduced during routine maintenance. Understanding the common causes saves you from repeatedly topping up a system that is quietly leaking.

    Leaks in the Heating System

    Water loss is the leading cause. A pinhole leak on a radiator valve, a corroded pipe joint under the floorboards, or a failing pressure relief valve can drain pressure slowly over weeks. Look for damp patches, discoloured ceilings, or greenish crusting around radiator valves.

    Bleeding Radiators

    Bleeding radiators releases trapped air, so system pressure drops. This is normal, and a quick top-up restores it. Cold spots at the top of a radiator with warmth at the bottom usually mean trapped air, bleed it, then check the gauge and top up if needed.

    Seasonal Causes: Why Pressure Drops Differ in Summer and Winter

    The cause of pressure loss often changes with the season, and knowing which pattern you are seeing speeds up diagnosis.

    Winter (high demand)

    • Thermal expansion and contraction. More heating cycles stress joints and seals, so a weak joint that holds in summer may weep in winter.
    • Frozen condensate pipe. Not a pressure fault itself, but it can cause a lockout homeowners mistake for low pressure. Check for ice on the external pipe.
    • Higher system temperatures. Pressure swings more between hot and cold, so a marginal expansion vessel shows up as repeated low-pressure lockouts.
    • Increased radiator bleeding. Trapped air rises as systems heat up, so more homeowners bleed radiators in winter, each bleed dropping pressure.

    Summer (low usage)

    See our boiler repair and servicing →

    • Standing pressure loss. With the heating off for weeks, a slow leak becomes obvious because nothing masks it.
    • Corrosion inhibitor degradation. Warm-weather stagnation lets inhibitor levels drop, accelerating internal corrosion and pinhole leaks.
    • Expansion vessel charge loss. A vessel that has lost its air charge over winter may only become noticeable when the system is cold for long periods.
    • Seal drying. Rubber seals and washers can dry out when not exposed to warm water, leading to small weeping joints when the system restarts in autumn.

    Fault Codes That Accompany Low Pressure

    The most common low-pressure codes are F22/E22 (low water pressure), F1/E1 (ignition lockout, often pressure-related), and F75/E75 (no pressure change detected). Top up first, then monitor. If the code returns within days, the cause is still present and needs an engineer.

    Watch Out
    Never keep topping up a system that loses pressure repeatedly without investigating. A constant fresh water supply dilutes the corrosion inhibitor in your system, which accelerates internal rust and can lead to premature boiler failure.
    Pro Tip
    Keep a simple log: date, cold pressure reading, and whether you topped up. After a few weeks you will see whether the loss is seasonal, constant, or linked to heating use, which helps an engineer diagnose faster.

    How to Use a Boiler Filling Loop to Top Up Pressure

    Using a boiler filling loop is a straightforward job most homeowners can complete safely. The filling loop is a braided flexible hose, usually with two valves, that temporarily connects your mains cold water supply to the heating circuit. Some boilers have an internal filling loop operated by a key or lever; others use an external hose stored near the boiler.

    Step-by-Step Guide

    Total time: 10 minutes
    Difficulty: Beginner

    What you’ll need:

    • Your boiler manual (to confirm the target pressure)
    • A cloth for drips
    1. Turn the heating off and let the system cool. Pressure must be read cold; topping up a hot system gives a false reading.
    2. Locate the filling loop and pressure gauge. The gauge needs to be visible while you work.
    3. Open one valve slowly. On a two-valve loop, open the valve nearest the boiler first. You should hear water flowing.
    4. Open the second valve slowly. Watch the gauge, pressure can jump from 1.0 to 2.0 bar in seconds.
    5. Stop at 1.2 to 1.3 bar. Aim slightly below the maximum so there is headroom for expansion.
    6. Close both valves firmly. Close the valve nearest the heating circuit first, then the mains side.
    7. Disconnect the hose if it is removable. Leaving a filling loop permanently connected is against water regulations.
    8. Run the heating and recheck. After an hour, confirm the cold reading still sits in range.

    Boiler Pressure Keeps Dropping After Topping Up: What to Do

    Pressure that falls again within days points to an active fault rather than normal expansion and contraction, an unresolved leak, a failed pressure relief valve, or a faulty expansion vessel.

    Work through this diagnostic sequence:

    • Check every visible radiator valve and joint for weeping or crusting.
    • Inspect the pressure relief valve discharge pipe outside the property. If it drips constantly, the valve is passing and needs replacing.
    • Look at the expansion vessel charge. A vessel that has lost its air charge causes pressure to swing wildly between hot and cold.
    • Check for air ingress. If radiators need bleeding every few weeks, air is being drawn in somewhere.

    When to Call a Gas Safe Registered Engineer

    Call a Gas Safe registered engineer for any work involving the gas supply, the combustion chamber, or components inside the boiler casing. In the UK, it is a legal requirement that anyone working on a gas appliance is on the Gas Safe Register, and you can verify an engineer’s credentials through the official Gas Safe Register.

    • Pressure drops repeatedly within days of topping up
    • The pressure relief valve is discharging
    • You can smell gas or see soot or yellow staining around the boiler
    • The boiler shows a fault code you cannot clear
    • The boiler is over ten years old and has never been serviced
    Pro Tip
    Note your pressure reading and the date every time you top up. A written record turns a vague “it keeps dropping” into hard evidence an engineer can work from, and it often reveals whether the loss is seasonal or constant.

    Conclusion

    Pressure loss is one of the most common boiler complaints, and the fix is rarely just topping up. Finding the underlying cause, a weeping valve, a failed expansion vessel or air from bleeding radiators, is what keeps your heating reliable through the coldest months.

    Frequently Asked Questions

    What is the correct pressure for a gas boiler?

    Most gas boilers should be set between 1.0 and 1.5 bar when the system is cold. This is the ideal range for efficient operation. If the pressure reads below 1.0 bar, you may need to top it up using the filling loop. If it reads above 2.0 bar, you should bleed a radiator or call an engineer. Always check your boiler manual for the manufacturer’s specific recommendation, as some models vary slightly.

    Why does my boiler pressure keep dropping after topping up?

    If your boiler pressure keeps dropping after topping up, there is likely a leak somewhere in the heating system. Common culprits include a faulty pressure relief valve, a leaking radiator valve, or a hidden pipe leak. It could also be trapped air that needs bleeding. If the pressure falls again within days, it is best to call a Gas Safe registered engineer to investigate and fix the underlying issue.

    Is it safe to top up my own boiler pressure?

    Yes, topping up boiler pressure using the filling loop is generally safe for homeowners and is considered routine maintenance. However, you must never open the boiler casing or attempt repairs on gas components. If you are unsure how to use the filling loop, or if the pressure keeps dropping, contact a Gas Safe registered engineer. They can safely diagnose and repair any faults.

    When should I call a Gas Safe registered engineer for pressure issues?

    Call a Gas Safe registered engineer if your boiler pressure drops repeatedly after topping up, if you notice water leaks around the boiler, if the pressure relief valve is discharging, or if you smell gas. Also seek professional help if you are unsure how to operate the filling loop or if the boiler shows a fault code. Engineers can safely repair leaks, replace faulty valves, and ensure your system is safe.

    Book your visit online →

  • How to Reset a Boiler After Lockout: A 2026 Guide

    How to Reset a Boiler After Lockout: A 2026 Guide

    Table of Contents

    Last Updated: September 16, 2026

    What a Boiler Lockout Means and Why It Happens

    A boiler lockout is a safety shutdown: the control board has detected a fault it cannot safely clear and has cut the gas supply to the burner. Unlike a normal switch-off, it is deliberate, and the boiler stays off until someone resets it manually.

    The most common triggers are ignition failure, flame failure, low system pressure, a frozen condensate pipe, or a power cut that interrupted the startup sequence. In each case the boiler is protecting you, not failing on you.

    At Apex Gas & Heating Ltd, we attend lockouts across Sussex and Surrey every week.

    Close-up of a homeowner's hand pressing the reset button on a modern white wall-mounted boiler control panel in a bright kitchen, with a fault code visible on the digital display
    Close-up of a homeowner’s hand pressing the reset button on a modern white wall-mounted boiler control panel in a bright kitchen, with a fault code visible on the digital display
    Key Takeaway
    A lockout is a safety mechanism, not a breakdown. The boiler has shut itself down because something in the startup sequence did not check out.

    Safety Checks Before You Reset a Boiler

    Before you touch anything, confirm three things: no smell of gas, no signs of leaking water, and a clear area around the boiler. If you smell gas, do not reset the boiler. Turn off the gas at the meter, open windows, leave the property, and call the National Gas Emergency Service on 0800 111 999.

    The Gas Safe Register’s guidance for homeowners is clear that gas work must only be carried out by a registered engineer. Pressing a reset button is a user control, not gas work, so it sits outside that restriction. Anything beyond it does not.

    Checking Gas Supply and Power

    Two failure points cause more false alarms than any other: an interrupted gas supply and a power cut.

    • Check other gas appliances. If the hob lights, gas is reaching the property.
    • Check the boiler’s power. Look for a lit display or standby light.
    • Check the programmer or thermostat is calling for heat.
    • Check the pressure gauge reads between 1 and 1.5 bar when the system is cold.

    If the display is dead, the issue is electrical and resetting will do nothing. If the gauge reads below 1 bar, pressure has dropped and you must top up the filling loop before resetting.

    How to Locate the Reset Button on Your Boiler

    The reset button is almost always on the front control panel, either as a dedicated button marked with a flame symbol or circular arrow, or as a combined button that also serves as the pressure or mode selector. On most modern wall-mounted boilers it sits to the right of the display, below the pressure gauge, or behind a flip-down flap.

    If you cannot find it, the boiler manual is the fastest answer: every manufacturer publishes a digital copy, and searching your model number plus “manual” will bring it up.

    Visual Identification Guide for Common Boiler Brands

    Where the reset control sits varies by manufacturer.

    Brand Reset Control Location Typical Marking
    Worcester Bosch Right of the display, below the pressure gauge Flame symbol or “Reset”
    Glow-worm Left side of the control panel Circular arrow
    Baxi Centre panel, beside the mode selector Flame with a line through it
    Vaillant Far right of the fascia Flame symbol
    Ideal Below the display, separate button “Reset” text

    If your boiler is not listed, look for any button carrying a flame or a circular arrow, that is the reset control on most models.

    Step-by-Step: How to Reset a Boiler After Lockout

    Here is the sequence that works on almost every domestic boiler.

    Get your boiler looked at →

    1. Note the fault code. Before you reset anything, write down what the display shows. This is the single most useful piece of information for an engineer, and it disappears once the boiler restarts.
    2. Turn the thermostat down. Set the room thermostat to its lowest setting so the boiler does not immediately fire at full demand.
    3. Locate the reset button using the guide above or your manual.
    4. Press and hold for three seconds. Most boilers require a sustained press, not a tap. Some models need up to five seconds.
    5. Release and wait. The boiler will run a purge cycle, usually 30 to 60 seconds, before attempting ignition.
    6. Watch the display. A steady flame symbol or a temperature reading means it has fired successfully.
    7. Turn the thermostat back up and check that radiators begin to warm within 15 minutes.

    How Long to Hold the Reset Button

    Three seconds is the common figure, but the correct hold time is model-specific, and getting it wrong is a frequent reason a reset appears not to work.

    • Worcester Bosch and Vaillant models typically need a firm press of around three seconds until the display flashes or the fault code clears.
    • Baxi and Ideal units often respond to a shorter press of one to two seconds, and holding longer can push the boiler into a service mode rather than a reset.
    • Glow-worm controls generally require the button to be held until the display changes, which can take up to five seconds.

    If nothing happens after a five-second press, release and wait ten seconds before trying once more. A button that feels loose or fails to register points to a control panel fault rather than a lockout, and no amount of pressing will clear it.

    What Happens During the Purge Cycle

    After a successful reset the boiler does not fire immediately. It runs a pre-purge, drawing air through the combustion chamber to clear residual gas before ignition, which is why you hear the fan run for 30 to 60 seconds with no flame. Do not press reset again during this window: interrupting a purge cycle is the fastest way to trigger a second lockout.

    Once the purge completes you should hear the ignition spark, then the flame establishing, and the display will move from a flashing fault code to a steady temperature reading. If the boiler fires, runs a few minutes and locks out again, the fault is intermittent, note that pattern for the engineer.

    If the First Reset Fails

    A single failed reset is not unusual, particularly after a power cut or a period of inactivity.

    Watch Out
    Never hold the reset button down continuously or press it more than three times in succession. On some models this can cause unburnt gas to accumulate in the combustion chamber, which is a genuine safety risk when the boiler next attempts ignition.
    Pro Tip
    If your boiler locks out after a power cut, check the programmer has retained its settings before you reset. A programmer that has defaulted to ‘off’ will let the boiler fire, satisfy nothing, and lock out again within minutes, which looks like a boiler fault but is not.

    Boiler Error Codes Explained: What the Display Is Telling You

    Code Type Common Meaning Action
    F1 / E1 / EA Ignition failure or flame failure Check gas supply, then reset once
    F22 / E119 Low system pressure Top up via filling loop to 1-1.5 bar
    F28 / E133 Flame detected when none expected Do not reset. Call an engineer
    F75 / E110 Overheat thermostat tripped Check pump and radiator valves
    F29 / E168 Flame lost during operation Check condensate pipe for freezing

    Common Causes of Low Boiler Pressure and Lockouts

    Low boiler pressure is the most frequent cause of lockout we see, and the most misunderstood.

    Seasonal Lockout Causes: Winter Versus Summer

    Lockouts cluster at two points in the year, with a different cause each time.

    Lockouts After Running Out of Fuel

    If your property runs on LPG or oil rather than mains gas, running the tank low is a common lockout trigger.

    Lockouts After a Power Cut

    Key Takeaway
    Match the lockout to the season and the fuel type before you reach for the reset button. A frozen condensate pipe, an empty LPG tank and a pressure drop all present as the same lockout, but each needs a different first response.

    When to Call a Gas Safe Registered Engineer

    Pro Tip
    Photograph the fault code and the pressure gauge reading before you call. Engineers can often identify the likely part needed from those two images alone, which means a first-visit fix instead of a second appointment.

    Frequently Asked Questions

    How long should I wait before trying to reset a boiler after lockout?

    Wait at least 10 to 15 minutes after the lockout occurs before pressing the reset button. This gives the boiler’s safety mechanisms, such as the overheat thermostat, time to cool and reset internally. If you try immediately, the boiler may lock out again straight away. If it fails to restart after two attempts, stop and call a Gas Safe registered engineer.

    Why does my boiler keep locking out after a reset?

    Repeated lockouts usually point to an underlying fault rather than a one-off glitch. Common causes include low system pressure, a blocked condensate pipe, ignition failure, or a faulty pump. If your boiler locks out more than twice in a row, do not keep pressing reset. Book a boiler repair with a Gas Safe registered engineer to diagnose the root cause properly.

    Is it safe to reset a boiler multiple times?

    No. Resetting a boiler more than twice in quick succession can mask a serious fault and may damage components. The lockout is a safety mechanism designed to protect you. If the boiler will not stay running after two reset attempts, switch it off and arrange for a qualified engineer to inspect it. This is especially important if you smell gas or see warning lights.

    What should I do if the reset button does not work?

    If pressing the reset button has no effect, check that the boiler has power and the gas supply is on. Also check the pressure gauge; if it reads below 1 bar, you may need to repressurise the system. If the button still does nothing, the fault likely requires professional attention. Call Apex Gas & Heating Ltd for a fast emergency call-out across Sussex and Surrey.

    Request a call back →