







Rated Excellent Rating Gas Safe Registered BPEC Certified 25 Years’ Experience 2 Year Guarantee Card Payments AcceptedApple Pay, Mastercard, Visa, Amex, Google Pay Worcester BoschVaillantBaxiGlow-wormAccredited

Category: Blog

  • Average Cost of Gas Boiler Service (2026 UK Guide)

    Average Cost of Gas Boiler Service (2026 UK Guide)

    Table of Contents

    Last Updated: September 6, 2026

    Average Cost of Gas Boiler Service: What You’ll Pay in 2026

    The average cost of gas boiler service in the UK typically lands between £70 and £120 for a standard one-off annual check, though this varies with your location, boiler type, and the engineer you choose. That figure is the headline most homeowners search for, but the real question isn’t just what you’ll pay, it’s what you get for your money and whether you’re actually covered when something goes wrong. At Apex Gas & Heating Ltd, we’ve spent years servicing boilers across Sussex and Surrey, and we understand how a cheap service can leave homeowners with expensive surprises three months later.

    A boiler service is a preventative maintenance check carried out by a Gas Safe registered engineer to confirm your appliance is operating safely and efficiently. It is not a repair, and it will not fix a boiler that is already broken. Understanding this distinction before you book saves confusion later, and it helps you compare quotes on a like-for-like basis rather than simply picking the lowest number.

    Below, we’ll break down what a standard service includes, how long it takes, why older boilers cost more to maintain, and exactly what you should expect from a qualified engineer. We’ll also cover the questions most guides skip, like whether DIY checks are ever acceptable and how your boiler’s age quietly inflates the bill.
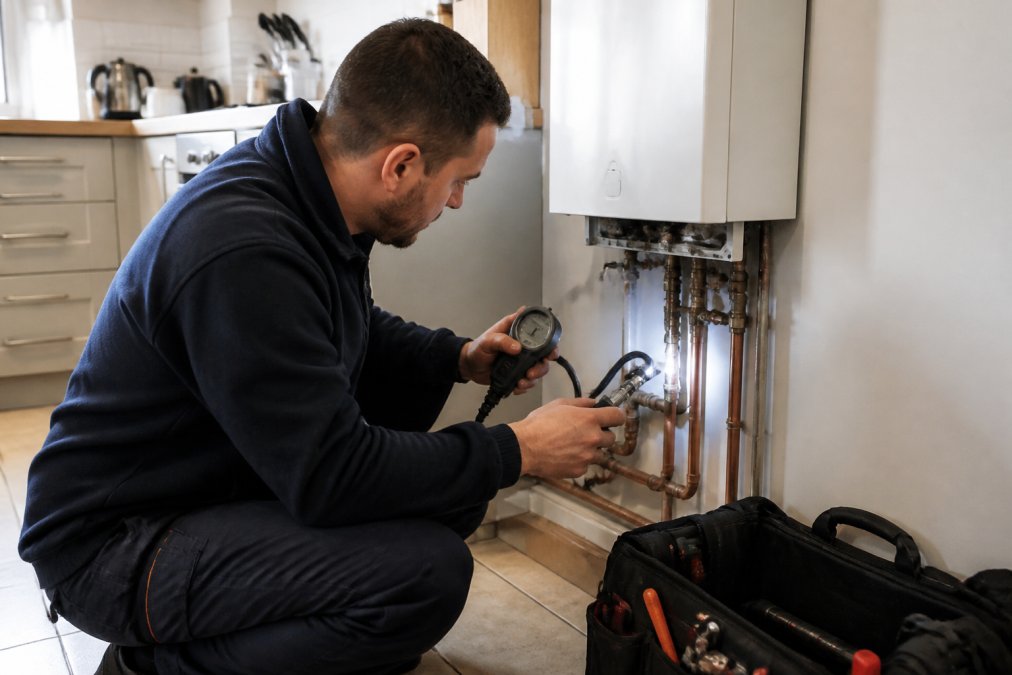
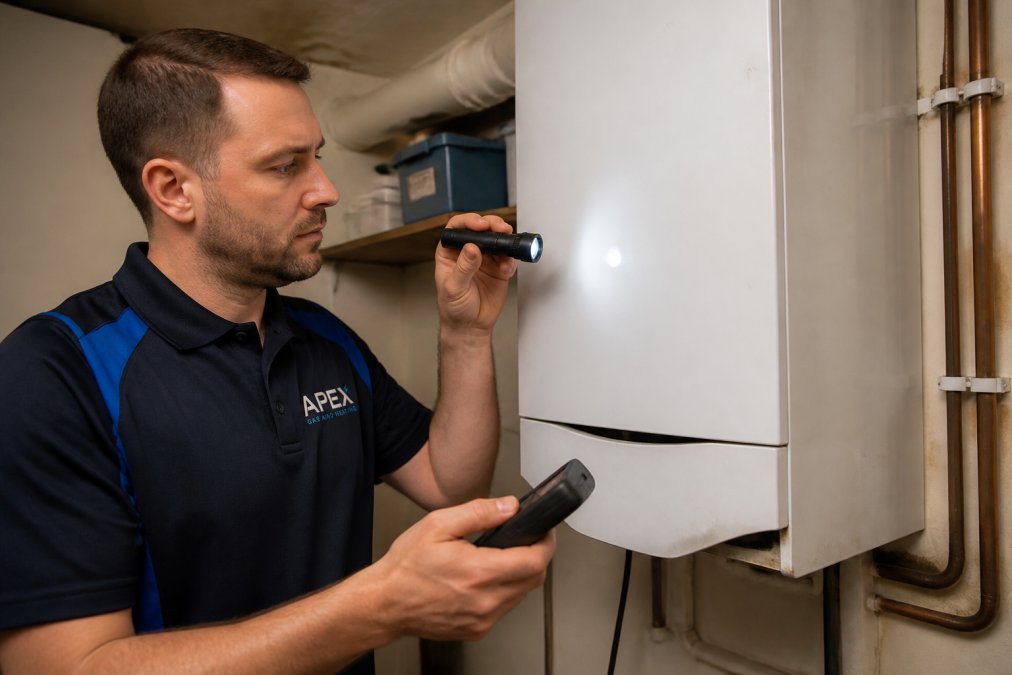
    A Gas Safe registered engineer in navy workwear kneeling beside a modern white combi boiler in a UK kitchen, holding a digital pressure gauge and checking the pipework with a torch
    A Gas Safe registered engineer in navy workwear kneeling beside a modern white combi boiler in a UK kitchen, holding a digital pressure gauge and checking the pipework with a torch

    What’s Included in a Standard Boiler Service?

    A full boiler service is a systematic safety and performance inspection, not a quick visual glance. The engineer should remove the boiler casing, inspect internal components, and run a series of checks that verify safe operation and reasonable efficiency.

    Typical elements of a thorough service include:

    • Flue gas analysis using a calibrated analyser to check combustion readings
    • Pressure check on the system and inspection of the expansion vessel
    • Carbon monoxide testing around the appliance and its connections
    • Heat exchanger inspection for blockages or corrosion
    • Condensate trap and pipe check to confirm clear drainage
    • Burner and ignition component cleaning where needed
    • Thermostat calibration and control verification
    • Gas supply pressure test at the appliance

    The engineer should also test all safety devices, including the cut-off mechanisms that protect against gas leaks. After the service, you should receive a written service record or certificate that logs the work completed and notes the appliance’s condition. This document matters for your warranty requirements, as most manufacturers require proof of an annual service to keep boiler warranties valid.

    A common mistake is assuming a service includes fixing problems the engineer finds. It does not. If a component is faulty, the engineer should flag it and quote separately for the repair. A reputable engineer will always explain what they found before doing any additional paid work.

    How Long Does a Boiler Service Take?

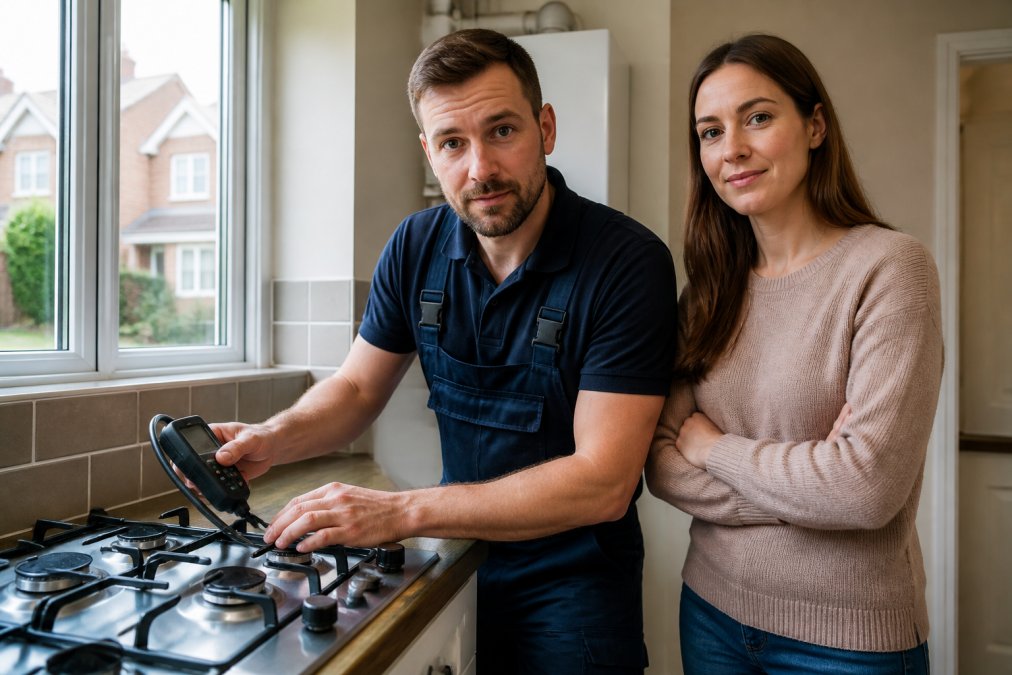
    A standard boiler service typically takes between 45 and 60 minutes for an experienced engineer working on an accessible appliance. This assumes the boiler is easy to reach, the system has been maintained reasonably well, and no faults are discovered during the inspection.

    Several factors can extend that timeframe. Older boilers with corroded components take longer to inspect safely. Systems with poor access, such as units tucked into tight cupboards or lofts, slow the engineer down. And if the service reveals a developing fault, the engineer may spend extra time diagnosing the cause and explaining your options.

    If an engineer quotes you a 15-minute service, treat that as a red flag. A proper service cannot be rushed, and cutting corners on flue gas analysis or internal inspection defeats the purpose of booking one. The [Gas Safe(/2026/08/14/how-to-verify-gas-safe-engineer/) Register’s guidance on boiler servicing | gassaferegister.co.uk] is clear that a thorough annual service by a registered engineer is the best way to keep your appliance safe and efficient.

    For most homeowners, blocking out an hour is realistic. The engineer needs space to work, so clear the area around your boiler before they arrive. That simple step keeps the visit on schedule and lets the engineer focus on the inspection rather than moving your storage boxes.

    Why Boiler Age and Condition Affect Service Cost

    Older boilers cost more to service, and the gap is wider than most homeowners expect. A boiler approaching or exceeding 15 years of age requires more careful handling, more time to inspect, and often reveals wear that a younger appliance simply doesn’t have.

    The reasons are practical. Components on older units are harder to source, and engineers must take extra care not to damage brittle seals or corroded fittings during the service. The combustion analysis also takes longer to interpret because older burners rarely produce the clean readings of a modern condensing model. If the service uncovers a developing issue, you face a separate repair quote on top of the service fee.

    Age also affects whether a service is worth paying for at all. If your boiler is past its expected lifespan, typically 12 to 15 years for a well-maintained unit, you may be pouring money into an appliance that should be replaced. A service that costs £90 might be followed by a £400 repair three months later, and then another one after that. At some point, the annual maintenance bill starts to rival the cost of a new, more efficient boiler.

    The condition of your system matters just as much as its age. A boiler that has been serviced annually since installation will almost always be in better shape than one that has gone five years without attention. Regular maintenance catches minor issues before they become major failures, which is why the Energy Saving Trust’s advice on heating maintenance recommends an annual service to keep your system running efficiently and to prolong its working life.

    Annual Boiler Service Checklist: What to Expect

    Knowing what should happen during a service helps you spot a thorough engineer from one rushing through the job. Use this checklist to track what your engineer covers and to confirm nothing important is skipped.

    • Engineer confirms Gas Safe registration and ID before starting
    • Visual inspection of the boiler, flue terminal, and visible pipework
    • Boiler casing removed for internal component inspection
    • Flue gas analysis completed and readings recorded
    • Carbon monoxide test performed around the appliance
    • Gas pressure verified at the boiler
    • Pressure relief valve and expansion vessel checked
    • Heat exchanger and burner inspected for corrosion or debris
    • Condensate trap cleaned and drainage confirmed
    • Seals and gaskets checked for deterioration
    • Service record completed and explained to you

    If any of these steps are missing, ask why. A service that skips flue gas analysis or carbon monoxide testing is not a service at all, it is a visual check dressed up as something more. The Health and Safety Executive’s guidance on gas safety is explicit that annual servicing by a registered engineer is the most effective way to protect against the dangers of carbon monoxide poisoning and gas leaks.

    After the service, keep the certificate or service record safe. You will need it if you make a warranty claim, and landlords must retain gas safety records for their properties. If you are a landlord, remember that a boiler service is separate from the landlord gas safety certificate, though both require a Gas Safe registered engineer.

    Gas Safe Registered Engineer Requirements Explained

    Gas Safe Register is the official list of engineers legally allowed to work on gas appliances in the UK. It replaced the old CORGI scheme in 2009, and it is a legal requirement that anyone carrying out gas work on your boiler is registered.

    Book a boiler repair or service →

    Registration is not a single qualification. Engineers are registered for specific areas of work, so an engineer qualified to fit cookers is not automatically qualified to service your boiler. When you book a service, confirm the engineer holds the relevant domestic gas safety qualifications and is registered for boiler work specifically. You can verify any engineer’s registration and qualifications on the Gas Safe Register’s engineer checker using their licence number.

    The requirements exist for a reason. Gas appliances that are incorrectly serviced or installed can cause carbon monoxide leaks, gas escapes, and fires. Using an unregistered engineer voids your boiler warranty, invalidates your home insurance in many cases, and puts your household at genuine risk.

    At Apex Gas & Heating Ltd, every engineer on our team is Gas Safe registered, and we are approved installers for both Glowworm and Worcester. That approval means we meet the manufacturer’s own training and quality standards, which gives our customers confidence that their boiler is being handled by someone who knows the appliance inside out. We carry full public liability insurance on every job, and our transparent pricing means you know what a service costs before we start.

    DIY vs Professional Service: Safety Risks You Should Know

    Attempting to service your own gas boiler is illegal in the UK unless you are Gas Safe registered, and the risks go far beyond breaking the law. Gas work requires specialist knowledge, calibrated testing equipment, and an understanding of combustion that cannot be learned from a YouTube tutorial.

    The specific dangers are serious. A boiler serviced incorrectly can produce carbon monoxide, a colourless, odourless gas that causes approximately 50 deaths per year in England and Wales according to the Office for National Statistics data on carbon monoxide poisoning. Flue blockages, incorrect burner pressure, or damaged seals can all lead to dangerous combustion byproducts entering your living space.

    What you can do yourself is limited to safe, non-invasive tasks. Checking your boiler’s pressure gauge and topping up the system when it drops too low is fine. Bleeding radiators to release trapped air is fine. Keeping the area around your boiler clear and knowing how to switch off your gas supply in an emergency is fine.

    Everything else, including any work that involves removing the boiler casing, adjusting gas pressure, or inspecting internal components, must be done by a Gas Safe registered engineer. If your boiler is under warranty, DIY interference will almost certainly void it. And if something goes wrong after an unregistered person has worked on your appliance, your insurance may not cover the resulting damage.

    The cost difference between a professional service and a DIY attempt is not worth the risk. A service typically costs less than a single emergency call-out, and it gives you the peace of mind that comes from knowing a qualified engineer has verified your appliance is safe.

    Conclusion: Book Your Service Before Winter

    The average cost of gas boiler service is a small price to pay for the safety, efficiency, and reliability it delivers. Booking your service before the colder months arrive means you are not competing for engineer availability during the winter rush, and it gives you time to arrange any repairs the service uncovers before you truly need the heating.

    A properly serviced boiler runs more efficiently, which translates directly into lower energy bills. It is also far less likely to break down on the coldest night of the year, when emergency call-out fees are at their highest and engineers are at their busiest. Preventative maintenance is always cheaper than emergency repair, and an annual service is the single most effective way to protect your boiler and your household.

    If your boiler is due for its annual service, or if you cannot remember when it was last checked, do not wait for a fault to force your hand. Apex Gas & Heating Ltd provides comprehensive boiler servicing across Sussex and Surrey, with Gas Safe registered engineers, approved status for Glowworm and Worcester appliances, and full public liability insurance on every job. Our 24/7 emergency call-out service means help is available when you need it most, and our transparent pricing ensures no surprises on your invoice.

    Get a quote today and book your service before winter arrives. A warm, safe, efficient home starts with a boiler you can trust.


    The average cost of gas boiler service depends on your location, boiler type, and the engineer you choose. What matters more than the price is the quality of the service itself. A thorough annual service by a Gas Safe registered engineer protects your home, your warranty, and your wallet. If you are in Sussex or Surrey and your boiler needs attention, Apex Gas & Heating Ltd offers reliable, transparent servicing backed by approved installer status and a fast emergency response team. Get a quote and secure your service before the winter rush.

    Frequently Asked Questions

    How often should your gas boiler be serviced?

    Your gas boiler should be serviced once a year by a Gas Safe registered engineer. Annual maintenance keeps the appliance running efficiently, reduces the risk of carbon monoxide leaks, and is usually required to keep your manufacturer warranty valid. Most warranties specify a 12-month gap between services, so missing one could leave you without cover if the boiler breaks down.

    What is included in a standard annual boiler service?

    A standard annual boiler service includes a visual inspection of the appliance and flue, a flue gas analysis to check combustion efficiency, checking the pressure and expansion vessel, inspecting the heat exchanger and condensate trap, and testing safety devices including the carbon monoxide detector. The engineer will also check for gas leaks and confirm the appliance meets current safety standards before issuing a service record.

    Is it a legal requirement to have my boiler serviced annually?

    For homeowners, an annual boiler service is not a legal requirement, but it is a condition of most manufacturer warranties. Landlords have a legal obligation under the Gas Safety (Installation and Use) Regulations 1998 to have gas appliances serviced annually and hold a valid Gas Safety Record (CP12). For homeowners, regular servicing is strongly recommended to maintain efficiency and avoid breakdowns.

    Why does boiler service cost vary between providers?

    Boiler service cost varies based on several factors, including your location, the type and age of your boiler, and whether you choose an independent Gas Safe engineer or a national company. Some providers offer fixed-price servicing, while others charge an hourly rate plus a call-out fee. Cover plans from companies like British Gas or Hometree bundle servicing with breakdown cover, which can change the overall value.

    What are the signs that my boiler needs an urgent service?

    Signs your boiler needs urgent attention include strange noises like banging or whistling, a yellow flame instead of blue, water leaks around the appliance, fluctuating pressure, and an unexpected rise in energy bills. If you smell gas or suspect a carbon monoxide leak, turn off the boiler, open windows, and call the Gas Emergency Service on 0800 111 999 immediately.
    Book online, it takes a minute →

  • How to Detect a Natural Gas Leak at Home: 2026 Guide

    How to Detect a Natural Gas Leak at Home: 2026 Guide

    Table of Contents

    Last Updated: September 5, 2026

    Natural gas is odourless in its natural state, which is why detecting a leak in your home often comes down to knowing what to look for. Understanding how to detect a natural gas leak at home is a vital skill for any homeowner, as a small leak can escalate into a serious safety hazard if left unchecked. This guide from Apex Gas & Heating Ltd covers the signs, the checks, and the exact steps to take if you suspect a problem.

    Speed matters: gas leaks are a combustible risk, and the difference between a safe outcome and a dangerous one is often measured in minutes. Below, we walk you through the four key signs of a leak, how to inspect your pipes and appliances, and the emergency procedure that keeps your household safe.

    Why Detecting a Gas Leak at Home Matters

    A gas leak is not something to wait on. When natural gas escapes into an enclosed space, it can build up to a level where a single spark from a light switch or an appliance can ignite it. Beyond the fire risk, incomplete combustion and poor ventilation can also lead to carbon monoxide issues, a separate but equally serious health concern.

    Fittings can loosen over time, pipes can corrode, and rubber hoses can perish. Regular detection is part of routine home maintenance, not just an emergency response. By learning the signs now, you avoid the panic of trying to figure them out while a leak is already filling your kitchen.

    The 4 Key Signs of a Natural Gas Leak

    Four primary indicators may signal a natural gas leak in your home. If you notice any single one, it warrants immediate investigation.

    The Smell: Rotten Eggs and Sulphur

    Gas suppliers add a chemical called mercaptan to natural gas precisely so you can smell it. Mercaptan has a strong, distinctive odour that most people describe as similar to rotten eggs or sulphur. This is your first line of defence.

    Do not ignore it. The odour can be faint at first, so check near appliances, pipework, and around your gas meter. The smell can be masked by cooking odours, so a lingering egg-like scent after you’ve finished in the kitchen is a red flag.

    The Sounds: Hissing and Whistling

    A hissing or whistling sound near your gas pipes, meter, or appliances is a strong indicator of a leak. Gas escaping under pressure from a loose connection or a crack in a pipe often produces an audible noise.

    A faint hiss behind your boiler or under the sink where a gas pipe runs is not normal. If you hear a continuous whistling sound you cannot trace to a window draft or a tap, treat it as a potential leak and investigate immediately.

    Visual Clues: Bubbles, Dead Vegetation, and Discoloured Flames

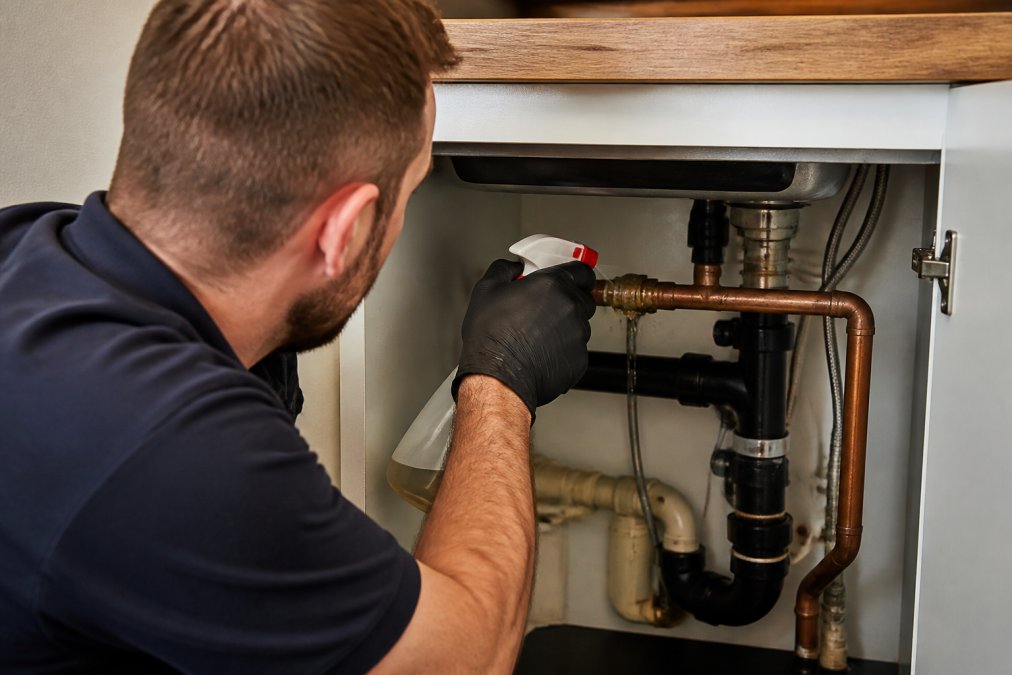
    Not all gas leaks are detectable by smell or sound, which is why visual checks matter. If you suspect a leak on an exposed pipe joint, apply a soapy water solution to the area. If gas is escaping, it will create small air bubbles at the point of the leak.

    Outside, look for dead or dying vegetation in an otherwise healthy lawn, as leaking gas can starve plant roots of oxygen. Inside, check the flame colour on your gas hob: a healthy flame is a crisp blue, while yellow or orange flames indicate incomplete combustion.

    A close-up of a hand holding a spray bottle applying soapy water to a gas pipe joint under a kitchen sink, with small bubbles forming at the connection point, lit by a bright under-cabinet light
    A close-up of a hand holding a spray bottle applying soapy water to a gas pipe joint under a kitchen sink, with small bubbles forming at the connection point, lit by a bright under-cabinet light

    Physical Symptoms: Headaches, Dizziness, and Nausea

    Exposure to a gas leak can cause headaches, dizziness, nausea, and fatigue before you ever smell or hear it. If multiple household members feel unwell at the same time and symptoms ease when you leave the house, a leak is a likely cause.

    These symptoms are your body reacting to gas in the air you are breathing. Do not dismiss them as a general bug. If you experience them alongside any other sign on this list, follow the emergency procedure below without delay.

    How to Check Your Pipes and Appliances for Leaks

    A quick sensory check is a good start, but a thorough inspection means going room by room. Below is a practical checklist covering the most common leak points in a typical UK home. If you find anything suspicious at any stage, stop and follow the emergency procedure further down this page.

    Kitchen: Gas Hob and Oven

    The flexible hose connecting your hob to the gas supply is one of the most vulnerable points in the house. It can perish, crack, or work loose over time, especially if the appliance has been pulled forward for cleaning.

    • Check the hose along its full length for cracks, brittleness, or signs of wear. In the UK, flexible hoses should be replaced every five years, check the date stamp printed on the hose.
    • Check the fittings where the hose meets both the appliance and the gas pipe. Hand-tighten then use a spanner to ensure they are snug, but do not overtighten.
    • Test the joints with the soapy water method described below.
    • Check the flame colour on each burner. A healthy flame is a crisp blue. If you see yellow or orange tips, the burner may be clogged or the air-to-fuel ratio is wrong, this needs a professional look.
    • Check for soot or black marks around the burner rings, which indicates incomplete combustion.

    Utility Cupboard or Bathroom: Boiler and Water Heater

    Your boiler is the highest-risk appliance in the home because it runs frequently and operates under pressure. Leaks here can develop internally, making them harder to spot.

    • Listen for hissing around the boiler casing, particularly near the gas valve and the pipework entering the unit.
    • Check the condensate pipe (the plastic pipe leading outside) for leaks, although this carries water, not gas, a fault here can cause the boiler to shut down and potentially lead to gas pressure issues.
    • Look for soot or staining around the boiler casing or flue. This suggests incomplete combustion and a potential carbon monoxide risk.
    • Check the flame through the viewing window if your boiler has one. It should be a steady blue flame, not yellow or flickering.
    • Feel for unusual heat around the gas pipework, a warm pipe can indicate a leak nearby, though this is rare.

    Living Room or Bedroom: Gas Fire

    If you have a gas fire, it shares many of the same risks as a boiler but is often forgotten because it is only used seasonally.

    • Check the burner for blockages or debris that could cause incomplete combustion.
    • Inspect the flue (if accessible) for blockages, a blocked flue can push carbon monoxide back into the room.
    • Look for discolouration on the fire surround or the wall above it, which can indicate soot or heat damage.

    Outside: Gas Meter and Pipework

    Your gas meter is the entry point for gas into your home, and the pipework around it is exposed to the elements.

    • Check the meter area for rust or corrosion on the pipework.
    • Look for damage to the meter box or the pipes leading into it, strimmers and garden tools can easily damage exposed pipes.
    • Sniff around the meter, the distinctive rotten egg smell is often strongest here if there is a leak on the supply side.
    • Check the ground above buried pipework for dead patches of grass or unusual plant growth patterns.

    The Soapy Water Test: How to Do It Properly

    The soapy water test is the most reliable DIY method for pinpointing a leak on an exposed joint:

    1. Mix a teaspoon of washing-up liquid with water in a spray bottle. The solution should be soapy but not thick.
    2. Spray the solution generously onto every joint, fitting, and connection you can see on your gas pipework.
    3. Wait 30 seconds and watch closely. A leak will cause small bubbles to form and grow at the point of escape.
    4. If you see bubbles, do not attempt to tighten the joint yourself if it is on the hard pipework, call a Gas Safe registered engineer. If the leak is on a flexible hose connection, you can try tightening it slightly with a spanner, then re-test.
    Watch Out
    Do not use washing-up liquid that contains bleach or ammonia, as these can corrode brass fittings over time. Plain washing-up liquid is fine.

    What This Checklist Cannot Catch

    This DIY checklist cannot detect leaks behind plasterboard walls, under floorboards, or inside appliances, nor can it measure the overall pressure integrity of your gas system. A slow leak in a hidden pipe can go undetected for months. This is why an annual service by a Gas Safe registered engineer is not just a legal requirement for landlords, it is the only way to fully verify that your entire gas system, including the parts you cannot see, is sound.

    DIY vs. Professional Gas Leak Detection Tools

    Handheld gas detectors are available to buy and can be useful for ongoing peace of mind. However, they vary significantly in quality and sensitivity, and a false negative from a cheap unit can give you dangerous confidence.

    Professional engineers use calibrated electronic gas sniffers that can pinpoint the exact source of a leak, including in areas you cannot see. They also test the gas pressure of the entire system to confirm no leak is present. For a thorough annual check, a professional service is the only way to be sure. The Health and Safety Executive provides clear guidance on gas safety responsibilities, and it is worth checking their advice on landlord gas safety duties and homeowner responsibilities to understand what your legal obligations cover.

    Emergency Gas Leak Procedure: What to Do First

    If you suspect a gas leak, the next few minutes matter more than anything else. The procedure below follows official guidance from the National Gas Emergency Service and the Health and Safety Executive. Read it now, before you need it, so the steps are automatic in a crisis.

    Step 1: Stop What You Are Doing and Do Not Touch Anything Electrical

    Do not operate any electrical switches, including light switches, doorbells, or appliance plugs, and do not use a mobile phone inside the property. A tiny spark from switching a light on or off is enough to ignite gas that has accumulated in the room. Even unplugging a device can create a spark at the socket.

    If you are cooking, turn off the gas at the appliance if you can do so without reaching across a flame. Do not use any extractor fans.

    See our CP12 gas safety checks →

    Step 2: Extinguish All Naked Flames and Do Not Smoke

    Put out candles, cigarettes, and any other naked flames immediately. If you have a pilot light on your boiler or gas fire, leave it, attempting to extinguish it could create a spark. Just ensure the room is ventilated as per Step 3.

    Step 3: Open Doors and Windows to Ventilate

    Open every external door and window you can reach safely to create a through-draft that pushes the gas outside. Do not spend time opening internal doors, focus on external openings. If the smell is strongest in one room, start there and work outwards.

    Step 4: Turn Off the Gas Supply at the Emergency Control Valve

    Your emergency control valve is normally located next to your gas meter, the rectangular tap on the pipe leading into it. To turn it off:

    • Use a spanner or adjustable wrench to grip the flat part of the tap.
    • Rotate it a quarter turn so the tap sits across the pipe (perpendicular to it). When it is in line with the pipe, gas is flowing. When it is across, the supply is off.
    • Do not turn it back on under any circumstances. Only a Gas Safe registered engineer can safely restore your supply after a leak.

    If you cannot find the valve quickly, or it is stuck, do not waste time wrestling with it, move to Step 5.

    Step 5: Leave the Property and Get to Fresh Air

    Get everyone out of the house, including pets. Do not stop to gather belongings. Walk to a safe distance, at least 10 metres from the property, where you can no longer smell gas.

    Step 6: Call the National Gas Emergency Service

    From outside your home, call the National Gas Emergency Service on 0800 111 999. This number is free from UK landlines and mobiles and is available 24 hours a day, 365 days a year. If calling from a mobile and the line drops, call back, the service will prioritise your call.

    When you speak to the operator, be ready to give:

    • Your full address, including postcode.
    • The nature of the problem (e.g., “I can smell gas in my kitchen”).
    • Whether you have turned off the gas supply.
    • Any symptoms anyone in the household is experiencing.

    What Happens After You Call

    The emergency service will dispatch an engineer to your property, usually within one hour. The engineer will:

    1. Use calibrated detection equipment to locate the source of the leak.
    2. Make the area safe, which may involve capping the gas supply or isolating the affected appliance.
    3. Advise you on the next steps.

    If the engineer isolates your gas supply, you will need a Gas Safe registered engineer to carry out repairs and conduct a pressure test before your supply can be restored. The emergency service will not repair your internal pipework or appliances, that is your responsibility as the homeowner.

    When to Evacuate Immediately

    If you smell gas and hear a hissing sound, or if the smell is overwhelming, do not attempt any steps above except opening doors and windows on your way out. Leave immediately and call 0800 111 999 from outside. The same applies if you feel dizzy, nauseous, or have a headache, these symptoms suggest significant gas exposure, and every second inside increases the risk.

    Watch Out
    Never go back into the property until the emergency engineer has confirmed it is safe. The smell can linger even after the leak has been capped, and re-entering too early puts you at risk.

    What Not to Do in a Gas Emergency

    • Do not use a landline phone inside the house, the handset can create a spark when lifted.
    • Do not turn lights on or off.
    • Do not strike matches or use a lighter to check for leaks.
    • Do not use a torch or any battery-operated device inside the property.
    • Do not assume the smell will dissipate on its own, it will not, and the risk only grows.
    • Do not attempt to find the leak yourself beyond the visual checks described earlier in this guide.

    Save the Number Now

    Take 30 seconds to save the National Gas Emergency Service number (0800 111 999) into your phone contacts right now. Also note the location of your emergency control valve and keep a spanner near it. These two small preparations could save your home and your family in the event of a leak.

    How to Turn Off Gas Supply Safely

    The emergency control valve, also known as the gas shut-off valve, is typically located next to your gas meter. Find it now, before an emergency, so you are not searching for it in a panic.

    To turn it off, use a spanner or adjustable wrench to rotate the rectangular tap a quarter turn, so it sits across the pipe rather than in line with it. Once off, do not turn it back on yourself, you will need a registered engineer to check the system and restore the supply safely.

    Is a Carbon Monoxide Detector Worth It for Gas Leaks?

    A carbon monoxide detector is a separate safety device from a gas leak detector. Carbon monoxide is produced by incomplete combustion, not by a leak of unburnt natural gas, so a carbon monoxide detector will not alert you to a raw gas leak.

    That said, a carbon monoxide detector is absolutely worth installing in any home with gas appliances. It protects you from a silent, odourless danger that can arise from a faulty boiler or poor ventilation. The NHS guidance on carbon monoxide poisoning highlights the serious health risks, including long-term neurological damage. Install a detector near bedrooms and have your appliances serviced annually to cover both risks.

    Common Gas Leak Myths Debunked

    Several myths about gas leaks persist, and believing them can be dangerous.

    Myth: You can smell a gas leak easily. False, the gas itself has no smell. You rely entirely on the added mercaptan, which can be undetectable if you have a cold or if the leak is very small.

    Myth: Only old homes have gas leaks. Not true. Leaks can occur in new installations due to poor workmanship or fittings that have worked loose during transport and installation.

    Myth: A gas leak will always cause an explosion. While the risk is real, a leak more often causes carbon monoxide poisoning or a fire. The explosion risk increases when gas accumulates in an enclosed space, which is why ventilation is your immediate priority.

    Myth: You can fix a gas leak yourself. This is the most dangerous myth. Working on gas is legally restricted to Gas Safe registered engineers in the UK. Attempting a DIY repair puts your household at risk and is against the law. If you need help finding a registered professional in your area, the official Gas Safe Register search tool is the only place you should look.


    Detecting a gas leak is about knowing the signs and acting decisively. From the smell of rotten eggs to the hiss of escaping gas, your senses are your first tool, but they are no substitute for professional checks. Annual servicing of your boiler and gas appliances is the single best way to catch problems before they become emergencies. At Apex Gas & Heating Ltd, our Gas Safe registered engineers provide thorough boiler servicing and leak detection across Sussex and Surrey, giving you the peace of mind that your home is safe. As approved Worcester and Glowworm installers with full public liability insurance and a 24/7 emergency call-out service, we are here when you need us most. Get a quote today and ensure your gas system is in safe hands.

    Frequently Asked Questions

    Will a carbon monoxide detector detect a natural gas leak?

    No, a carbon monoxide detector will not detect a natural gas leak. Natural gas is primarily methane, while carbon monoxide (CO) is a separate, toxic byproduct of incomplete combustion. CO detectors are essential for catching silent, odourless carbon monoxide, but a natural gas leak is detected by its distinctive rotten egg smell (mercaptan), a hissing sound, or a dedicated natural gas alarm. For complete home safety, install both a CO detector and a natural gas alarm.

    What should I do if I smell gas in my home?

    Follow the emergency gas leak procedure immediately. Do not operate any electrical switches, light a match, or use your phone inside the house. Open all doors and windows to ventilate the area, turn off your gas supply at the emergency control valve if safe to do so, and evacuate the property. Once outside, call the National Gas Emergency Service on 0800 111 999 to report the leak.

    How long can a gas leak go unnoticed?

    A gas leak can go unnoticed for a significant period, especially if it is small or located outside. The strong odour of mercaptan is designed to alert you quickly, but a slow leak may only produce a faint smell that can be masked by other household odours. Regular visual checks of your pipes and appliance connections for bubbles or hissing sounds can help you identify a leak early before it becomes a more serious hazard.

    Is it free to get a gas leak checked?

    The National Gas Emergency Service will attend a suspected gas leak for free. However, if the issue is within your property’s internal pipework or an appliance, they may cap the supply and ask you to contact a Gas Safe registered engineer to carry out the repair. A professional engineer will charge for their call-out and any necessary work. Regular annual servicing of your gas appliances can help prevent leaks and costly emergency repairs.

    Book your visit online →

  • Does Power Flushing Improve Boiler Efficiency?

    Does Power Flushing Improve Boiler Efficiency?

    Table of Contents

    Last Updated: September 4, 2026

    What Is a Power Flush and How Does It Work?

    A power flush is a professional cleaning process that removes sludge, rust, and debris from your central heating system without dismantling radiators or pipework. The question of does power flushing improve boiler efficiency comes up constantly among homeowners in Crawley and across Sussex, and the short answer is yes, when your system actually needs it. A trained engineer connects a flushing machine to your heating circuit, then circulates water at high velocity with cleaning chemicals to dislodge and wash away years of accumulated contamination.

    The process works by forcing water through the system at a controlled flow rate, loosening sludge that has settled in radiators and the heat exchanger. The machine filters out the dislodged debris before the water is recirculated, so nothing harmful stays in the circuit. A power flush is often the difference between a struggling boiler and one that heats evenly again.

    Signs Your Heating System Needs a Power Flush

    Several warning signs indicate that your heating system needs a power flush rather than simple repairs. Cold spots at the bottom of radiators while the top feels hot are the most common clue, since sludge settles and blocks the lower sections. A boiler that takes noticeably longer to warm your home, makes gurgling noises, or requires frequent venting to remove trapped air all point toward system debris interfering with normal circulation.

    Other indicators include dirty water when you bleed a radiator, black or discoloured water coming from drain points, and a circulation pump working harder than it should. If your fuel bills have crept up despite similar usage patterns, restricted flow could be forcing the boiler to run longer to deliver the same heat. Energy Saving Trust guidance on heating controls and maintenance confirms that keeping your heating system in good condition helps control energy consumption and heating performance over time.

    How Power Flushing Improves Boiler Efficiency

    Removing sludge buildup and iron oxide

    Sludge buildup is a mixture of rust, iron oxide, and scale deposits that forms naturally inside steel radiators and pipework over years of use. This dark, magnetic debris settles in the lowest points of your heating circuit and coats the boiler’s heat exchanger, creating an insulating layer that stops heat from transferring into the water efficiently. When sludge accumulates on the heat exchanger surfaces, the boiler must run at higher temperatures and for longer cycles to achieve the same output, a direct driver of wasted fuel and higher energy bills.

    Restoring flow rate and heat distribution

    When sludge restricts the flow rate, your boiler’s circulation pump must work harder to push water around the system, increasing energy consumption while delivering less heat to your rooms.

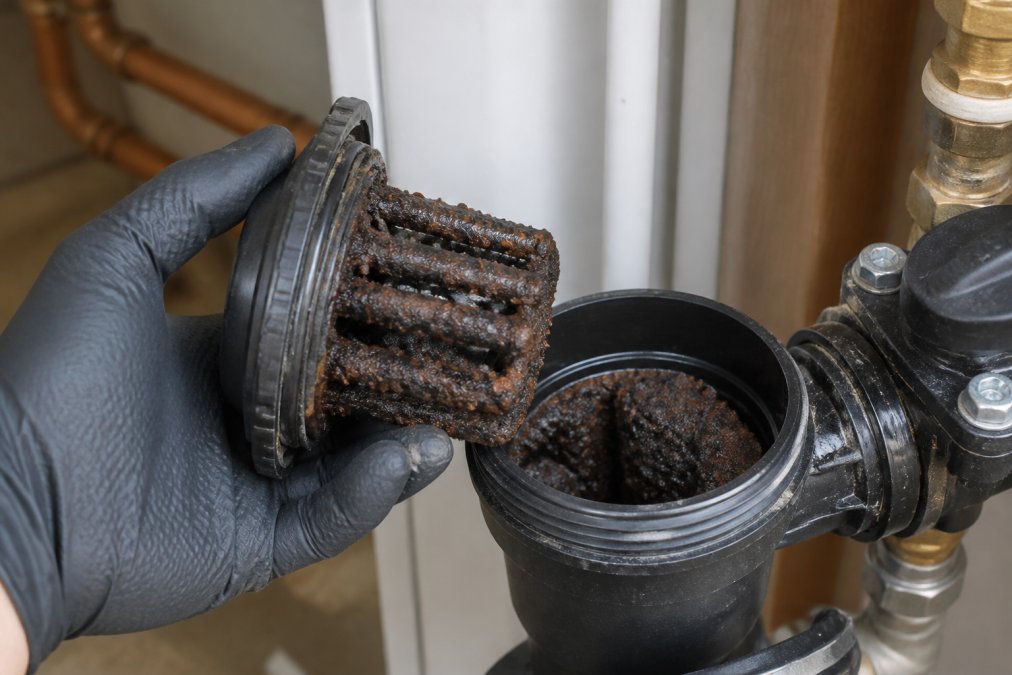
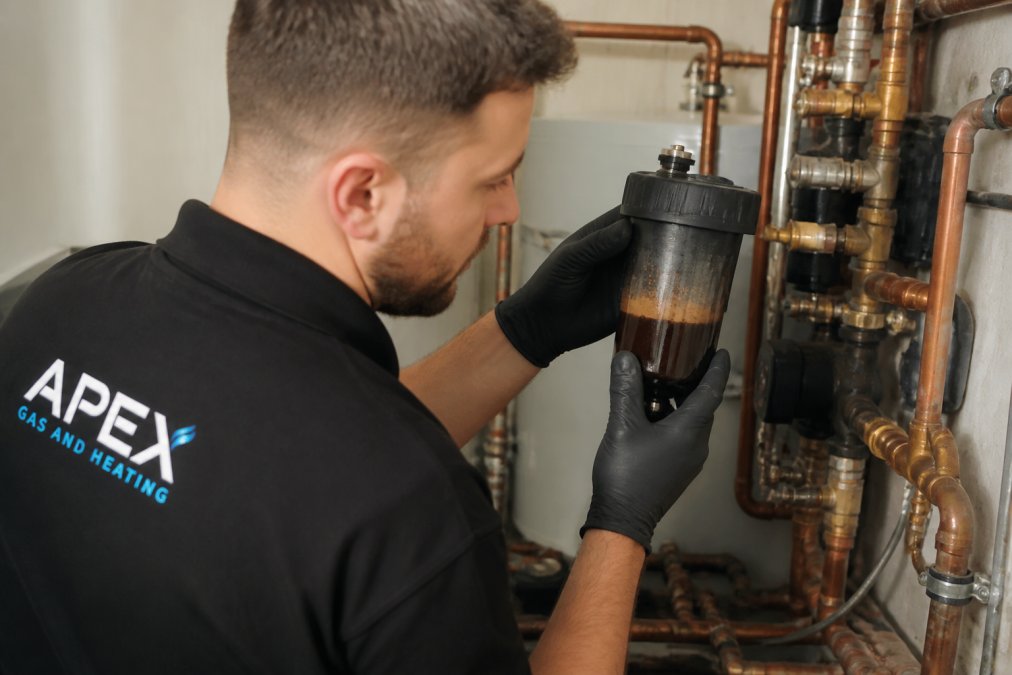
    Close-up of a magnetic filter cartridge being opened, showing dark sludge and iron oxide deposits collected from a domestic heating system, with the engineer's gloved hand holding the cartridge
    Close-up of a magnetic filter cartridge being opened, showing dark sludge and iron oxide deposits collected from a domestic heating system, with the engineer’s gloved hand holding the cartridge

    Once the flushing machine removes this contamination, water moves freely through the heat exchanger and radiators again. The boiler reaches temperature faster, heats rooms evenly, and cycles off sooner rather than running constantly. This restoration of the heating circuit is where the real efficiency gain comes from, along with reduced strain on components that extends boiler lifespan and lowers the risk of a boiler breakdown.

    Assessing whether your system will actually benefit

    Not every heating system needs a power flush, and determining whether yours will see a genuine efficiency improvement depends on several factors. A system showing cold spots on radiators (especially at the bottom while the top is hot), black or discoloured water when bleeding radiators, or a boiler that takes noticeably longer to heat your home is almost certain to benefit from flushing, as these are direct signs of sludge obstruction.

    Conversely, if your system is relatively new (under five years old), has been serviced annually, and shows no cold spots or discolouration, a power flush is unlikely to deliver measurable efficiency gains. In such cases, fitting a magnetic filter alone may be sufficient preventative maintenance. Similarly, if your boiler is over 15 years old and already inefficient due to age rather than contamination, a power flush will improve heat distribution but may not justify the cost if the boiler is nearing end-of-life.

    A qualified engineer can diagnose your system by checking boiler pressure stability (sludge-filled systems often show pressure fluctuations), water colour and clarity at drain points, and radiator temperature distribution across the circuit. In Crawley and across Sussex, a proper assessment takes 20-30 minutes and will confirm whether flushing is the right investment or whether your system simply needs a filter and annual servicing instead. This diagnostic step is essential because rushing into a power flush on a system that doesn’t need one wastes money, whilst delaying a flush on a heavily contaminated system allows efficiency to deteriorate further.

    Power Flushing vs Chemical Flush: Which Method Works Best?

    When comparing power flushing vs chemical flush, the distinction comes down to force versus chemistry. A chemical-only flush involves adding a cleaning solution to the system and letting it circulate, which helps break down some deposits but does nothing to physically dislodge stubborn sludge that has hardened over time.

    Power flushing combines chemicals with high-velocity water movement, giving you both the softening effect and the physical removal. For systems with heavy contamination, power flushing is the more thorough option because the engineer can see the dirty water being expelled and continue until it runs clear. A chemical flush might suit a relatively clean system as preventative maintenance, but for genuine sludge problems, the machine-based approach delivers better system restoration.

    Method Best For Limitations
    Power flush Heavy sludge, cold spots, poor heat distribution Requires professional equipment and expertise
    Chemical flush Mild contamination, routine maintenance Cannot dislodge hardened deposits

    How Long Does a Power Flush Take?

    A typical power flush takes between four and eight hours, depending on the size of your property and how contaminated the system has become. A small home with three or four radiators and moderate sludge might be completed in half a day, while a larger house with extensive buildup could require a full day to flush each radiator individually.

    The engineer will work through the system methodically, checking the water clarity and monitoring the flow rate as the cleaning progresses. UK government guidance on maintaining heating systems for energy efficiency highlights the importance of proper maintenance, and a power flush is one of the most effective ways to restore a system that has deteriorated. Most reputable engineers will also add a corrosion inhibitor after flushing to protect the freshly cleaned system.

    Do You Need a Power Flush or a New Boiler?

    This is the decision that confuses many homeowners, and the answer depends on the age and condition of your boiler. If your boiler is relatively modern, under ten years old, and has been serviced regularly, a power flush is often the right call when efficiency has dropped due to sludge.

    Get your boiler looked at →

    If the boiler is older, frequently breaking down, or showing signs of heat exchanger failure, replacement might be more cost-effective than cleaning a system that will soon need replacing anyway. A qualified engineer can assess your system pressure, water quality, and boiler condition to give you an honest recommendation. In Crawley and throughout Sussex, the Apex Gas & Heating Ltd team offers both boiler repair and new boiler installation, so we can advise on the most sensible path rather than pushing you toward an unnecessary purchase.

    Watch Out
    Skipping a power flush and simply replacing a radiator or pump on a sludge-filled system often leads to premature failure of the new component. The contamination will quickly damage fresh parts.

    Post-Flush Maintenance: Protecting Your System Long-Term

    A power flush is not a one-time fix that lasts forever. Without ongoing protection, sludge will slowly build up again within 12-24 months, so preventative maintenance matters just as much as the initial clean. The key to maintaining efficiency after flushing is a three-part strategy: magnetic filtration, corrosion inhibitor replenishment, and annual boiler servicing.

    Magnetic filtration

    Fitting a magnetic filter (also called a magnetic sump or magnetic trap) is one of the most effective steps you can take after flushing. These devices use a permanent magnet to capture iron oxide particles before they circulate through the boiler and radiators. Most magnetic filters should be checked and cleaned every 6-12 months, depending on how much debris the system is still releasing. A filter that becomes heavily laden with black sludge indicates ongoing corrosion and may signal that inhibitor levels are dropping or that a leak is allowing fresh water (which contains dissolved oxygen) to enter the circuit.

    Worcester Bosch guidance on system protection and magnetic filters recommends magnetic filtration as part of a proper maintenance regime, and as approved Worcester installers, we follow these guidelines closely. The filter should be positioned on the return line to the boiler, where it catches particles before they can damage the heat exchanger.

    Corrosion inhibitor levels

    After a power flush, the system water is replaced with fresh water and a new dose of corrosion inhibitor is added. This inhibitor forms a protective layer on internal metal surfaces, preventing rust and iron oxide from forming again. However, inhibitor strength degrades over time, typically losing effectiveness after 3-5 years depending on water hardness and system age.

    Your engineer should test inhibitor concentration at the annual service using a test kit. If levels have dropped below the manufacturer’s recommended range (usually 30-50% concentration for most inhibitors), a top-up is needed. Skipping this step is a common reason why systems re-sludge quickly after flushing: without adequate inhibitor, fresh corrosion begins immediately.

    Annual boiler servicing and system checks

    A full boiler service each autumn includes checking system pressure, inspecting the heat exchanger for signs of corrosion or debris, and verifying that the circulation pump is running smoothly. During this visit, the engineer will also:

    • Bleed radiators to check water colour (should be clear or pale yellow, not black or brown)
    • Inspect the magnetic filter and clean or replace the cartridge if needed
    • Test inhibitor concentration and top up if necessary
    • Check for any leaks or pressure loss, which would allow fresh water to enter and restart corrosion
    • Verify that the boiler is cycling normally and not running longer than it should

    Regular servicing also gives an engineer the chance to spot early signs of system debris or pressure instability before they become serious problems. Many homeowners skip the annual service to save money, but this false economy often leads to a re-sludged system within 18 months and a repeat power flush, which costs far more.

    Conclusion

    The answer to does power flushing improve boiler efficiency is a clear yes for systems suffering from sludge buildup, but it is not a universal cure. If your radiators have cold spots, your boiler runs longer than it should, or your fuel bills are climbing, a power flush could restore your heating performance and cut energy consumption.

    Getting an accurate diagnosis matters, which is why Apex Gas & Heating Ltd offers boiler servicing and repair across Sussex and Surrey with transparent pricing and fully insured engineers. Whether you need a power flush, a new boiler installation, or ongoing maintenance, our approved Glowworm and Worcester installers will keep your home warm and your heating system running efficiently. Get a quote today and find out what your system really needs.

    Frequently Asked Questions

    Does power flushing really improve boiler efficiency?

    Yes, power flushing removes sludge buildup and iron oxide from your central heating system, which restores flow rate and allows your boiler to heat water more effectively. When debris blocks the heat exchanger and radiator passages, your boiler works harder to maintain temperature, consuming more fuel. Clearing these blockages reduces energy consumption and improves heating performance. However, efficiency gains depend on how much sludge has accumulated and the age of your system.

    What are the signs your heating system needs a power flush?

    Watch for cold spots on radiators (especially at the bottom), slow heating response, noisy pipes or circulation pump, low system pressure that drops repeatedly, and discoloured water when bleeding radiators. If your fuel bills have increased without explanation, or your boiler is cycling on and off frequently, sludge buildup may be restricting flow. These signs indicate system debris is reducing efficiency and heat distribution throughout your property.

    How long does a power flush take to complete?

    A typical power flush takes 4 to 8 hours, depending on system size and sludge severity. Smaller properties with straightforward layouts may finish faster, while larger homes with multiple zones or heavily contaminated systems require longer. The process involves connecting a powerful flushing machine to your heating circuit, running cleaning solution through all pipes and radiators, then installing a magnetic filter to catch remaining debris. Planning a full day for the work is advisable.

    Is power flushing better than chemical cleaning?

    Power flushing is generally more effective for severe sludge buildup because it uses mechanical force to dislodge compacted debris, whereas chemical descaling dissolves scale deposits but works more slowly. Power flushing also installs a magnetic filter to trap iron oxide particles, preventing recontamination. Chemical cleaning suits lighter contamination or systems with scale rather than sludge. Many engineers recommend power flushing for older systems with significant corrosion, as it provides more thorough system restoration and better long-term protection for your boiler lifespan.

    Request a call back →

  • Power Flushing vs Magnetic Filters: Which Works Best?

    Power Flushing vs Magnetic Filters: Which Works Best?

    Table of Contents

    Last Updated: September 3, 2026

    Understanding Power Flushing and Magnetic Filters

    Power flushing vs magnetic filters represents one of the most important decisions homeowners face when maintaining a central heating system. At Apex Gas & Heating Ltd, we’ve worked with properties across Sussex and Surrey, and this choice comes up repeatedly when systems show signs of age or poor performance.

    Both approaches address the same underlying problem: sludge and magnetite accumulation inside your heating circuit. Over time, corrosion, scale buildup, and system debris collect in your pipework and radiators, reducing boiler efficiency and causing cold spots. Power flushing is a one-time deep clean using high-velocity water flow and chemical treatments to blast debris out. Magnetic filters work continuously, capturing iron oxide particles as water circulates. Understanding when each makes sense can save you money and prevent costly boiler breakdowns.

    Signs Your Heating System Needs Cleaning

    Your heating system sends clear signals when sludge accumulation has become a problem.

    Cold radiators are the most obvious indicator. If your radiators heat unevenly, warm at the bottom but cold at the top, magnetite and debris are blocking the flow. Certain radiators may never heat properly, no matter how much you adjust the thermostat.

    Boiler noise is another red flag. A kettling sound, grinding, or banging from your boiler suggests debris is moving through the heat exchanger. This indicates your boiler is working harder than it should, shortening its lifespan and increasing energy consumption.

    Slow heating response is equally important. Your system takes noticeably longer to reach temperature because sludge restricts water flow. You’ll see this reflected in higher fuel bills even though your usage hasn’t changed.

    Visible discolouration in your system is a direct sign of corrosion. If you open a bleed valve and the water runs brown or grey, iron oxide has built up significantly.

    Frequent boiler breakdowns, especially in winter, often stem from system contamination. If you’re calling an engineer multiple times per season, your system likely needs a thorough clean. If you’re experiencing repeated issues, our boiler repair service can diagnose the underlying cause, though addressing system contamination through power flushing or filtration often prevents future failures.

    How Often Should You Power Flush Radiators?

    The frequency of power flushing depends on your system’s age, condition, water quality, and boiler type.

    System age and condition assessment:
    If your system is showing active signs of contamination, cold radiators, kettling noises, slow heating response, or discoloured water, a power flush is your immediate priority. For systems over 10 years old that have never been flushed, a single flush often restores significant performance gains. Newer systems installed with proper inhibitor and no visible contamination may never require flushing.

    Boiler type matters:
    Combi boilers are particularly sensitive to sludge accumulation because they have smaller, more intricate heat exchangers. If you have a combi and notice any heating irregularities, flushing should be considered sooner rather than later. System boilers and heat-only boilers are more forgiving but still benefit from preventative maintenance.

    Water hardness and corrosion risk:
    In areas with hard water, scale and corrosion form more rapidly, increasing magnetite production. If you’re in a hard-water region across the South East, your system accumulates debris faster. Your water supplier can confirm your local water hardness; this is a useful baseline for planning maintenance intervals.

    Maintenance intervals after initial flushing:
    After a power flush, most systems perform well for 2-4 years before significant recontamination occurs. If your system is old with active corrosion, sludge may reaccumulate within 12-18 months. With a magnetic filter installed after flushing, reaccumulation drops dramatically, and you typically avoid repeat flushing entirely, instead performing simple annual filter servicing.

    Cost-benefit over time:
    A single power flush is a one-time cost with immediate results but requires repeat treatments if contamination returns. A magnetic filter is a one-time installation with minimal annual servicing but provides continuous protection. For most homeowners planning to remain in their property, a filter typically offers better long-term value.

    When to act:
    Don’t wait for a breakdown. If you’re experiencing cold radiators, boiler noise, or higher-than-expected energy bills, schedule an inspection with a qualified engineer. They can assess your system’s condition and advise whether flushing is needed now and whether a filter should follow.

    Benefits of Magnetic Boiler Filters

    Magnetic filters offer several compelling advantages for long-term system health, efficiency, and peace of mind.

    Continuous, passive protection:
    Unlike power flushing, a magnetic filter works every day your heating system runs. It captures iron oxide particles as they form, preventing sludge accumulation before it becomes a problem. This means fewer emergency repairs, more predictable system performance, and no need to schedule disruptive flushing appointments.

    Improved boiler efficiency and faster heat-up:
    A clean system circulates water more freely, allowing your boiler to reach temperature faster and maintain consistent heat output. You’ll notice faster radiator warm-up times and more even heating across your home.

    Reduced energy consumption and lower fuel bills:
    When your boiler doesn’t have to work against sludge-clogged pipework, it uses less fuel to heat your home.

    Extended boiler lifespan and reduced breakdown risk:
    Boilers operating in clean systems experience less stress and fewer breakdowns. Additionally, fewer breakdowns mean fewer expensive emergency engineer call-outs.

    Minimal maintenance and clear DIY boundaries:
    Magnetic filters require straightforward annual servicing: drain collected magnetite from the filter chamber, inspect the magnet, and refill. Many homeowners can safely perform this themselves. However, filter installation must be performed by a qualified Gas Safe engineer. If the filter develops a leak or the magnet becomes damaged, professional replacement is necessary.

    System-specific compatibility:
    Magnetic filters work effectively in all boiler types, combi, system, and heat-only, but they’re particularly valuable in systems prone to corrosion. Filters are compatible with most modern pipework materials, though your engineer will confirm compatibility during assessment.

    Book a boiler repair or service →

    Environmental advantage:
    Power flushing generates chemical waste that must be disposed of responsibly. Magnetic filters produce no chemical waste; they simply trap iron oxide particles that are safely disposed of during annual servicing.

    Long-term warranty and reliability:
    Market-leading magnetic filters are designed for durability and come with substantial warranties. With proper annual servicing, a quality filter will protect your system for many years.

    The combined approach:
    The greatest benefit emerges when a magnetic filter is installed after a power flush. The flush removes existing contamination, restoring immediate heating performance. The filter then prevents reaccumulation, eliminating the need for repeat flushing.

    Power Flushing vs Magnetic Filters: Key Differences

    Understanding how these two methods differ is essential for making the right choice.

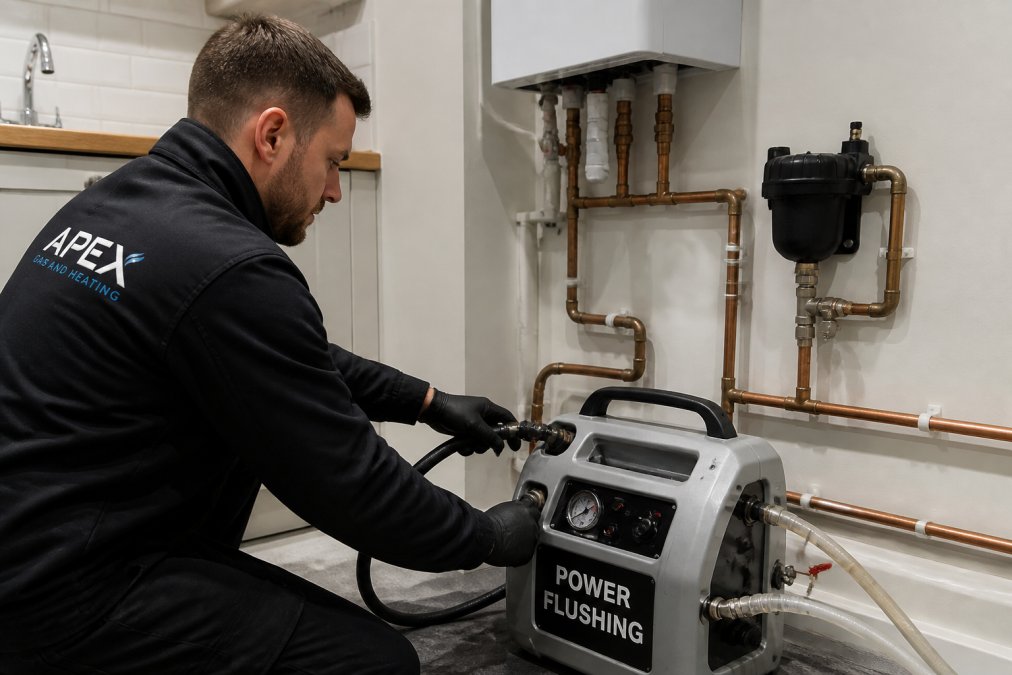
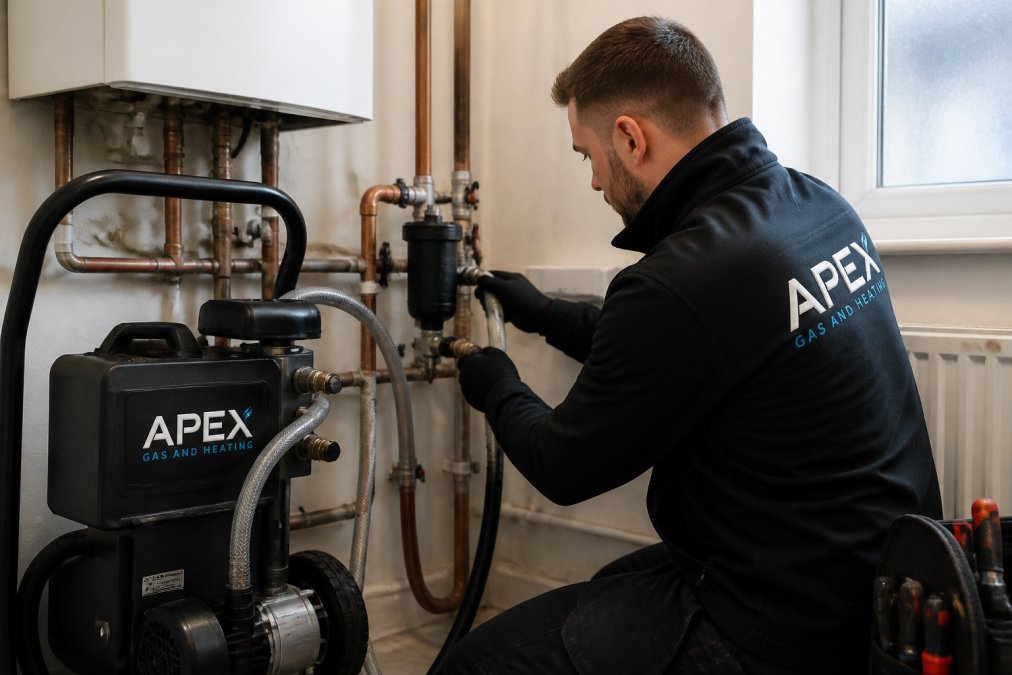
    Professional technician performing power flushing work on central heating pipework with high-velocity equipment, showing system circulation and debris removal in action
    Professional technician performing power flushing work on central heating pipework with high-velocity equipment, showing system circulation and debris removal in action

    How Power Flushing Works

    Power flushing uses specialist equipment to force water through your heating circuit at high velocity. A pump creates pressure that dislodges accumulated sludge, scale, and corrosion from pipework, radiators, and the boiler’s heat exchanger. Chemical treatments are added to break down deposits and prevent new corrosion.

    The procedure typically takes 4-8 hours depending on system size and contamination severity. An engineer connects the power flushing pump to your system, isolates sections of pipework, and forces treated water through each circuit. The debris is flushed out through a drain, and the system is refilled with fresh water and chemical inhibitor.

    Power flushing is highly effective for systems with significant existing contamination. However, it’s a one-time intervention; once complete, sludge can begin reaccumulating, particularly in older systems with active corrosion.

    How Magnetic Filters Work

    Magnetic filters work on a simpler principle. A powerful neodymium magnet is positioned inside the filter body, typically installed on the return pipe to the boiler. As water circulates through your heating system, magnetite particles are attracted to the magnet and trapped inside the filter chamber.

    The filter requires no chemicals and no active intervention; it works passively as your heating system operates. Servicing is straightforward: drain the filter annually to remove accumulated magnetite, check the magnet, and refill.

    Magnetic filters are preventative rather than corrective. They work best when installed in systems that are already reasonably clean, or after a power flush has removed existing contamination.

    Can a Magnetic Filter Replace a Power Flush?

    If your system is already clean, a magnetic filter can absolutely prevent future sludge accumulation. However, if your system currently has significant sludge buildup, a magnetic filter alone won’t fix it. Existing debris remains in your pipework and radiators.

    The most effective approach combines both methods. Power flush first to remove existing contamination, then install a magnetic filter to prevent future buildup. This strategy addresses the immediate problem and provides long-term protection. In some cases, particularly with newer systems or those recently installed with inhibitor, a magnetic filter alone is sufficient. Your engineer can assess your system during an inspection and advise accordingly.

    Which Solution Is Right for Your Heating System?

    Choosing between power flushing and magnetic filters requires considering your system’s age, condition, and your long-term maintenance preferences.

    Choose power flushing if:

    • Your system currently shows signs of contamination (cold radiators, boiler noise, slow heating)
    • You want immediate restoration of heating performance
    • Your system is old and has never been flushed

    Choose magnetic filter installation if:

    • Your system is already reasonably clean
    • You want preventative maintenance to avoid future problems
    • You’re planning to stay in your property long-term

    Choose both if:

    • Your system shows active contamination but you want long-term protection
    • You want the fastest return to optimal performance plus future prevention

    At Apex Gas & Heating Ltd, we recommend a consultation with a qualified engineer who can assess your specific system. During a boiler service or inspection, we can identify sludge accumulation, measure heating performance, and advise whether flushing, filtration, or both makes sense for your property. Our team across Sussex and Surrey, including Crawley and surrounding areas, can arrange either service, and we often recommend the combined approach for systems with a history of problems.


    Choosing the right approach to heating system maintenance protects both your comfort and your investment. If your radiators aren’t heating evenly, your boiler is making strange noises, or you’re seeing higher energy bills, your system likely needs attention. Apex Gas & Heating Ltd offers both power flushing and magnetic filter installation across Sussex and Surrey, with transparent pricing and 24/7 emergency support. Our approved Worcester and Glowworm installers can assess your system, recommend the best solution, and ensure your heating performs reliably all winter. Get a quote today and discover how a clean, well-maintained heating system can save you money and stress.

    Frequently Asked Questions

    Q: Can a magnetic filter replace the need for a power flush?

    A: Not entirely. A magnetic filter captures magnetite and iron oxide particles from ongoing circulation, but it cannot remove heavy sludge accumulation already present in your system. If your heating system has years of built-up debris, a power flush cleans the circuit thoroughly first. After that, a magnetic filter prevents future contamination. For systems already clean, a magnetic filter alone maintains health. For heavily contaminated systems, power flushing followed by magnetic filter installation offers the best long-term protection.

    Q: How often should you power flush radiators to maintain system health?

    A: Most heating systems benefit from power flushing every 5 to 10 years, depending on water quality and system age. If your radiators develop cold spots, your boiler becomes noisy, or heating performance drops, flushing may be needed sooner. Once flushed, adding a magnetic filter significantly extends the interval between services by capturing new debris before it accumulates. Annual boiler servicing helps identify whether flushing is overdue. Discuss your system’s specific needs with a qualified engineer during servicing.

    Q: What are the main signs your heating system needs cleaning?

    A: Watch for cold spots on radiators despite the system running, unusual boiler noises (kettling or banging), slower heat-up times, uneven heating across rooms, or increased energy consumption without obvious cause. These indicate magnetite sludge and debris restricting circulation and reducing heat exchanger efficiency. Discoloured water when bleeding radiators is another clear sign. If your boiler is over 10 years old and has never been flushed, preventative cleaning prevents future breakdowns. A professional inspection during annual servicing can confirm whether your system needs attention.

    Q: Is it worth installing a magnetic filter to an older heating system?

    A: Yes, especially if your system is over 10 years old. Older systems accumulate more magnetite from corrosion and scale buildup. A magnetic filter captures this debris, protecting your boiler from premature breakdown and maintaining heating performance. If the system has never been flushed, combine power flushing with magnetic filter installation for maximum benefit. The filter then prevents re-contamination during the system’s remaining lifespan. For landlords managing rental properties, magnetic filters reduce emergency repair calls and extend asset life, making them a sound investment.

    Book online, it takes a minute →

  • Does Home Insurance Cover Burst Pipes?

    Does Home Insurance Cover Burst Pipes?

    Table of Contents

    Last Updated: September 2, 2026

    What Is Escape of Water and How Does It Affect Your Claim?

    Escape of water is the term insurers use to describe water damage caused by pipes, tanks, or plumbing systems leaking or bursting inside your property. It’s one of the most common claims homeowners file, yet also one of the most misunderstood. Insurers treat escape of water differently depending on how it happened. A sudden pipe burst that floods your kitchen is handled very differently from a slow leak that goes unnoticed for weeks. Most home insurance policies include some form of escape of water cover, but details vary enormously, some cover damage to your property itself, others cover the cost of finding and repairing the leak, and some cover both.

    Does Home Insurance Cover Burst Pipes?

    What Is Typically Covered

    Does home insurance cover burst pipes? Yes, most standard home insurance policies cover sudden and accidental burst pipes. The key word is “sudden.” If a pipe bursts overnight and floods your living room, that’s typically covered. If a pipe has been slowly leaking for months unnoticed, that’s often excluded.

    When a burst pipe is covered, your buildings insurance usually pays for:

    • Repairing or replacing the damaged pipe
    • Fixing structural damage caused by the water (walls, floors, ceilings)
    • Replacing damaged plaster, decoration, and finishes
    • Emergency drying and dehumidification services

    Contents insurance covers damage to your belongings, furniture, carpets, and electronics. However, most policies exclude pipes that freeze and burst if you haven’t taken reasonable precautions. If your loft pipes freeze because you didn’t insulate them, insurers may refuse to pay, arguing you failed to maintain your property.

    Common Exclusions and Limitations

    Understanding what’s not covered is just as important as knowing what is:

    Gradual leaks and seepage. If water has been dripping from a pipe for weeks or months, most policies exclude this entirely. The logic is that you should have noticed it and called a plumber.

    Lack of maintenance. If you haven’t serviced your boiler or insulated your pipes, insurers may deny your claim. This is particularly strict for frozen pipes.

    Unoccupied properties. If your home has been empty for more than 30 days, escape of water cover often lapses. This catches out landlords and people with second homes.

    Negligence. If you knew about a problem and did nothing, the insurer can refuse to pay.

    Underground service pipes. The pipes running from the mains water supply to your property are often excluded from standard cover. You typically need separate cover.

    Damage from tree roots. If tree roots have damaged your underground pipes, that’s usually excluded.

    Sudden vs. Gradual Damage: Why the Distinction Matters

    Insurers divide water damage into two categories: sudden and accidental, or gradual and foreseeable.

    Sudden damage happens quickly without warning. A pipe bursts. A radiator splits. A washing machine hose ruptures. Your policy almost certainly covers these, assuming you’ve maintained your property reasonably well.

    Gradual damage develops over time. A slow leak from a corroded joint. Condensation building up and causing damp. Insurers routinely reject these claims, arguing you should have spotted the problem earlier.

    The line between sudden and gradual isn’t always clear. A pipe might have been corroding for years before it finally splits. In practice, if you can show the damage happened without warning, you’re likely covered. If there were warning signs you missed, you’re likely not covered.

    The best protection is to keep records. If a pipe bursts, take photos immediately. Document what you did to maintain your property. If you’ve had your boiler serviced regularly, keep the service certificates. These records can be the difference between a claim being accepted and rejected.

    Understanding Trace and Access Cover

    Trace and access cover is an optional add-on that many people don’t realise they need. It covers the cost of finding a leak and accessing it, even if the leak itself isn’t covered.

    You notice damp on your living room wall. A plumber investigates and discovers a leak in a pipe running inside the wall cavity. To access and repair that pipe, the plumber must cut into the wall, locate the pipe, fix it, and make good the damage. The cost can easily run into hundreds of pounds.

    Standard escape of water cover pays for repairing the pipe and the water damage it caused, but often doesn’t pay for finding and accessing it. Trace and access cover pays for leak detection, cutting into walls or floors to access the pipe, and making good the damage caused by accessing the leak.

    Without this cover, you’re responsible for access costs yourself. If you have an older property or pipes running through walls and cavities, trace and access cover is worth serious consideration.

    How to Turn Off Your Water Supply in an Emergency

    When a pipe bursts, the first thing you need to do is stop the water flowing. Every minute the water runs, more damage occurs. Knowing where your stopcock is and how to turn it off can prevent hundreds of pounds of additional damage.

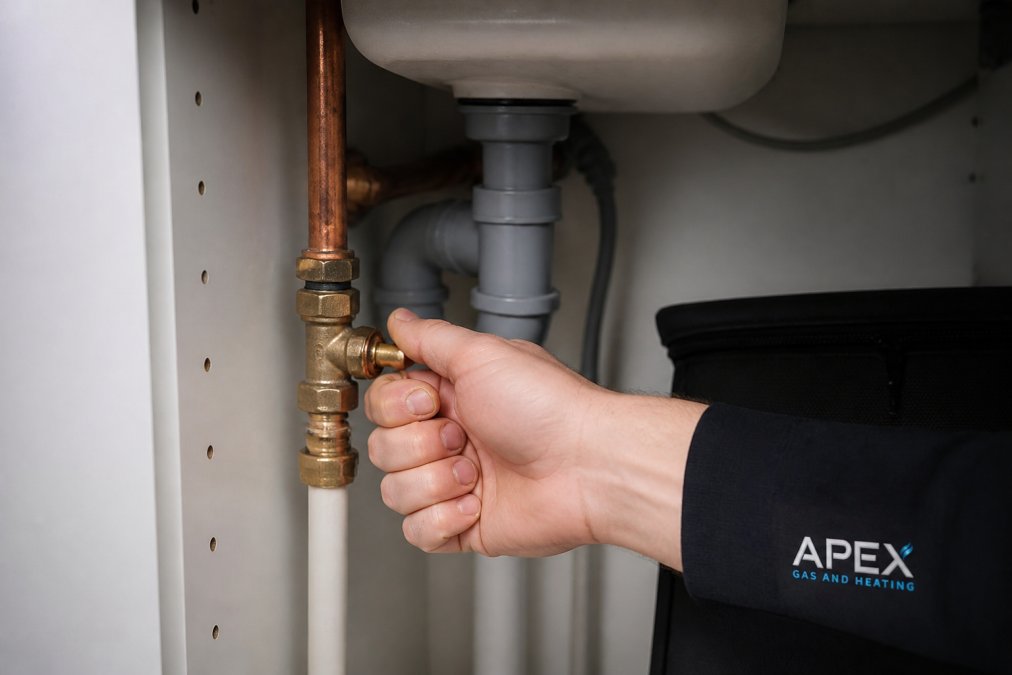
    Homeowner's hand firmly gripping and turning a stopcock valve located under a kitchen sink, showing the valve in the off position with water pipes visible in the background
    Homeowner’s hand firmly gripping and turning a stopcock valve located under a kitchen sink, showing the valve in the off position with water pipes visible in the background

    Your stopcock (also called a stop valve or shut-off valve) controls water flow into your entire property. Most stopcocks are located under the kitchen sink, but some are in the bathroom, utility room, or under the stairs.

    To find your stopcock:

    • Check under the kitchen sink first
    • Look in the bathroom under the sink or behind the toilet
    • Check the utility room or cupboards near water pipes
    • If you can’t find it, contact your water company

    Once found, turn it clockwise (to the right) until it stops. The water supply to your home will stop immediately. If you can’t locate your stopcock or it’s jammed, you can turn off the water at the meter instead, usually located outside your property near the boundary.

    Many people also fit isolation valves on individual pipes, for example, under the kitchen sink or near the boiler. These allow you to turn off water to just that area without shutting off the whole house.

    Steps to Take Immediately After a Pipe Bursts

    The moments after a pipe bursts are critical. Your actions in the first hour can significantly reduce the damage and protect your insurance claim.

    Step 1: Turn off the water supply. Locate your stopcock and turn it off immediately.

    Step 2: Turn off your heating. If your heating system is flooded, turn off your boiler and heating system. Never attempt to reset a boiler that’s been flooded.

    Step 3: Open windows and doors. Get air flowing through the property to start the drying process and prevent mould and damp.

    See our plumbing services →

    Step 4: Move furniture and belongings away from the water. Wet items left in place will develop mould and become permanently damaged.

    Step 5: Take photographs. Before you clean anything up, take photos and videos of all the damage. Photograph the burst pipe itself, the flooded areas, and any damaged belongings.

    Step 6: Contact your insurance company. Call your insurer as soon as possible. Don’t wait until you’ve cleaned up or had repairs done. Your insurer may want to send a loss adjuster to assess the damage before any work is carried out.

    Step 7: Call a qualified plumber. If the pipe is still leaking or you’re unsure it’s safe, call a plumber immediately. At Apex Gas & Heating Ltd, we offer 24/7 emergency plumbing services across Sussex and Surrey, so you don’t have to wait until Monday morning.

    Step 8: Keep records of everything. Keep receipts for any emergency repairs, temporary accommodation costs, or cleaning services. Your insurer will need these to assess your claim.

    How to Make a Claim for Water Damage

    Making an insurance claim for water damage follows a standard process, but the details matter enormously.

    Notify your insurer immediately. Call your insurance company as soon as you discover the damage. Most insurers have a 24-hour claims line. The sooner you notify them, the sooner they can begin the assessment process.

    Provide a detailed account of what happened. Explain exactly what happened and when. Was it sudden or gradual? Did you notice any warning signs beforehand? The answers significantly affect whether your claim is accepted.

    Submit photographs and video evidence. Send photos and videos of the damage as soon as possible, including wide shots and close-ups.

    Provide a list of damaged items. Create a detailed list of what’s been damaged or destroyed, including the age of each item and what you paid for it. For expensive items, provide receipts if you have them.

    Keep all receipts and quotes. If you need emergency repairs, get quotes from multiple plumbers before choosing one. Keep all receipts for work done, materials purchased, and temporary accommodation if you’ve had to move out.

    Be honest about maintenance. If you’ve had your boiler serviced regularly, say so and provide certificates. Dishonesty about maintenance is grounds for claim rejection.

    Don’t agree to a settlement you’re unhappy with. If the loss adjuster’s assessment seems too low, you can challenge it. Get your own quotes for repairs and provide them to your insurer.

    Consider using a loss adjuster or claims specialist. For large claims, it’s often worth paying for an independent loss adjuster or claims specialist to represent you. They understand insurance policies and can often negotiate a higher settlement.

    Preventing Burst Pipes in Winter

    Winter is when most burst pipes occur. Freezing temperatures cause water in pipes to expand, putting pressure on the pipe walls. The good news is that burst pipes are largely preventable with proper preparation.

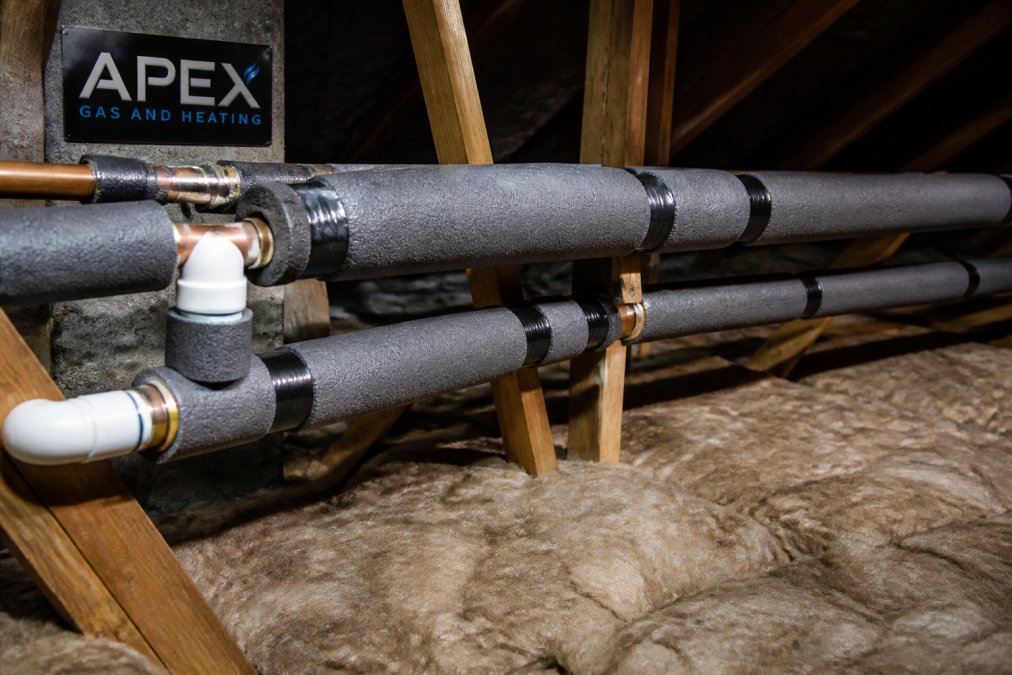
    Exposed copper and plastic pipes wrapped tightly with thick foam pipe insulation in a cold, unheated loft space, showing proper installation technique with insulation secured with tape
    Exposed copper and plastic pipes wrapped tightly with thick foam pipe insulation in a cold, unheated loft space, showing proper installation technique with insulation secured with tape

    Insulate your pipes. This is the single most effective way to prevent frozen pipes. Foam pipe insulation is cheap, easy to install, and very effective. Focus on pipes in unheated areas: loft pipes, pipes in the garage or shed, external pipes, pipes in the basement, and any pipes exposed to cold air.

    Keep your heating on. If you’re away during winter, don’t turn your heating completely off. Set it to a low temperature (around 13-15°C) to keep pipes warm enough that water doesn’t freeze.

    Bleed your radiators. Air trapped in radiators prevents hot water from circulating properly, which can cause pipes to freeze. Bleeding radiators improves circulation and helps keep pipes warm.

    Drip your taps in freezing weather. On very cold nights, let cold taps drip slightly. Moving water is less likely to freeze than static water.

    Leave cabinet doors open. Pipes under sinks are exposed to cold air from outside walls. Leaving cabinet doors open allows warm air from the house to reach these pipes.

    Maintain your boiler. A well-maintained boiler heats your home more efficiently, which helps keep pipes warm. At Apex Gas & Heating Ltd, we offer annual boiler servicing to keep your heating system in peak condition and help prevent frozen pipes.

    Check your water pressure. High water pressure puts extra stress on pipes, making them more likely to burst. A plumber can install a pressure-reducing valve if needed.

    Know where your stopcock is. Even with prevention, pipes can still burst. Knowing where your stopcock is and being able to turn it off quickly can limit the damage.


    Burst pipes are one of the most expensive emergencies homeowners face, but also one of the most preventable. Understanding what your insurance covers, taking simple precautions before winter, and knowing what to do if a pipe bursts can save you thousands of pounds and months of disruption. If you need emergency plumbing assistance or want to discuss preventative measures for your property in Crawley or across Sussex and Surrey, Apex Gas & Heating Ltd provides 24/7 emergency plumbing services. Our qualified plumbers can assess your property, recommend insulation upgrades, and respond immediately if a pipe bursts. Get a quote today and protect your home against water damage.

    Prevention Method Best For Effectiveness
    Pipe insulation Loft and external pipes Very high
    Low heating in winter Properties left unoccupied High
    Radiator bleeding Improving circulation Medium
    Pressure-reducing valve High water pressure areas High
    Trace and access insurance Older properties with hidden pipes High (financial protection)

    Frequently Asked Questions

    Can I claim on house insurance for a burst pipe?

    Most buildings insurance policies cover burst pipes under the ‘escape of water’ section, provided the damage is sudden and accidental rather than caused by neglect or gradual wear. However, you must act quickly to minimise damage, document the incident thoroughly, and notify your insurer promptly. Check your policy documents for specific exclusions, some insurers exclude claims if pipes weren’t adequately insulated or if your property was left unoccupied for extended periods.

    What should I do immediately if a pipe bursts in my home?

    First, locate your stopcock and turn off the water supply immediately, this is the most critical step. Next, drain the system by opening all taps and flushing toilets. Move belongings away from the affected area to prevent further damage. Document everything with photographs and notes about when you discovered the burst. Contact your insurer as soon as possible and keep all receipts for emergency repairs. If you’re unsure how to turn off your water supply, contact an emergency plumber straightaway.

    Does home insurance cover the cost of finding the leak?

    Trace and access cover is a specialist add-on that pays for the cost of locating hidden leaks within your plumbing system, often the most expensive part of water damage claims. Standard buildings insurance typically does not include this, so you may face substantial bills for leak detection if your pipes are buried or concealed. Many insurers offer trace and access cover as an optional extra, so it’s worth reviewing your policy or asking about it when renewing. Without this cover, you could be liable for hundreds of pounds in detection costs alone.

    What is the difference between escape of water and accidental damage cover?

    Escape of water covers damage caused by water leaking from your plumbing system, heating system, or appliances, such as burst pipes, leaking radiators, or faulty washing machines. Accidental damage cover is broader and includes unintended damage from other sources, such as knocking over a paint tin or accidentally flooding a room. Escape of water is usually included in standard buildings insurance, whereas accidental damage is typically an optional add-on. Understanding this distinction helps you know what your policy actually covers and whether you need additional protection.

    Book your visit online →

  • How Long Does a Power Flush Take to Complete?

    How Long Does a Power Flush Take to Complete?

    Table of Contents

    Last Updated: August 31, 2026

    What Is a Power Flush?

    A power flush is a professional cleaning process that removes sludge, debris, and corrosion buildup from your central heating system. Over time, magnetite particles, rust, and mineral scale accumulate inside radiators, pipework, and the boiler’s heat exchanger, restricting water flow and reducing heating efficiency. A heating engineer uses a specialised power flushing machine to circulate chemical cleaner through your entire heating circuit at high velocity, dislodging trapped material and flushing it out through a magnetic filter. The process restores system performance and extends boiler life by preventing corrosion and blockages from worsening. At Apex Gas & Heating Ltd, we’ve helped homeowners across Sussex and Surrey restore heating system efficiency through professional power flushing. The procedure is particularly valuable before installing a new boiler, as it ensures your pipework and radiators are clean and won’t damage expensive new equipment.

    How Long Does a Power Flush Take to Complete?

    Typical Duration

    A standard power flush typically takes between 4 to 8 hours to complete, though some systems may require longer depending on sludge severity and system complexity. Most residential properties finish within a single working day. The heating engineer will connect the power flushing machine to your system, run the chemical treatment cycle, and monitor water clarity as the process progresses.

    Professional heating engineer connecting power flushing machine to central heating system pipework with magnetic filter visible, demonstrating circulation equipment in action
    Professional heating engineer connecting power flushing machine to central heating system pipework with magnetic filter visible, demonstrating circulation equipment in action

    Duration depends on when water running through the magnetic filter becomes clear, indicating sludge removal is nearly complete. Some engineers may recommend leaving inhibitor to circulate overnight for particularly contaminated systems, extending the total time to the following morning.

    System Size and Complexity

    Larger properties with more radiators naturally require longer flushing times. A three-bedroom semi-detached house with eight radiators typically takes 5 to 6 hours, whilst a larger five-bedroom detached property with twelve radiators can take 7 to 8 hours or more. Bungalows and smaller flats may finish in 4 to 5 hours.

    Pipework layout also affects duration. Properties with microbore pipework (small-diameter plastic pipes) may take longer than those with standard 15mm copper pipework, as the smaller diameter restricts flow. Systems with multiple heating circuits or underfloor heating add complexity and time.

    Factors Affecting How Long a Power Flush Takes

    Central Heating System Size

    System volume, measured in litres, is the primary factor determining flushing duration. A typical three-bedroom semi-detached property has a system volume of 60 to 100 litres, whilst larger detached homes can reach 150 to 200 litres. The power flushing machine must circulate chemical cleaner through every litre multiple times to achieve effective sludge removal. A property with eight radiators typically contains 80-100 litres; one with twelve radiators may hold 140-180 litres.

    Sludge and Debris Buildup

    The condition of your heating system dramatically impacts flushing time. A system that’s never been flushed and has been running for 15+ years will contain far more sludge than one maintained regularly. Severely contaminated systems may require 8 to 10 hours or even a split process across two days.

    Water colour provides the clearest indicator of progress. Initially, water exiting the system appears dark brown or black due to magnetite particles and rust. As flushing continues, the water gradually lightens. When it runs clear or pale yellow, the process is nearing completion.

    Pipework Configuration and Age

    Older properties with complex pipework layouts experience longer flushing times. Microbore systems, common in properties built during the 1980s and 1990s, have smaller pipe diameters (typically 8-10 mm compared to standard 15 mm copper) and restricted flow rates, increasing duration by 1 to 2 hours compared to standard systems.

    Properties with radiator towel rails, heated floors, or multiple heating zones require extended flushing time to ensure chemical circulation reaches every part of the system. A property with underfloor heating in addition to standard radiators may add 1-2 hours to the total duration.

    Boiler and Heat Exchanger Condition

    A boiler’s heat exchanger condition influences flushing duration. Engineers may recommend slower circulation speeds to protect an aging heat exchanger from thermal shock, which extends the overall timeframe by 1-3 hours. If your boiler is scheduled for replacement, power flushing beforehand ensures the new unit isn’t contaminated immediately.

    How These Factors Combine: Realistic Scenarios

    A small bungalow (four radiators, 50-60 litres, standard 15 mm pipework, recently serviced) with light sludge buildup typically completes in 4-5 hours. A three-bedroom semi-detached (eight radiators, 80-100 litres, standard pipework, 10+ years without flushing) with moderate contamination usually takes 6-7 hours. A larger detached property (twelve radiators, 150+ litres, mixed pipework including microbore sections, 15+ years old, severe sludge) with underfloor heating can easily require 8-10 hours or a two-day process.

    Signs Your Central Heating Needs a Power Flush

    Cold spots on radiators are the most obvious indicator that sludge buildup is restricting water flow. If the bottom half of your radiator feels noticeably cooler than the top, or if entire radiators remain cold whilst others heat normally, sludge is likely blocking the heating circuit.

    Discoloured water when you bleed radiators, brown, orange, or black water instead of clear, signals magnetite and rust particles circulating through your system. Noisy boilers, banging pipes, or gurgling sounds often accompany sludge buildup as air pockets form around debris.

    Rising energy bills without obvious cause frequently indicate reduced heating efficiency from sludge restricting flow. If your heating bills have increased year-on-year without changes in usage patterns, sludge accumulation is a likely culprit.

    Frequent boiler breakdowns, particularly pressure loss or lockout codes, can result from contamination damaging internal components. If you’re repairing your boiler repeatedly within a few years, a power flush may prevent future failures.

    Is a Power Flush Necessary Before a New Boiler Installation?

    Yes, a power flush is strongly recommended before installing a new boiler, particularly if your existing system shows signs of contamination. A new boiler’s heat exchanger is precision-engineered and vulnerable to damage from sludge particles. Debris circulating through a brand-new unit can cause scaling, corrosion, and premature failure, potentially voiding your warranty.

    Many boiler manufacturers, including Worcester and Glowworm, recommend power flushing before installation when replacing an older unit. The cost of power flushing is worthwhile insurance against expensive repairs within the first few years. Engineers at Apex Gas & Heating Ltd routinely recommend power flushing as part of new boiler installation packages. If your existing system is over 10 years old or shows signs of sludge buildup, scheduling a power flush before your new boiler arrives is the sensible approach.

    Get your boiler looked at →

    How to Prepare Your Home for a Power Flush

    Access and Workspace Preparation

    Clear access to your boiler, radiators, and airing cupboard before the engineer arrives. The engineer needs to connect the power flushing machine to your heating system, typically near the boiler, and access the magnetic filter for emptying during the process. Ensure at least 1 metre of clear floor space in front of the boiler for equipment placement.

    Check that all radiators are accessible, if any are blocked by furniture or radiator covers, move them beforehand. The engineer may need to isolate individual radiators or access their bleed valves during flushing. Ensure the heating system’s isolation valves (usually located near the boiler or in the airing cupboard) are accessible and not painted over or stuck.

    System Information and Documentation

    Gather information about your heating system before the engineer arrives. Locate your boiler manual or note the boiler make, model, and age. Count your radiators and note which rooms they’re in; this helps the engineer calculate system volume accurately. If you have records of previous servicing or maintenance, have these ready.

    Inform the engineer if your property has a system boiler with a separate hot water cylinder (rather than a combi boiler), as this affects how the power flushing machine is connected. Similarly, if you have a heat pump, biomass boiler, or any non-standard heating setup, mention this in advance.

    Communicating System Issues and History

    Inform the engineer of any known system problems before work begins. Describe which radiators don’t heat properly and whether cold spots are at the bottom, middle, or top. If you’ve noticed pressure loss, boiler lockouts, or unusual noises, explain these in detail, they help the engineer determine whether sludge is causing problems.

    Mention if you’ve had previous power flushes and what the outcome was. If a previous flush didn’t resolve your heating issues, the engineer needs to know this to investigate whether a different problem exists.

    Heating Disruption and Timing

    Plan for disruption to your heating during the work; the system will be isolated from the boiler whilst flushing occurs. Schedule power flushing during milder months if possible, or arrange temporary heating if flushing during winter. Ensure you’re home throughout the procedure, the engineer will need to access various parts of your system and may need to discuss progress.

    Safety and Utility Considerations

    Ensure the area around your boiler is safe and well-lit. Clear any trip hazards, and if you have pets, arrange for them to be kept away from the work area. If your heating system uses oil rather than gas, inform the engineer in advance. Ensure your water supply is accessible in case the engineer needs to top up the system during or after flushing.

    Post-Flush Maintenance and System Care

    Close-up of heating engineer inspecting water clarity in magnetic filter after power flushing, examining collected debris and system cleanliness during maintenance check
    Close-up of heating engineer inspecting water clarity in magnetic filter after power flushing, examining collected debris and system cleanliness during maintenance check

    After power flushing, your heating engineer will add inhibitor to your system, a chemical treatment that prevents future corrosion and sludge formation. Inhibitor effectiveness typically lasts 3 to 5 years, after which your engineer can top it up during a boiler service.

    Regular boiler servicing becomes even more important after power flushing. Annual servicing allows your engineer to monitor system pressure, check inhibitor levels, and catch emerging issues before they develop into costly problems.

    Maintain system pressure within the normal operating range shown on your boiler’s pressure gauge, typically 1 to 1.5 bar when the system is cold. Low pressure can indicate a leak or water loss, which compromises inhibitor concentration. Bleed radiators annually if air accumulates, but frequent radiator bleeding more than once or twice yearly suggests an underlying issue requiring professional attention.

    Avoid adding water treatment products or additives unless your engineer specifically recommends them. If you suspect contamination has returned, contact your heating engineer to discuss whether another power flush is needed.


    Power flushing is an investment in your heating system’s longevity and efficiency. Whether you’re preparing for a new boiler installation or addressing existing performance issues, professional power flushing removes the sludge and debris restricting your system’s potential. The 4 to 8 hours required for a thorough flush pays dividends through improved heating performance, lower energy bills, and extended boiler life. Apex Gas & Heating Ltd provides professional power flushing and new boiler installation services across Sussex and Surrey, with transparent pricing and a commitment to restoring your heating system to peak performance. Get a quote today and discover how power flushing can transform your home’s comfort and efficiency.

    Frequently Asked Questions

    Q: What factors influence the duration of a power flush?

    A: System size, sludge accumulation, pipework layout, and boiler condition all affect how long a power flush takes. Larger central heating systems with significant debris typically require 4-8 hours, whilst smaller systems may finish in a shorter timeframe. A heating engineer will assess your specific setup to provide an accurate timeframe before starting work.

    Q: Are power flushes worth it for older heating systems?

    A: Yes, power flushing can restore heating performance in older systems by removing corrosion, scale, and sludge that accumulate over decades. If your radiators have cold spots or your boiler operates inefficiently, a power flush often improves thermal efficiency significantly. However, a professional assessment is essential to confirm your system can handle the process safely.

    Q: Do you need access to all radiators for a power flush?

    A: Access to the boiler, pump, and primary pipework is essential, but you don’t necessarily need to isolate every radiator. The power flushing machine connects to the heating circuit and circulates chemical cleaner throughout the system. Your heating engineer will explain which radiators or valves need attention based on blockages or cold spots they identify.

    Q: How often should a central heating system be power flushed?

    A: Most systems benefit from power flushing every 5-10 years, depending on water quality, system age, and maintenance history. If you notice cold spots, reduced flow rate, or noisy pipes, flushing may be needed sooner. Regular boiler servicing and inhibitor top-ups help extend intervals between flushes and maintain system health.

    Request a call back →

  • What’s Included in Professional Boiler Servicing

    What’s Included in Professional Boiler Servicing

    Table of Contents

    Last Updated: September 1, 2026

    What Is Included in Professional Boiler Servicing

    Professional boiler servicing is a comprehensive inspection and maintenance procedure carried out by a Gas Safe registered engineer to ensure your heating system operates safely, efficiently, and reliably. A thorough service involves far more than a quick visual check. It includes internal component inspection, combustion analysis, safety device testing, and detailed pressure checks that catch problems before they become dangerous or expensive.

    The service typically takes between 60 and 90 minutes, depending on your boiler model and its condition. During this time, the engineer will methodically work through a detailed checklist, examining everything from the burner and heat exchanger to the flue system and safety controls. Each step serves a specific purpose: to verify that your boiler is burning gas efficiently, that no carbon monoxide is escaping into your home, and that all safety devices will activate if something goes wrong.

    Pro Tip
    Book your annual service before the heating season starts (September or October). Engineers are less busy then, and you’ll avoid the winter rush when emergency call-outs are common.

    Why Professional Boiler Servicing Matters for Safety and Efficiency

    Your boiler burns gas to create heat, producing combustion byproducts including carbon monoxide, a colourless, odourless gas that’s lethal in high concentrations. An unserviced boiler can develop leaks, cracks, or blockages that allow carbon monoxide to escape into your home instead of up the flue. Regular servicing is your primary defence against this silent killer.

    An unserviced boiler also becomes less efficient. Dust and debris accumulate inside the heat exchanger, the burner nozzle clogs, and gas pressure drifts out of specification. Each issue forces your boiler to work harder, increasing energy bills and shortening its lifespan. A well-maintained boiler can last 15 years or more; a neglected one might fail within 10.

    Most boiler manufacturers require annual servicing as a warranty condition. For landlords, the Gas Safety (Installation and Use) Regulations 1998 require that every gas appliance in a rental property is serviced annually and a Gas Safety Certificate (CP12) is issued and kept on file. Failure to do so is a criminal offence.

    Watch Out
    Never attempt to service a boiler yourself. Gas work must be carried out by a Gas Safe registered engineer. Tampering with gas appliances can invalidate your insurance and create serious safety hazards.

    How Long Does a Boiler Service Take

    A typical boiler service takes between 60 and 90 minutes. The exact duration depends on the age and model of your boiler, how well it’s been maintained, whether any faults are discovered, and how accessible the boiler is in your home.

    A straightforward service on a modern, well-maintained boiler might take closer to 60 minutes. If the engineer discovers a minor issue, a worn seal, misaligned burner, or small corrosion, they may spend additional time investigating or explaining findings. Older boilers often take longer because components wear over time and the risk of finding problems increases with age.

    Set aside at least two hours for the appointment to give the engineer time to work without rushing and allow space for questions about findings.

    Key Takeaway
    Book your service early in the day or mid-week when engineers have more flexibility. You’ll be less likely to face delays, and the engineer can give your boiler the attention it deserves.

    Annual Boiler Service Checklist: What Engineers Inspect

    When a Gas Safe engineer arrives to service your boiler, they follow a systematic checklist covering all critical safety and performance checks. Here’s what happens during a professional boiler servicing appointment.

    Visual Inspection of the Boiler and Casing

    The engineer begins by examining the external casing and surroundings, checking for signs of damage, corrosion, leaks, or loose fittings. They verify that the boiler is mounted securely with adequate clearance for safe operation and future maintenance. They also inspect the flue pipe to ensure it’s properly connected, undamaged, and not blocked.

    Corrosion on the casing might indicate internal rust or moisture issues. Loose connections could lead to gas leaks. A damaged flue could allow combustion gases to escape into the room instead of venting safely outside. The engineer will also verify that all safety labels and manufacturer instructions are visible and legible.

    Professional Gas Safe engineer in uniform inspecting the external casing of a domestic boiler in a utility room, checking for corrosion and damage with a torch and diagnostic tool
    Professional Gas Safe engineer in uniform inspecting the external casing of a domestic boiler in a utility room, checking for corrosion and damage with a torch and diagnostic tool

    Internal Components and Heat Exchanger

    The engineer opens the boiler casing to inspect internal components. They examine the heat exchanger, where gas is burned and heat is transferred to your water. Over time, the heat exchanger can develop scale deposits or corrosion, reducing efficiency and potentially causing failure.

    They inspect the burner, which ignites the gas and maintains a steady flame, checking that it’s clean, properly aligned, and free from debris. A dirty or misaligned burner causes incomplete combustion, leading to inefficiency and potentially dangerous emissions. Seals and gaskets throughout the boiler are examined for wear or deterioration, as these prevent gas and water from leaking where they shouldn’t. The engineer also checks the expansion vessel, which helps manage pressure changes in the central heating system.

    Gas Pressure, Flow Rate, and Combustion Analysis

    The engineer uses specialised equipment to measure gas pressure and flow rate, which must be within the manufacturer’s specifications for safe and efficient operation. If pressure is too low, the boiler won’t produce enough heat. If too high, it can damage components or cause unsafe combustion.

    The combustion analysis is performed using a flue gas analyser, which measures the composition of gases leaving the boiler. This reveals whether the boiler is burning gas completely and efficiently. The engineer checks for carbon monoxide levels, oxygen content, and flue gas temperature. If combustion isn’t complete, it indicates a problem requiring correction. These measurements are recorded and compared against the boiler’s specifications.

    Safety Devices and Carbon Monoxide Testing

    Every boiler has safety devices designed to shut down the appliance if something goes wrong. The main safety device is the flame supervision device, which cuts off gas supply if the flame goes out. During servicing, the engineer tests this device to ensure it responds correctly.

    The engineer also tests the boiler’s overheat thermostat and any other safety controls specific to your model. Carbon monoxide testing is performed at the flue outlet (to ensure the boiler isn’t producing excessive CO) and in the room where the boiler is located (to verify that no CO is leaking into your home). This is a critical safety check.

    Gas Safe Registered Engineer Requirements

    All gas work in the UK must be carried out by an engineer registered with Gas Safe Register. This is a legal requirement. Gas Safe registration means the engineer has demonstrated competence in gas safety, holds appropriate qualifications, and is subject to regular audits and inspections.

    Book a boiler repair or service →

    When you book a service with Apex Gas & Heating Ltd, you can verify that our engineers are Gas Safe registered. We’re also approved installers for leading boiler brands including Glowworm and Worcester, meaning our engineers have received manufacturer-specific training and are authorised to service and repair those appliances.

    The Gas Safe Register maintains a public search tool where you can check any engineer’s registration status, qualifications, and enforcement history. Always verify this before allowing anyone to work on your boiler.

    Pro Tip
    Before booking a service, ask for the engineer’s Gas Safe registration number and check it on the Gas Safe Register website. A legitimate engineer will provide this information immediately without hesitation.

    What Happens After Your Boiler Service

    Once the service is complete, the engineer will provide you with a detailed service report recording everything that was checked, tested, and measured. It includes combustion analysis results, pressure readings, safety device tests, and any faults or issues identified.

    If your boiler has passed all checks, the report will state this clearly. If any faults have been found, the report will explain what they are, how serious they are, and what action is needed. For landlords, the engineer will issue a Gas Safety Certificate (CP12) if all safety checks have passed. This certificate is your proof of compliance with the Gas Safety Regulations and must be kept on file for at least two years.

    The service report should also include recommendations for any maintenance work that would benefit your boiler, such as replacing worn seals or flushing the central heating system. Keep your service report and certificate in a safe place for warranty claims, home sales, or compliance proof.

    Preparing Your Home Before the Engineer Arrives

    Ensure the engineer has clear access to your boiler. If it’s in a cupboard, remove any items stored in front of it. Clear the surrounding area of clutter so the engineer has space to open the casing, use tools, and move around safely.

    Check that the area is well-lit. Make sure the central heating system is turned on and has been running for at least 20 minutes before the engineer arrives, allowing the boiler to reach normal operating temperature for accurate testing.

    If you’ve noticed any issues with your boiler recently, unusual noises, pilot light problems, or inconsistent heating, make a note and mention them to the engineer. Ensure someone is home during the appointment, as the engineer may need to ask questions and explain their findings.

    Homeowner clearing space and removing items from around a boiler in a utility room to ensure safe access for the Gas Safe engineer during servicing
    Homeowner clearing space and removing items from around a boiler in a utility room to ensure safe access for the Gas Safe engineer during servicing

    Have your boiler’s model number and serial number to hand if possible, as these help the engineer verify they’re servicing the correct appliance and following the right procedures.


    Professional boiler servicing is an investment in your home’s safety, comfort, and efficiency. A well-maintained boiler runs more reliably, uses less energy, and lasts longer. At Apex Gas & Heating Ltd, our Gas Safe registered engineers carry out thorough, systematic services that catch problems early and keep your heating system operating at its best. We’re approved installers for Glowworm and Worcester boilers and provide transparent, detailed service reports so you understand exactly what’s been done and what comes next. If your boiler is due for its annual service, get a quote from us today and enjoy the peace of mind that comes with knowing your heating system is in safe, expert hands.

    Frequently Asked Questions

    What does a full boiler service include?

    A full professional boiler service includes visual inspection of the boiler casing and internal components, combustion analysis to check flue gas quality, gas pressure and flow rate testing, safety device testing, heat exchanger examination, and checks on seals, gaskets, and the condensate trap. The engineer will also test for carbon monoxide leaks and verify that all heating controls function correctly. A service report detailing findings and any recommendations is provided at the end.

    How long does a boiler service take?

    A standard boiler service typically takes 60 to 90 minutes, depending on the boiler model, its age, and any issues the engineer discovers. Older boilers or those requiring additional cleaning may take longer. The engineer will discuss timing when booking and explain any delays if components need closer attention or if fault finding is required.

    Should a boiler be serviced every 12 months?

    Yes, annual boiler servicing is recommended for all domestic boilers to maintain efficiency, safety, and warranty compliance. For landlords, an annual gas safety inspection (CP12 certificate) is a legal requirement under the Gas Safety (Installation and Use) Regulations 1998. Regular servicing helps prevent breakdowns, extends boiler life, and ensures carbon monoxide safety devices function properly.

    What happens if a Gas Safe engineer finds a fault during a service?

    If a fault is discovered, the engineer will document it in the service report and explain the issue and recommended repair. Minor faults may be fixed during the service; serious safety concerns will result in the boiler being isolated until repairs are completed. You’ll receive a clear explanation of options and costs. For landlords, certain faults must be remedied before the property can legally remain occupied.

    Do radiators get checked during a boiler service?

    Radiators are not routinely inspected during a standard boiler service. However, the engineer will check the central heating system pressure, expansion vessel, and circulation to ensure the heating system functions correctly. If you have concerns about specific radiators, discuss this with the engineer, as additional checks or plumbing work may be available.

    Why is an annual boiler service a legal requirement for landlords?

    Landlords must arrange an annual gas safety inspection to comply with the Gas Safety (Installation and Use) Regulations 1998. This legal requirement protects tenants from gas leaks, carbon monoxide poisoning, and unsafe appliances. Failure to provide a valid CP12 certificate can result in fines, prosecution, and loss of rental income if the property cannot be let. A Gas Safe registered engineer must perform the inspection.

    How do I know the engineer is actually Gas Safe registered?

    Ask the engineer for their Gas Safe ID card before work begins. You can verify their registration by visiting the Gas Safe Register website and searching their registration number. Reputable companies like Apex Gas & Heating Ltd employ only Gas Safe registered engineers and will provide proof of registration. Never allow unlicensed individuals to work on gas appliances.

    Book online, it takes a minute →

  • Improve Central Heating Efficiency in Older Homes

    Improve Central Heating Efficiency in Older Homes

    Table of Contents

    Last Updated: August 30, 2026

    Why Central Heating Efficiency Matters in Older Properties

    Homes built before the 1980s lose heat far more readily than modern properties. Poor insulation, draughty windows, ageing boilers, and inefficient radiator systems combine to create significant heat loss. For homeowners in older properties across Sussex, this translates directly into higher energy bills and rooms that never quite feel warm enough.

    Central heating efficiency in older homes isn’t merely about comfort, it’s about controlling costs and reducing your carbon footprint. A Victorian terraced house or Edwardian semi might lose 25-30% of its heat through the roof alone, with additional losses through walls, floors, and windows.

    The good news is that improving central heating efficiency doesn’t always require expensive full renovations. Strategic upgrades and maintenance steps can deliver measurable results. At Apex Gas & Heating Ltd, we’ve helped countless homeowners across Sussex and Surrey identify where their heating systems are underperforming and implement cost-effective solutions.

    This guide covers eight practical steps to improve central heating efficiency in older homes. Whether you’re dealing with a period cottage in Crawley or a Victorian villa elsewhere, you’ll find actionable advice on everything from draught-proofing and insulation to boiler upgrades and smart controls.


    Assess Your Current Heating System and Heat Loss

    Understanding where your home loses heat is the essential first step. Roofs and lofts account for roughly 25-30% of heat loss in uninsulated homes. Walls (particularly solid brick without cavity insulation) lose another 30-35%. Windows and doors contribute 15-20%, while floors account for 10-15%.

    Homeowner examining radiator pipework and checking for corrosion and sludge buildup in a period property with natural window light
    Homeowner examining radiator pipework and checking for corrosion and sludge buildup in a period property with natural window light

    Inspect your boiler and note its age, model, and fuel type. Boilers older than 15 years typically operate at 60-75% efficiency. Modern condensing boilers achieve 90%+ efficiency. Check your radiators for signs of sludge or corrosion. If radiators feel cold at the bottom or only warm at the top, internal debris is restricting water flow.

    An energy performance certificate (EPC) provides a baseline assessment of your home’s energy efficiency. Review the recommendations, as they often highlight the most cost-effective improvements for your specific property.


    Draught-Proof Windows and Doors to Reduce Heat Loss

    Draught-proofing is one of the quickest wins for improving central heating efficiency. Older windows and doors often have loose seals and gaps that allow warm air to escape.

    Check the seal around external doors by holding a lit candle near the edges on a windy day. If the flame flickers, air is leaking. Draught excluders, foam strips, brush seals, or rubber gaskets cost very little and install easily. Self-adhesive foam strips work for many gaps; for larger spaces, consider brush-seal strips or silicone caulk.

    Windows in older properties often have single glazing or loose-fitting sashes. Double-glazed replacement windows are expensive, but draught-proofing strips around the frame reduce air leakage significantly. Heavy thermal curtains or lined roller blinds help trap heat at night. Secondary glazing (a thin additional pane fitted inside existing frames) offers thermal benefits at a fraction of the cost of full replacement.

    Pay particular attention to sash windows, which are common in period homes. Brush seals designed specifically for sashes work well. Similarly, check letterboxes, keyholes, and any other openings that penetrate the external envelope.

    Draught-proofing can offer significant savings through reduced heating bills, and you’ll notice rooms feel warmer immediately.


    Benefits of Power Flushing Central Heating Systems

    Power flushing removes sludge, rust, and debris that accumulate inside radiators and pipework over decades. This buildup restricts water flow, forces your boiler to work harder, and reduces radiator output.

    Sludge forms when metal components corrode inside the heating circuit. In systems over 20 years old, this is almost inevitable. You’ll notice sludge buildup if radiators are cold at the bottom, if some radiators heat slowly, or if your boiler cycles on and off frequently.

    Power flushing involves connecting specialist equipment to your heating system and pumping high-velocity water through the circuit to dislodge and flush out debris. The process typically takes 4-8 hours depending on system size. After flushing, an inhibitor chemical is added to prevent future corrosion.

    Homeowners report that radiators heat more evenly, rooms reach target temperature faster, and boiler noise stops. Your boiler efficiency improves because it’s no longer working against restricted flow. In some cases, power flushing extends boiler life by several years.

    If you’re planning a boiler replacement, power flushing beforehand is essential. A new boiler installed into a sludge-filled system will underperform and may develop faults quickly. Apex Gas & Heating Ltd recommends power flushing as a precursor to any boiler upgrade.


    How to Bleed Radiators Effectively for Better Performance

    Air trapped inside radiators prevents hot water from filling them completely, leaving sections cold. Learning how to bleed radiators effectively is a simple maintenance task that improves heat output.

    You’ll need a radiator bleed key (a small square or flat tool) and a container to catch water drips. Turn off your heating and let the system cool slightly. Locate the bleed valve, typically a small nipple at the top corner of each radiator. Place your container underneath. Insert the bleed key and turn it anticlockwise slowly, you’ll hear a hiss as air escapes. Once water drips out steadily with no more air hissing, turn the key clockwise to close it.

    Bleed radiators in order from those furthest from the boiler toward it. This ensures air is pushed progressively toward the system outlet.

    After bleeding, check your system pressure using the gauge on the boiler. If pressure has dropped significantly, top up the system using the filling loop (a flexible pipe with isolation valves under or near the boiler). Consult your boiler manual for the correct pressure range, typically 1-1.5 bar when cold.

    Bleed radiators annually, ideally before winter. If air keeps returning to the same radiators, it may indicate a leak or a problem with the system’s air vent, worth having an engineer investigate.


    Smart Thermostat Installation Benefits and Setup

    A smart thermostat gives you precise control over when and how much your heating runs, eliminating wasteful cycles and adapting to your actual occupancy patterns.

    See our boiler repair and servicing →

    Hand adjusting a modern smart thermostat mounted on a wall in a traditional older home interior with period features visible
    Hand adjusting a modern smart thermostat mounted on a wall in a traditional older home interior with period features visible

    Traditional thermostats are often positioned in hallways or living rooms, meaning they respond to local temperature rather than your home’s actual heating needs. Smart thermostats learn your schedule, allow remote adjustment via smartphone, and some models include room sensors that balance temperature across your property.

    Installation is straightforward for most properties. The thermostat replaces your existing wall-mounted unit, connecting to the same wiring. Most smart models work with standard heating systems, though you should verify compatibility with your specific boiler before purchasing.

    Benefits include scheduling heating to run only when you’re home, reducing temperature by 1-2°C when away or asleep (each degree saves roughly 3% on heating bills), geofencing that turns heating on as you approach home, and historical data showing when and how much you heat.

    Setup typically takes 10-15 minutes. Download the app, connect to your home WiFi, input your schedule, and let the system learn your preferences over 1-2 weeks.


    Loft and Floor Insulation to Retain Heat

    Loft insulation is the single most effective upgrade for reducing heat loss in older homes. An uninsulated loft loses enormous amounts of warmth, particularly in period properties where the roof structure is exposed.

    Check your loft depth. If insulation is less than 100mm thick, or if there’s no insulation at all, you’re losing heat rapidly. Modern standards recommend 270mm of mineral wool or equivalent. Adding insulation is straightforward: lay mineral wool batts or rolls between the joists, ensuring complete coverage with no gaps.

    Ensure loft insulation doesn’t block ventilation. Older properties sometimes have inadequate roof ventilation, which can lead to condensation and damp. If your loft feels damp or shows signs of mould, improve ventilation before adding insulation. Soffit vents, ridge vents, or gable vents allow air to circulate while insulation prevents heat loss.

    Floor insulation is less commonly addressed but equally important in older homes. Ground floors in properties built before cavity wall construction often sit directly on earth with minimal protection. If your ground floor feels noticeably colder than upper floors, poor floor insulation is likely responsible.

    Solid concrete floors can be insulated from above by laying rigid foam board under new flooring. Suspended timber floors can be insulated by adding mineral wool between the joists from below or by lifting floorboards and inserting batts from above.

    For many homeowners, loft insulation is the priority, it’s the quickest, cheapest improvement with the most dramatic effect on central heating efficiency in older homes.


    When to Upgrade Your Boiler for Maximum Efficiency

    If your boiler is over 15 years old, replacement often delivers better returns than continued repairs. Modern condensing boilers operate at 90%+ efficiency, compared to 60-75% for older conventional models. This efficiency gap means a new boiler can reduce heating bills by 20-30% compared to an ageing unit.

    Signs that replacement is worth considering include: boiler is over 15 years old, repair costs are significant, boiler fails to maintain consistent temperature, kettling or banging noises, pilot light won’t stay lit, or annual servicing reveals significant corrosion or wear.

    Before committing to replacement, have a qualified engineer assess your system. They can confirm whether your boiler is the efficiency bottleneck or whether other factors (insulation, draught-proofing, radiator performance) are the real culprits.

    When you do upgrade, choose a modern condensing boiler. These extract heat from exhaust gases, recovering energy that conventional boilers waste. Condensing boilers require a condensate drain (a small pipe that removes acidic water produced during the condensation process), but installation is straightforward in most properties.

    Boiler choice depends on your fuel type and property size. Gas boilers remain the most common and cost-effective option for properties with mains gas. Oil boilers are necessary for rural properties without gas supply. Heat pumps (air source or ground source) are increasingly popular but require more space and higher upfront investment.

    When you’re ready to explore boiler replacement, Apex Gas & Heating Ltd can assess your current system and recommend the most efficient option for your property. Our team are approved Glowworm and Worcester installers, meaning you’ll receive expert fitting and manufacturer support.


    Summary Table: Central Heating Efficiency Improvements

    Improvement Typical Cost Payback Period Difficulty
    Draught-proofing See website for pricing 1-2 years DIY-friendly
    Power flushing See website for pricing Immediate Professional only
    Bleeding radiators See website for pricing N/A DIY-friendly
    Smart thermostat See website for pricing 1-2 years DIY or professional
    Loft insulation See website for pricing 3-5 years DIY or professional
    Boiler replacement See website for pricing 7-10 years Professional only

    Improving central heating efficiency in older homes requires a combination of maintenance, targeted upgrades, and strategic replacements. Start with quick wins like draught-proofing and radiator bleeding, then move toward larger investments in insulation and boiler replacement. Each step reduces heat loss, lowers your energy bills, and makes your home more comfortable.

    The most effective approach depends on your property’s specific condition, age, and construction. A Victorian terrace with solid walls and single glazing faces different challenges than an Edwardian semi with cavity walls and original sash windows. An energy audit or professional assessment helps identify which improvements will deliver the best returns for your situation.

    Apex Gas & Heating Ltd provides boiler servicing, replacement, and system assessments across Sussex and Surrey. If you’re uncertain whether your heating system is performing efficiently, or if you’re ready to upgrade to a modern condensing boiler, get a quote from our approved installers. We’ll assess your current setup and recommend the most cost-effective path to improved central heating efficiency in your older home.

    Frequently Asked Questions

    What are the main causes of poor central heating efficiency in older homes?

    Older homes lose heat through uninsulated lofts, single-glazed windows, draughty doors, corroded boilers, and sludge accumulation in pipework. Many period properties also have high ceilings and solid walls without cavity insulation, which increases thermal loss significantly. A professional heating assessment can identify which issues affect your property most.

    What are the benefits of power flushing central heating systems?

    Power flushing removes sludge, rust, and debris from your heating system, improving water circulation and boiler efficiency. It reduces cold radiators, can help lower energy bills, extends boiler lifespan, and prevents breakdowns during winter. Older systems particularly benefit, as sludge accumulates over decades and restricts heat distribution throughout your home.

    How often should I bleed my radiators to maintain central heating efficiency?

    Bleed radiators annually before winter or whenever you notice cold patches at the top. Air trapped in radiators prevents hot water circulation, reducing heating output. Bleeding takes minutes and is a simple DIY task: turn the bleed key at the radiator's top valve until water flows, then close it. Regular bleeding keeps your system running efficiently.

    Can smart thermostats really reduce heating costs in period properties?

    Yes. Smart thermostats learn your routine, adjust temperatures automatically, and allow remote control via smartphone. Many users see energy savings by avoiding overheating and scheduling heating to run only when needed. For older homes with poor insulation, smart controls prevent wasted heat and work alongside other efficiency measures like draught-proofing and insulation.

    Book your visit online →

  • Can Power Flushing Fix Cold Spots on Radiators?

    Can Power Flushing Fix Cold Spots on Radiators?

    Table of Contents

    Last Updated: August 29, 2026

    What Causes Cold Spots in Radiators

    Cold spots on radiators are a common heating complaint. A cold radiator means heat isn’t distributing evenly, leaving some areas warm whilst others remain noticeably cool to the touch.

    The primary culprit is sludge buildup inside your radiator and heating pipework. Over time, corrosion products accumulate, primarily iron oxide particles and debris, settling at the bottom of radiators and blocking water flow. This is why cold spots almost always appear at the radiator bottom first.

    Air trapped inside radiators also causes cold zones by blocking water circulation, typically after system drainage or improper bleeding. Stuck or failed thermostatic radiator valves can restrict flow to individual radiators, causing uneven heating. Scale buildup from hard water further reduces the effective diameter of heating circuits, slowing water circulation and creating poor heat distribution.

    At Apex Gas & Heating Ltd, we diagnose these issues across properties in Sussex and Surrey. The good news is that many cold spot problems can be resolved, though the solution depends entirely on what’s causing them.

    Radiator Sludge Symptoms and How to Spot Them

    Sludge buildup manifests in several telltale ways. The most obvious sign is a cold radiator bottom, the lower section remains noticeably cooler than the top, even at full heating capacity. This happens because sludge settles at the lowest point and creates a blockage.

    Close-up of a radiator showing cold spots concentrated at the bottom section with visible discoloration and mineral deposits, hand touching the temperature difference between warm upper section and cool lower section
    Close-up of a radiator showing cold spots concentrated at the bottom section with visible discoloration and mineral deposits, hand touching the temperature difference between warm upper section and cool lower section

    You might notice radiators taking longer to warm up, or some heating quickly whilst others lag behind. A significant temperature difference between top and bottom sections indicates sludge is the cause.

    Visible discoloration at the radiator bottom and darker water when bleeding a radiator suggest iron oxide and debris circulating through your system. Kettling sounds, distinct rumbling or popping noises from your boiler or pipes, often indicate sludge restricting water flow and causing pressure fluctuations.

    Rising heating bills without increased usage suggest sludge buildup. When your boiler works harder to push water through a clogged system, it consumes more fuel to maintain temperature.

    How Power Flushing Works to Restore Heat Distribution

    Power flushing is a professional method designed to remove accumulated sludge, debris, and corrosion products from your entire central heating system. Unlike manual radiator bleeding, power flushing uses high-pressure water to dislodge years of buildup settled inside radiators and pipework.

    Professional heating engineer operating a power flushing machine connected to a radiator system with visible hoses and gauges, demonstrating the equipment in action in a residential boiler room
    Professional heating engineer operating a power flushing machine connected to a radiator system with visible hoses and gauges, demonstrating the equipment in action in a residential boiler room

    A powerful flushing machine connects to your heating circuit and pumps water at high pressure in the opposite direction to normal flow. This reversed, high-pressure water dislodges sludge from radiator interiors and pipes, breaking up blockages. As debris loosens, it’s carried through a filter unit that captures sludge before it re-enters your system.

    Professional engineers typically run the power flush for several hours until water running through the filter becomes clear, indicating most sludge has been removed. Some use chemical flushing for stubborn buildup.

    Once complete, a corrosion inhibitor is added to prevent new sludge formation by slowing the corrosion process that produces iron oxide particles. This coating extends the time between flushes significantly.

    When cold spots are caused by sludge, power flushing typically resolves them completely. By removing blockages at the radiator bottom, water flows freely and heat distributes evenly. Most homeowners notice faster, more even warming within days.

    Signs Your Heating System Needs Power Flushing

    The most obvious sign is cold spots that don’t respond to bleeding or temperature adjustments. If your heating system is over 15 years old and has never been power flushed, it almost certainly needs one. Sludge accumulates gradually, and older systems become progressively more clogged.

    Boiler kettling, that distinctive rumbling, popping, or gurgling sound, indicates sludge restricting water flow and causing pressure fluctuations. This noise damages your boiler over time and signals inefficient operation.

    Rising heating bills without increased usage suggest your system is working harder than necessary. When sludge clogs pipework, your boiler must pump with greater force, consuming more fuel.

    Uneven heating across your home, with some rooms staying cold whilst others overheat, can indicate sludge problems, though it might also suggest faulty thermostatic radiator valves or system imbalance. A professional heating engineer can diagnose the issue.

    If you’ve recently had work done on your heating system, such as boiler installation or radiator replacement, power flushing beforehand ensures new equipment doesn’t get clogged with debris from the old system.

    How Long Does a Power Flush Take

    A typical power flush for a domestic property takes between 4 to 8 hours. Smaller systems with lighter sludge buildup might finish in 4 hours, whilst larger homes with multiple radiators and extensive pipework can take a full working day.

    The engineer must isolate your heating system, connect the power flushing machine, run initial flush cycles, monitor water clarity, add corrosion inhibitor, and check that all radiators warm evenly before disconnecting equipment.

    Systems requiring chemical flushing alongside power flushing take longer. Chemical flushing dissolves stubborn deposits over several hours and can extend total time to 10-12 hours across one or two visits.

    A thorough job requires patience to ensure all sludge is removed and your system is genuinely restored. Any engineer promising completion in under 3 hours is likely cutting corners.

    Get your boiler looked at →

    DIY Radiator Bleeding vs Professional Power Flushing

    Radiator bleeding involves opening a small valve at the top of your radiator to release trapped air. This straightforward task takes minutes per radiator and costs nothing if done yourself. Bleeding works well when cold spots are caused by air in the system, perhaps after recent drainage or new radiator installation.

    However, if radiators still have cold spots after bleeding, sludge is almost certainly the cause. Sludge sits at the radiator bottom where manual bleeding can’t reach it. You’d need a power flushing machine, expensive equipment that professional engineers own and operate safely.

    Power flushing requires specialist knowledge. The engineer must safely disconnect your heating system, operate high-pressure equipment, monitor water quality, add correct corrosion inhibitor, and ensure proper re-pressurisation and bleeding.

    Professional power flushing includes diagnosis. A heating engineer identifies whether cold spots stem from sludge, scale, trapped air, or faulty valves, then recommends the appropriate solution and checks your boiler and radiators before starting work.

    For most homeowners, professional power flushing is the practical choice. The investment typically pays for itself within one or two heating seasons through improved efficiency and reduced fuel bills.

    When Power Flushing Alone Won’t Fix the Problem

    Whilst power flushing resolves many cold spot issues, some problems require additional work. Power flushing works when cold spots are caused by sludge, debris, or corrosion products blocking water flow. However, if cold spots stem from a different cause, flushing alone won’t help.

    Faulty thermostatic radiator valves (TRVs) are a common culprit. If a TRV is stuck or has failed, it restricts flow regardless of system cleanliness. You’ll need the valve replaced. A heating engineer can test your TRVs during flushing and recommend replacements if necessary.

    Scale buildup from hard water requires different treatment. Whilst power flushing removes loose sludge, stubborn limescale deposits need chemical treatment. Your engineer might recommend chemical flushing alongside or instead of power flushing.

    System imbalance can cause cold radiators in larger homes. Water naturally takes the path of least resistance, flowing quickly through radiators near the boiler and slowly through distant ones. Balancing valves need adjustment to redirect flow appropriately. Power flushing won’t address this.

    Boiler problems can masquerade as cold radiator issues. If your boiler isn’t heating water to the correct temperature, all radiators will feel lukewarm. Power flushing won’t fix a faulty boiler; you’ll need boiler servicing or repair.

    If radiators still have cold spots after professional power flushing, the issue lies elsewhere. Further investigation by a qualified heating engineer becomes necessary to check TRVs, test boiler temperature, balance your system, or identify other causes.

    Maintaining Your System After Power Flushing

    Power flushing is an investment in your heating system’s health, but benefits only last with proper maintenance. The corrosion inhibitor added during flushing slows the corrosion process producing iron oxide sludge. However, its effectiveness diminishes over 2-3 years. Many engineers recommend annual inhibitor level checks and top-ups.

    Annual boiler servicing is essential after power flushing. A qualified engineer will check efficiency, clean the burner, and ensure all components work correctly. During servicing, they can assess your heating system’s overall condition and spot early sludge signs.

    Bleeding your radiators once or twice per heating season prevents air accumulation. Air pockets can trap sludge particles and reduce heating efficiency. A quick bleed takes minutes and costs nothing if done yourself.

    Checking your system pressure monthly is another simple task. Your boiler should maintain pressure between 1.0 and 1.5 bar when cold. If pressure drops significantly, it suggests a leak. Low pressure allows air to enter the heating circuit, triggering corrosion and sludge formation. Top up pressure using the filling loop if it drops below 1.0 bar.

    If cold spots return months or years after power flushing, don’t ignore them. Early intervention prevents sludge from building up to the point where another full power flush becomes necessary. A conversation with your heating engineer can determine whether you need inhibitor top-up, system balancing, or another service.

    For homeowners in Sussex and Surrey, Apex Gas & Heating Ltd provides comprehensive boiler servicing and heating system maintenance to keep your system running efficiently after power flushing. Our team can advise on the best maintenance schedule for your specific system and catch potential problems before they affect your comfort.


    Can power flushing fix cold spots on radiators? Yes, when cold spots are caused by sludge buildup, power flushing restores even heat distribution and improves system efficiency. However, proper diagnosis is essential. If cold spots persist after professional power flushing, the underlying cause is something else entirely, and continuing to pursue flushing wastes time and money. A qualified heating engineer can identify the real problem and recommend the appropriate solution. At Apex Gas & Heating Ltd, we diagnose heating issues correctly and deliver the right fix first time, saving you money and restoring your home’s warmth.

    Frequently Asked Questions

    Will power flushing completely fix cold spots on my radiators?

    Power flushing can fix cold spots caused by sludge buildup and debris blocking water circulation. However, if cold spots result from thermostatic radiator valve failure, system pressure issues, or boiler problems, power flushing alone won't resolve them. A heating engineer can diagnose the root cause and recommend whether power flushing will solve your specific issue or if additional repairs are needed.

    What are the main signs your heating system needs power flushing?

    Watch for radiators that are cold at the bottom but warm at the top, uneven heating across different rooms, noisy pipework, discoloured water when bleeding radiators, and declining boiler performance. If your system is over 10 years old and hasn't been flushed, sludge accumulation is likely. These signs suggest debris is restricting water flow through your heating circuit.

    How long does a power flush take to complete?

    A professional power flush typically takes 4 to 8 hours, depending on system size and sludge severity. Larger properties with multiple radiators may take longer. The engineer will isolate your system, connect high-pressure water equipment, circulate cleaning solution through pipework and radiators, then flush with fresh water and add corrosion inhibitor before reconnecting your boiler.

    Can I bleed my radiators myself instead of paying for power flushing?

    Radiator bleeding removes trapped air and can temporarily improve heat distribution, but it won't clear sludge or iron oxide buildup inside your system. If cold spots persist after bleeding, or if your radiator bottom stays cold whilst the top warms up, sludge is the problem and only power flushing will restore full water circulation and system efficiency.

    Request a call back →